
Results 1 to 6 of 21
Thread: Tutorial Project: Nº2
Hybrid View


-
November 14th, 2012 01:31 AM #1
 Skilled


- Join Date
- Sep 2012
- Location
- Malaga, Spain
- Posts
- 88
- Mentioned
- 0 Post(s)
- Tagged
- 28 Thread(s)


- Sex:

Tutorial Project: Nº2
Hello,
The aim of this tutorial project is to put togueter a series of smaller tutorials/how to on individual things.
Customizing a fan controller, painting a drive, and so on an so forth. All of these mini-tutorials will be posted as seperate threads.
This thread will be the main one focusing more on the whole build.
These are an initiative of the main sponsor, Lamptron.

Other sponsors that have helped out with this project are:


Thank you all, specially Chris @ Lamptron and Teseo @ Benchmark Hardware for their never ending support.
Right, so let´s start!
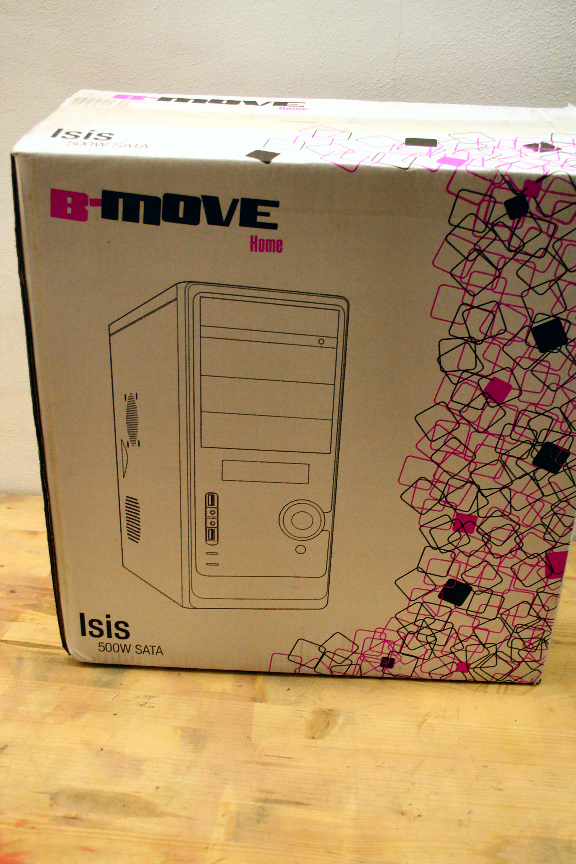
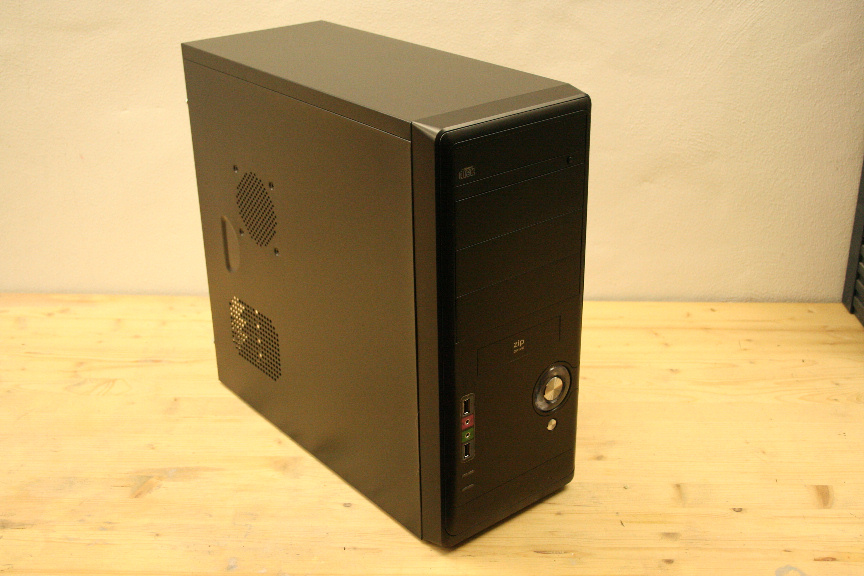
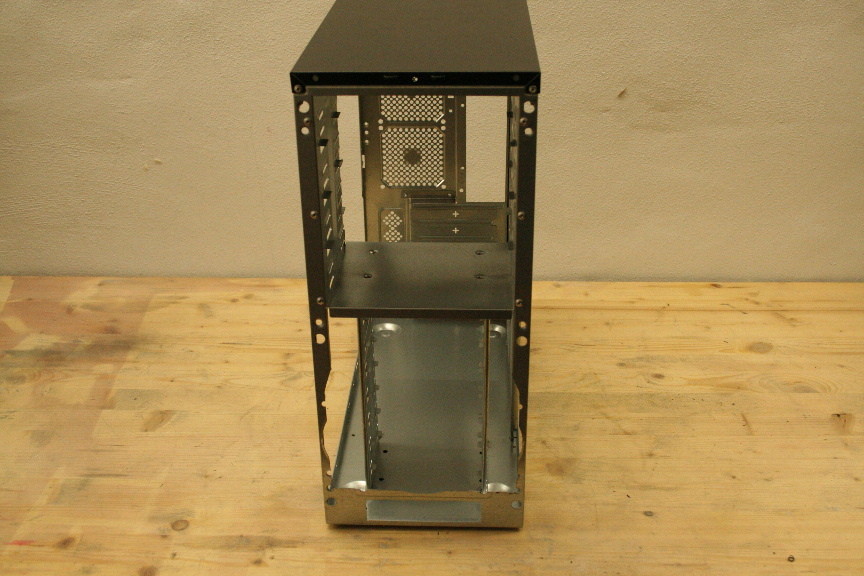
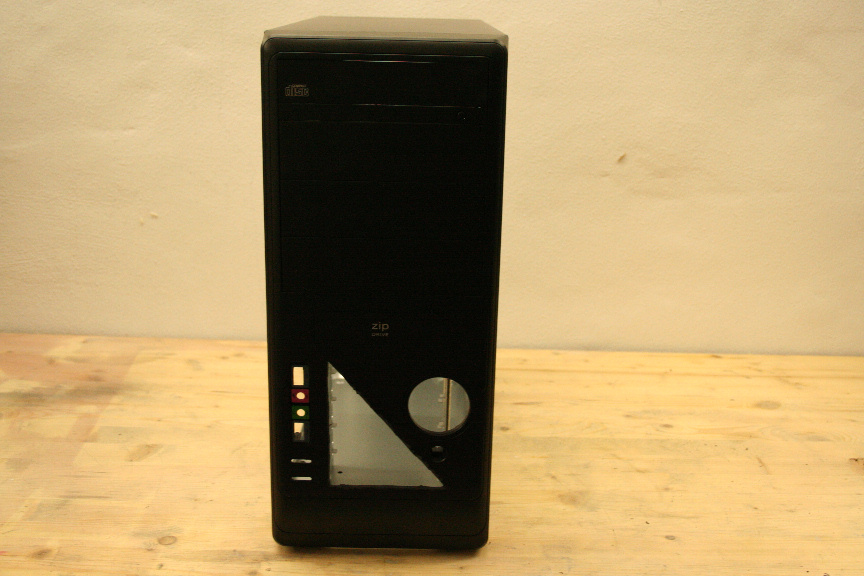
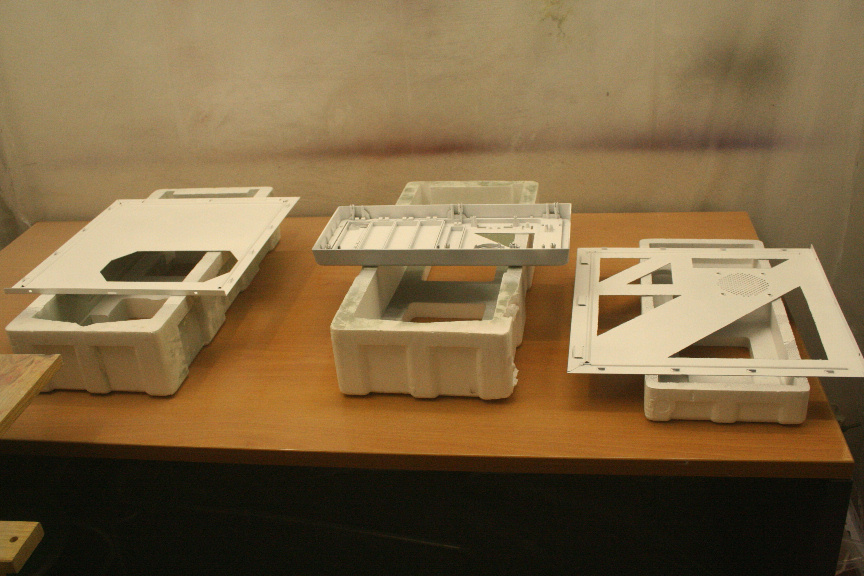
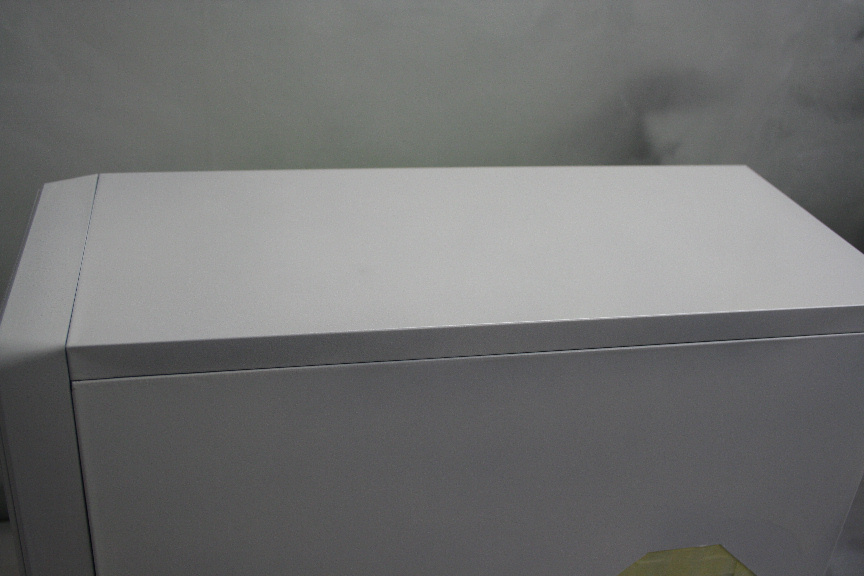
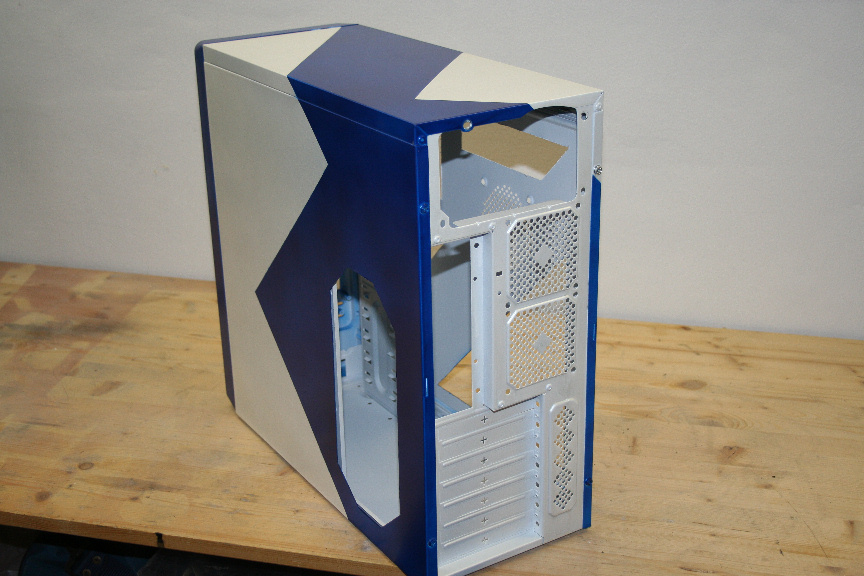
We will be using a very basic case, the entry level "Isis" by B-Move:
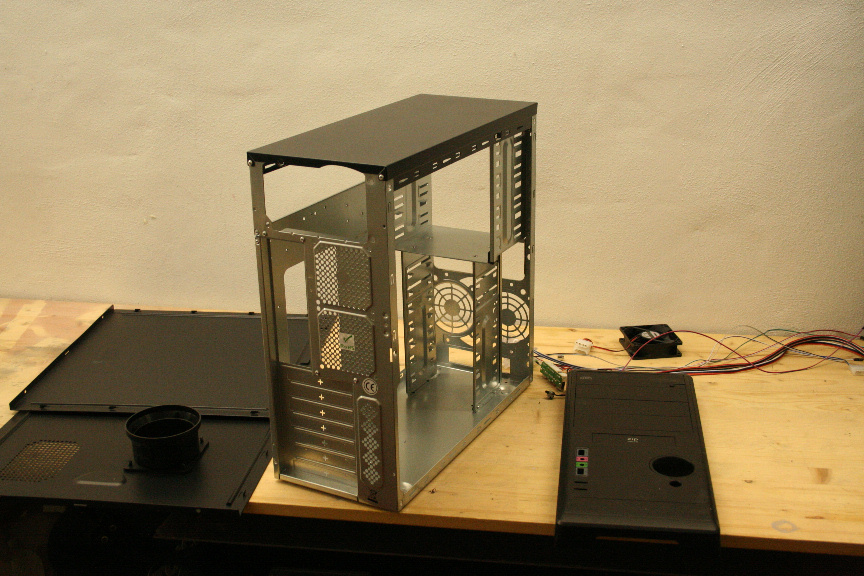
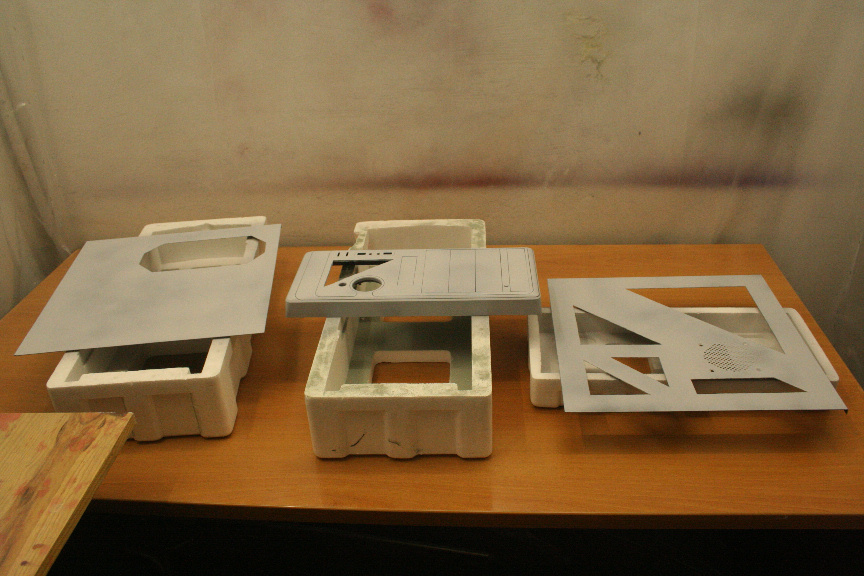
And we strip it down:
Edit (note by Burnout21 over @ Bit Tech): A good idea is de-rivetting the top side, that way we can trully get all the panels off which will make for a better finish. I didn´t on this particular case as all areas where easily accesible, but this isn´t normally what happens with most cases)
Edit (note by nagyizom over @ Bit Tech): Another good idea is to remove those ugly fan grills at the back and replace them with our own. Obviously this a matter of your own personal taste, it´s easy enough to do and won´t cause you any major troubles). This may or may not give you better noise reduction and airflow (depending on the specific case of course).
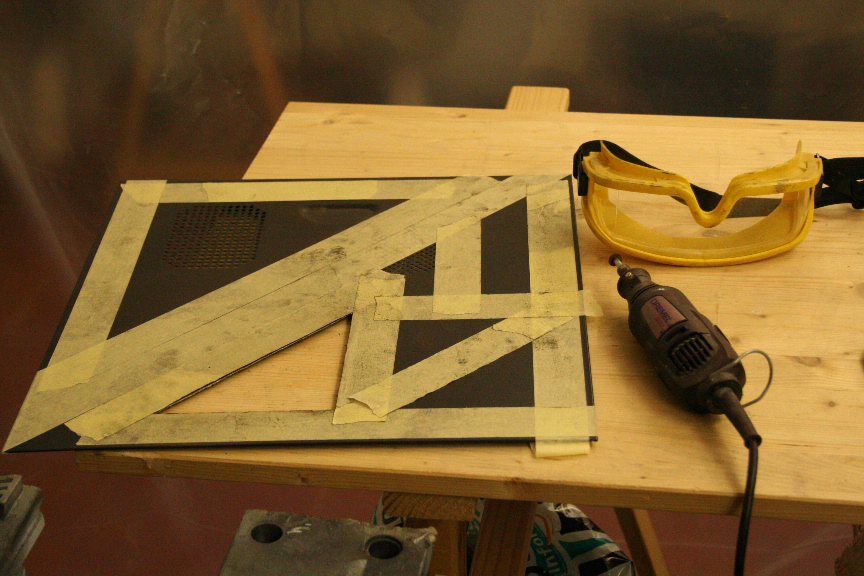
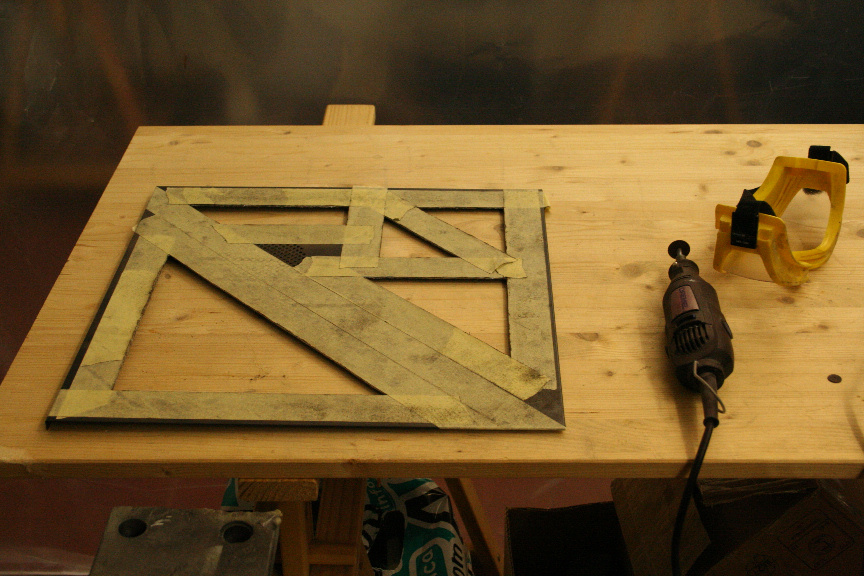
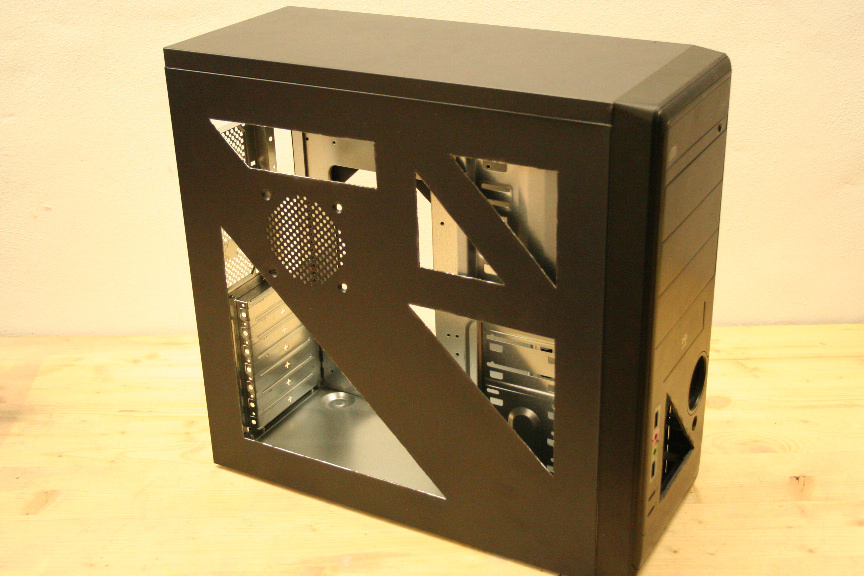
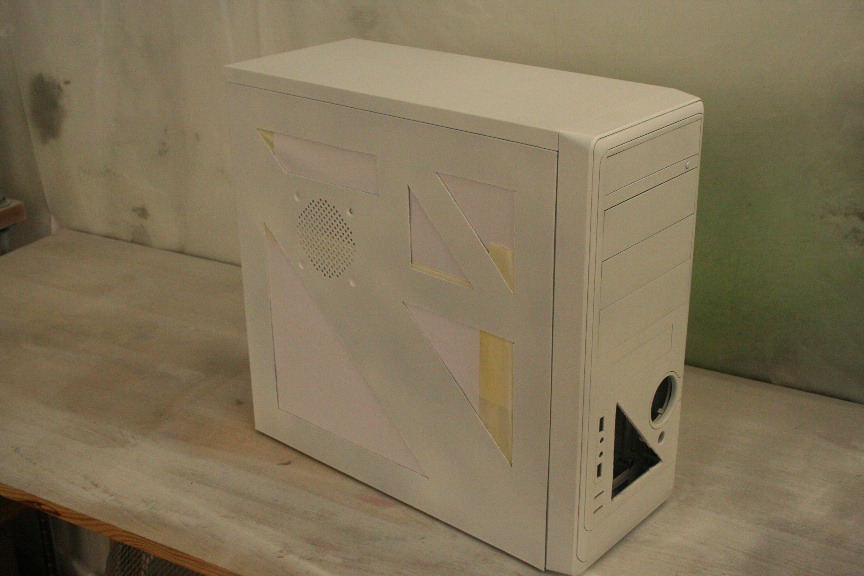
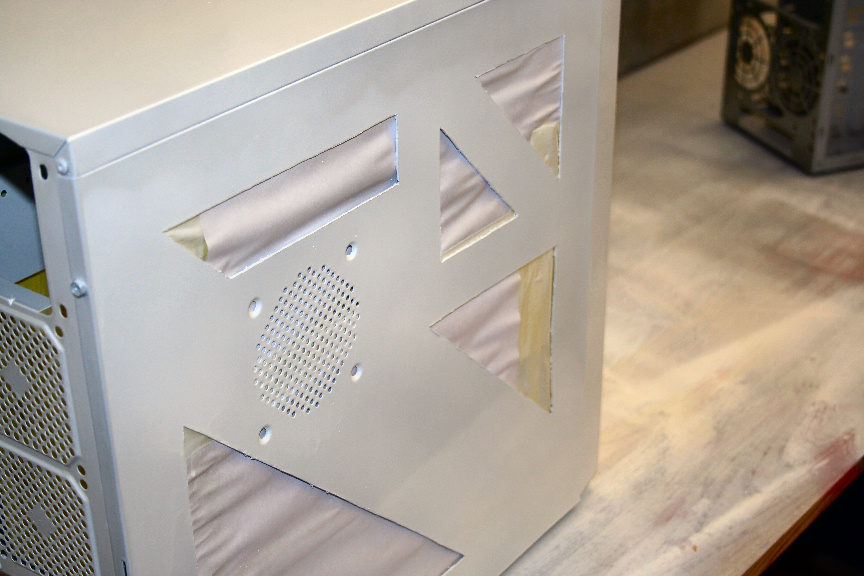
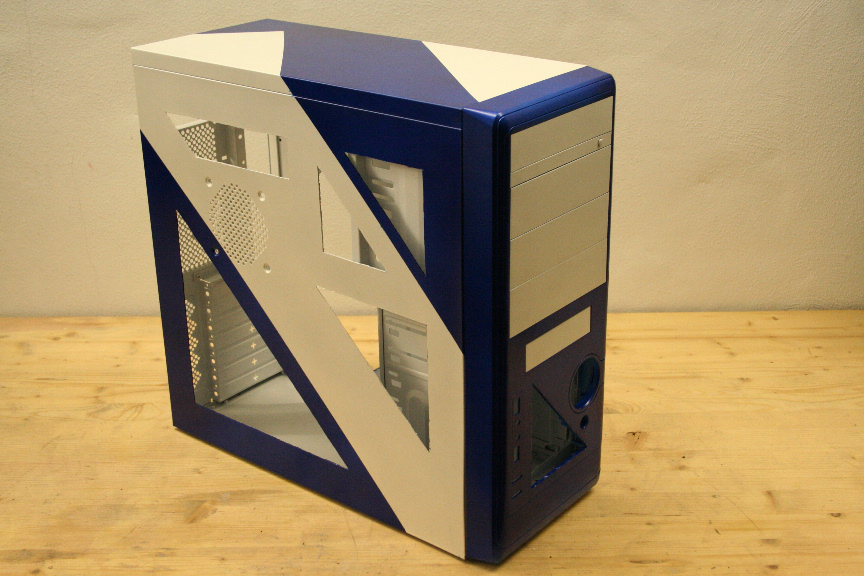
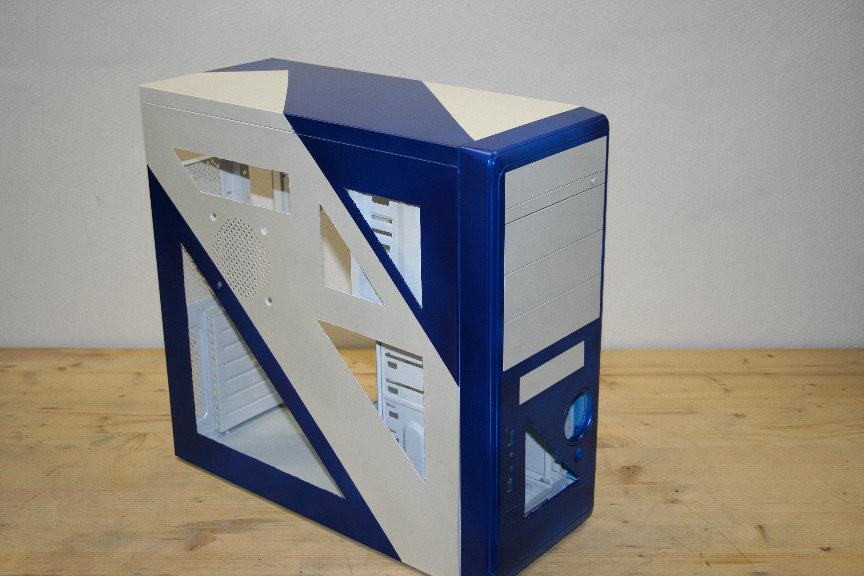
The first change I´m going to do is prepare the side for a window. If you feel you want a normal square window, there´s nothing wrong with that, go ahead, you can aply the same steps as I will be doing. Personally, I like something different, so I´m going to be doing a series of triangular shapes.
There´s many ways of doing this, but I´m going to explain the way I do it. I tape out the area to cut, in order to use the tape as a guideline, you can use drawn lines if you like, personally I preffer this way as with a normal line I end up not being able to see it due to the sparks that come when cutting.
Edit (note by nagyizom over @ Bit Tech): If you´ve never used a dremel, you will provably find it easier using a jigsaw, it should also give you a nice straight line. Personally I find tape for guiding and a steady dremel hand is good enough, again, it´s your choice.

Ok remember to ALWAYS use safety gogles when working with any kind of power tool. I use a dremel for this kind of modification, but really any kind of rotatory tool will do as long as it´s the right size.
Edit (note by DeathPrincess over @ [H]ard Forum): Thank you very much for reminding me of this!! I forgot about mentioning it. For this specific job I use the dremel discs line number 420 (Heavy Duty Cut Off wheel), you can get 20 of these for about 7-8€ in your local hardware store.
First section cut off:
And the rest...
Now, it still needs to be cleaned up for smooth edges but I felt like testing it on the rest of the case to get an idea of the look:
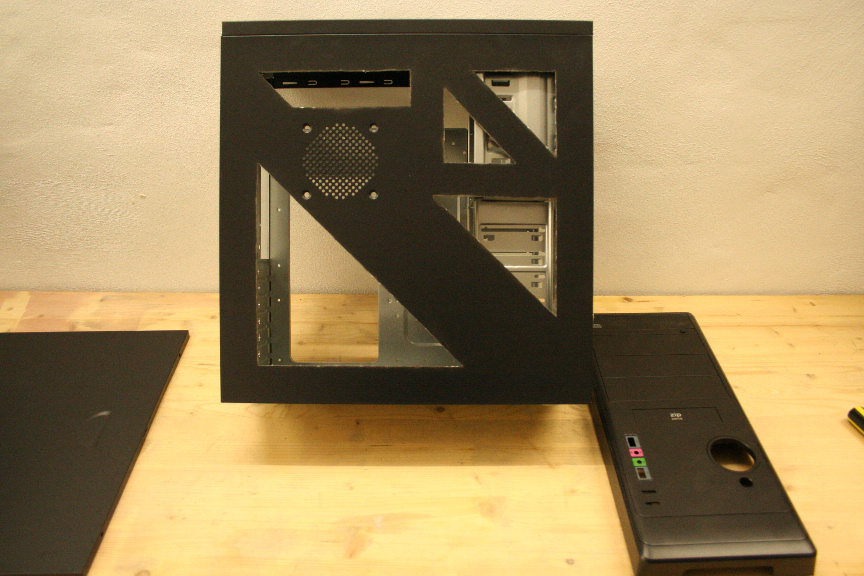
Yeah, I quite like that.
Edit (note by RustyTool over @ KustomPCs): RustyTool has a decent point here. Notice how part of the triangle windows are right on top of the bays. Depending on the case and on your intentions for interior design, you may or may not choose to do these as all you can see through them are the bays. On a personal note. If you´re using older cases, make sure that you have enough space between the window and the chasis to fit the plexy.
More soon : )
November 14th, 2012 01:32 AM #2
Skilled
- Join Date
- Sep 2012
- Location
- Malaga, Spain
- Posts
- 88
- Mentioned
- 0 Post(s)
- Tagged
- 28 Thread(s)
- Sex:
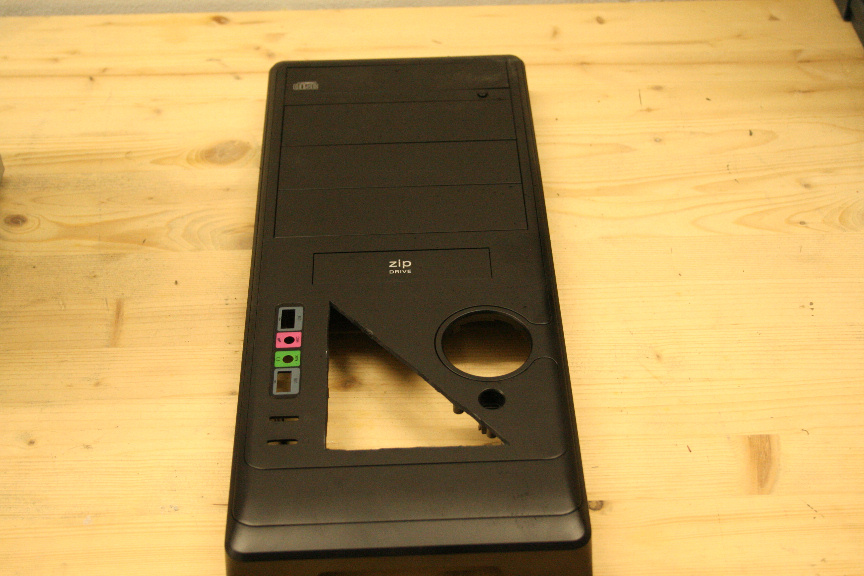
The front is awfully plain in this case, which really is to be expected on a low end case. I do like the start button though so I´ll leave that as it is. I won´t worry about the bays since they will be filled. But I do feel like adding some detail to it, following the rest.
Remember to set your dremel to low speed when cutting plastic, as high speed will just melt it and make a right mess of things.
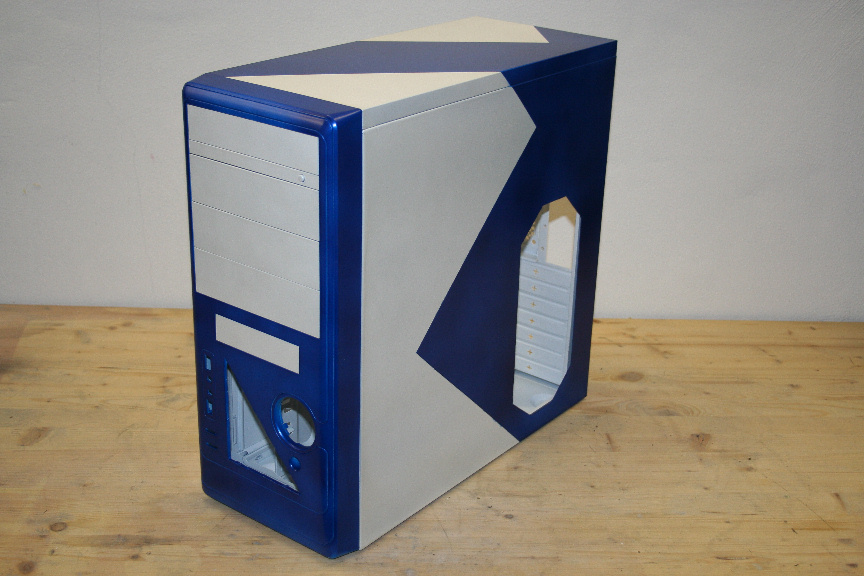
The bad thing, in my oppinion about most simple cases is that the right side tends to be awfully plain and there´s not that much you can do with aside from a nice paintjob, which won´t be seen much in most cases since the window side is the one facing you in most cases.
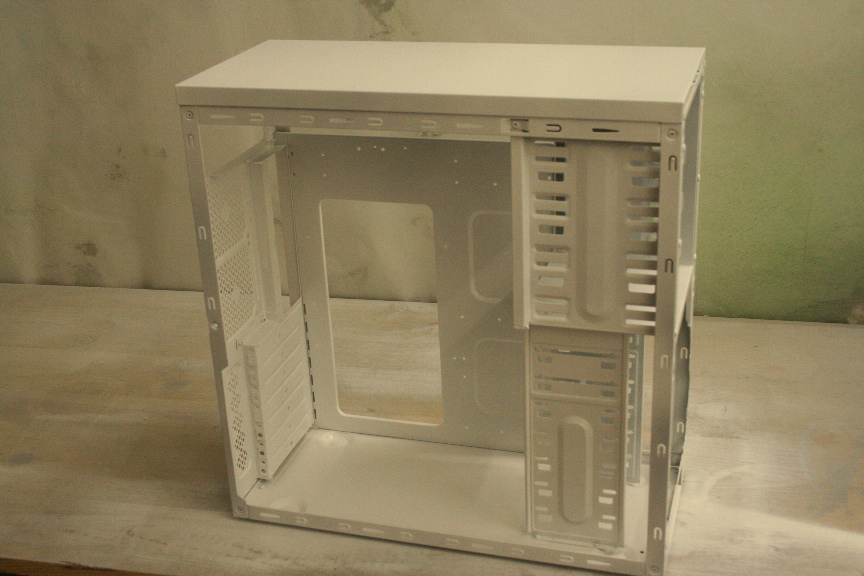
Lucky then that this case has a modern chasis design and has the opening under the board, so hey, why not make a window?
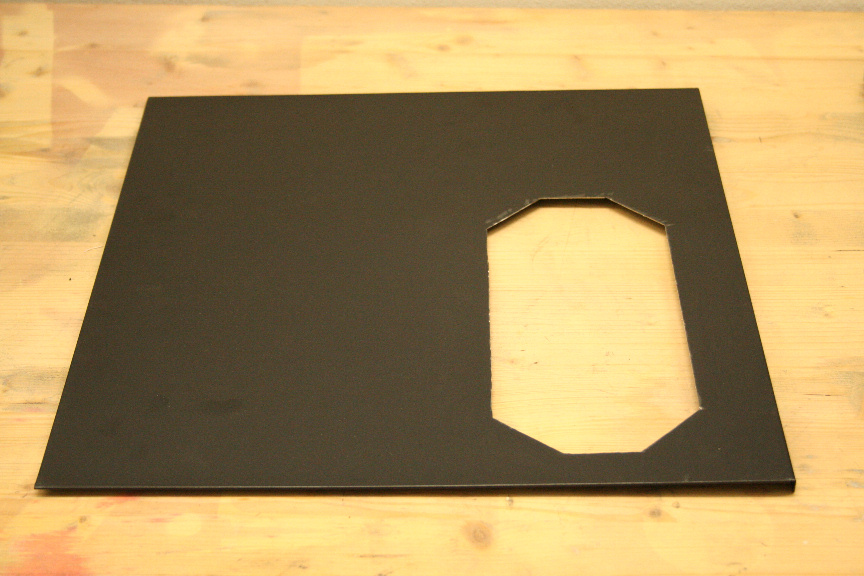
I tend to use number 420 on the dremel line of discs (Heavy Duty Cut-Off Disc). And for this thin metal sheeting, it´s like slicing through butter with a hot knive. Regardless, remember not to push the dremel or you´ll burn through discs.
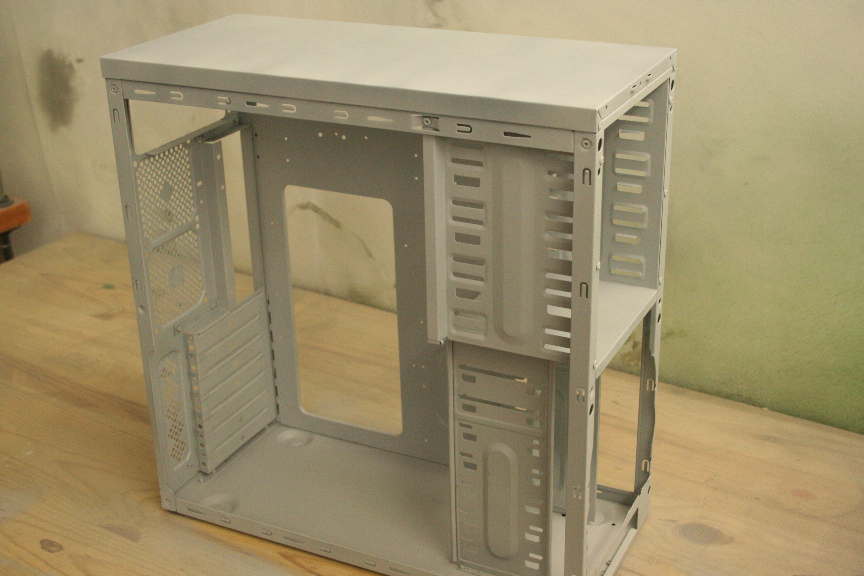
Right so let´s see it all put togueter with all cuts cleaned up (I don´t remember the specfic term in english, but it´s a sanding wheel for the dremel, that´s the way to go, personally I use the same cutting disc on it´s side to cut off all remnants and shave it down, and then I blunt the edges to prevent cutting).
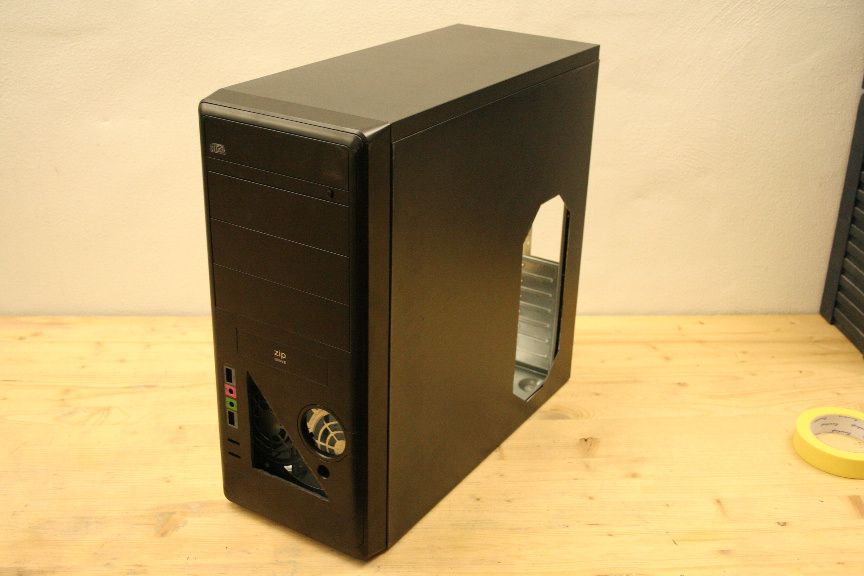
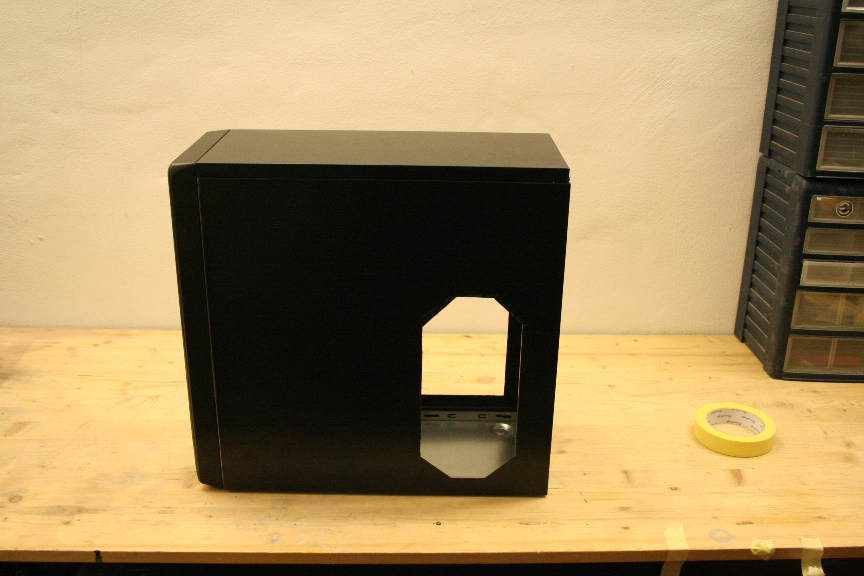
The problem with the front mini-window is that, right behind it there´s a pseudo dual-fan mount, which makes the window look ugly and a bit pointless, so let´s cut it.
And now...
...much better!
Ok, now we´ve got to sand down everything that´s got paint in it, so in this case, all panels, as you can see the interior is bare in this case. Once done, clean it all up. I personally use distilled water, but you can use alcohol or any kind of non-corrosive cleaning product. Now wait for it to dry, specially if you´ve used any kind of chemical to clean it (i´d stay away from that option, just in case).
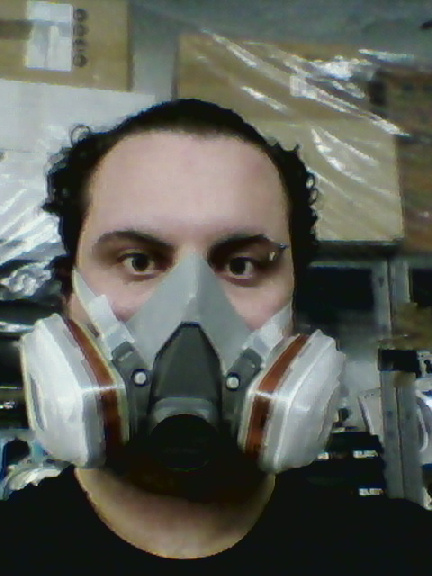
Now that it´s prepped, it´s painting time. Remember to always use a breather, this stuff is nasty in your lungs! Not to mention a well ventilated place, but not outside as you will get crap on your fresh paint, and you don´t want that.
A couple of notes about paint types. I´ve had quite a few discussions about this in several forums with all sorts of people. Some use x product and works fine for them, others say don´t use x product because of x reason.
Personally, I use acrylic paint, which is water based, it´s dries very quickly, so you don´t have to wait hours between coats, and it´s good for sanding down between coats to get an extra smooth finish. I stay away from sinthetic and plastic paints, for several reasons which I won´t go in to but regardless, if you want to take my advice, go for acrylic paints, be it in spray can or compressor & gun.
Right, down to it. First a coat of primer:

And now a base color as the effect I will be using (pearl) is almost transparent, so it needs a base color first, in this case, white.
And that´s it for today, more tomorrow.
As a small spoiler, no, the case won´t be all white, it´s simply easier doing it all in white and then painting on top as needed.
November 14th, 2012 01:33 AM #3
Skilled
- Join Date
- Sep 2012
- Location
- Malaga, Spain
- Posts
- 88
- Mentioned
- 0 Post(s)
- Tagged
- 28 Thread(s)
- Sex:
Edited the main post to add comments from several members of several forums, thanks for participating guys, I welcome more suggestive comments of the kind in order to add them further to the steps on this tutorial so that newcomers can use it, containing imput from more experience modders in order to create a decent first project.
Right so, update:
I sanded down with very fine grit and very gently the first coat of base white, this, while not entirely neccesary will give you a smoother finish on the next coat and it will make the next coat hold on tighter which in turn makes it that much resistant to scratches.
Once done, I aplied the second coat of base white:
I let that to dry for about 15-20 minutes (again this only aplies to acrylic paint due to it´s quick drying properties) and sanded it down again. I then proceeded to aply the third coat, this time, of pearl white effect. It´s an almost transparent coat, like lacquer if you will, but it´s not lacquer and can be aplied to any color (of the same kind of paint). This will give a glossy pearl finish (which, while the photos don´t do it justice, it´s very different to just using glossy white which I used in the AIO AL project).
While it´s drying time is the same, I will now leave it over night to cure as I will be using tape on top of it for the next stage of color.
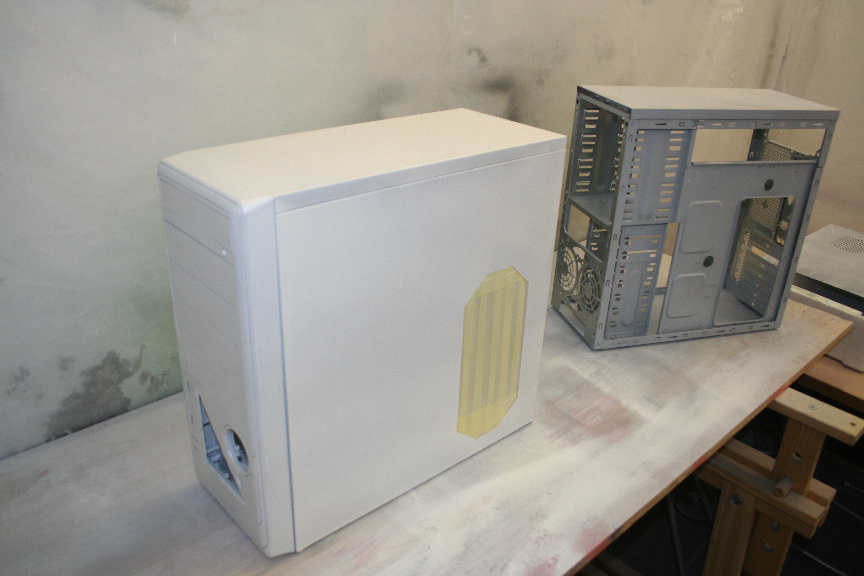
PS: The case next to it, is another exactly the same model case I´m preparing for a client, but that can go in another mini thread.
November 14th, 2012 01:33 AM #4
Skilled
- Join Date
- Sep 2012
- Location
- Malaga, Spain
- Posts
- 88
- Mentioned
- 0 Post(s)
- Tagged
- 28 Thread(s)
- Sex:
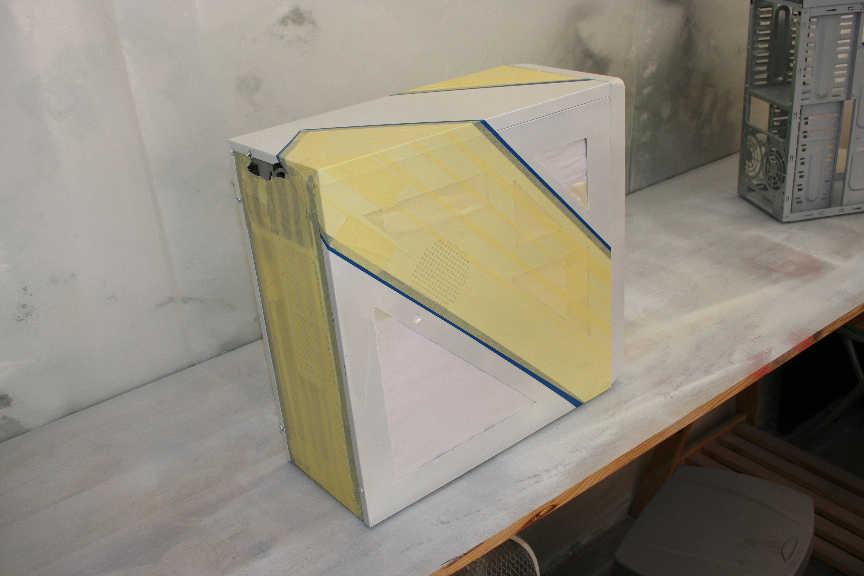
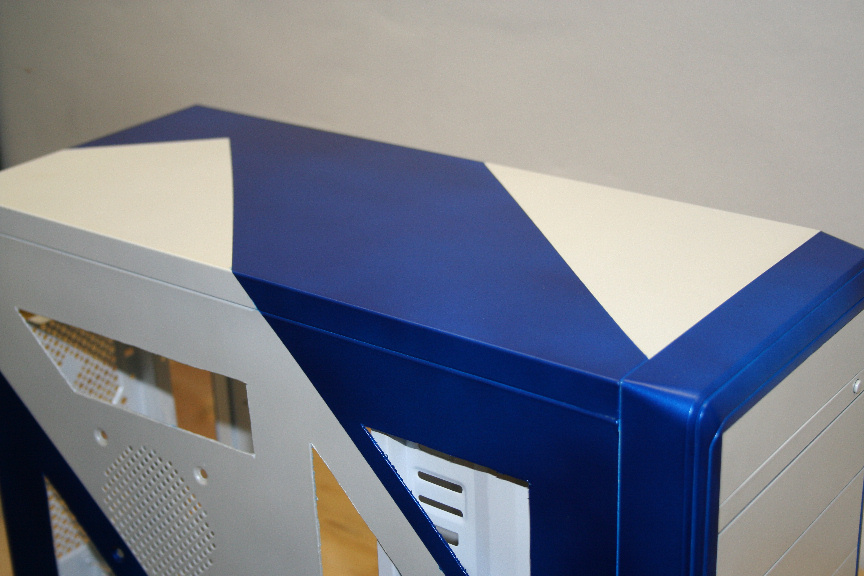
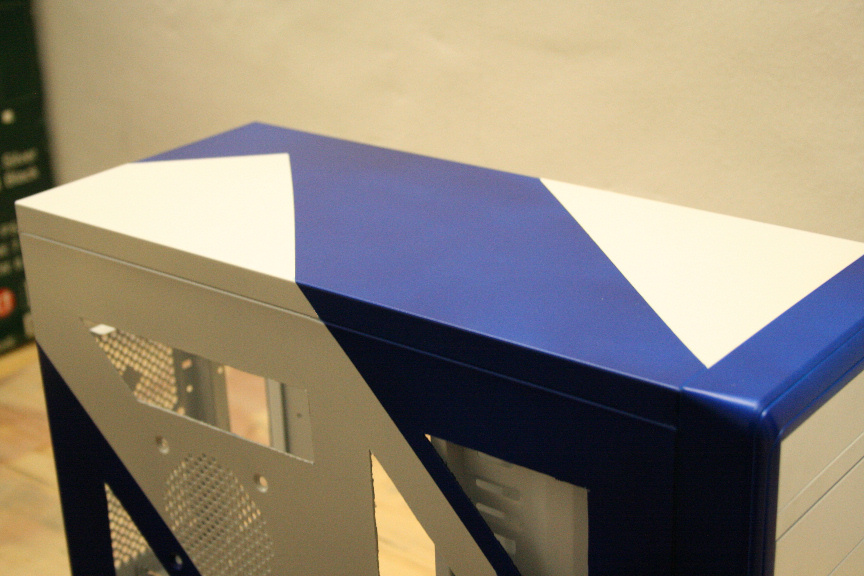
Now that the paint has cured, it´s safe for us to use tape on it, again go ahead and sand it down if it´s not smooth. I first used decal tape to mark lines (the blue tape) and then extra thick masking tape as filler (the yellow tape).
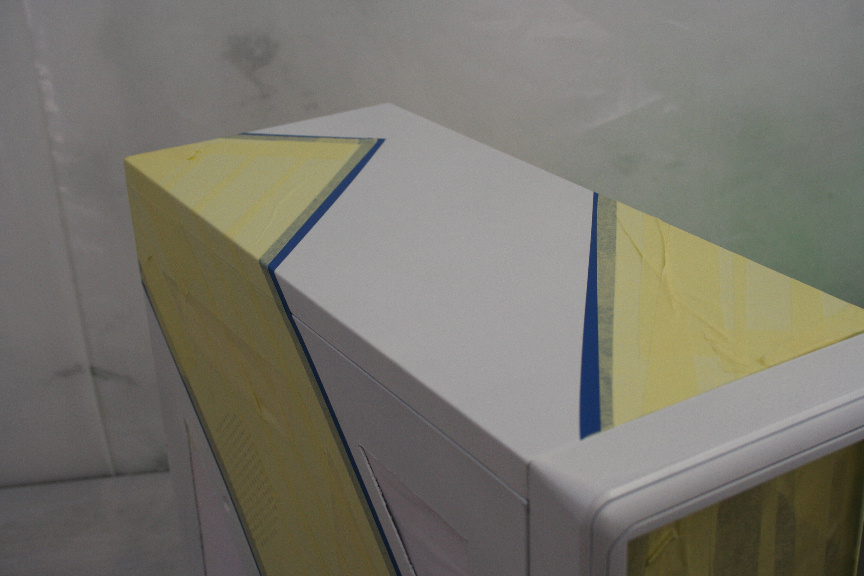

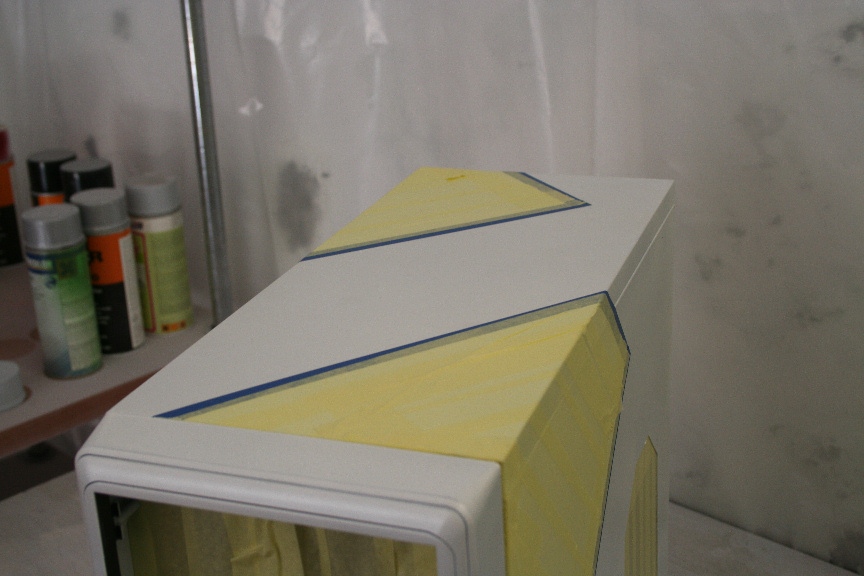
Let´s aply the first coat, of the second color. As with the white, I´ve gone with a pearl effect blue.
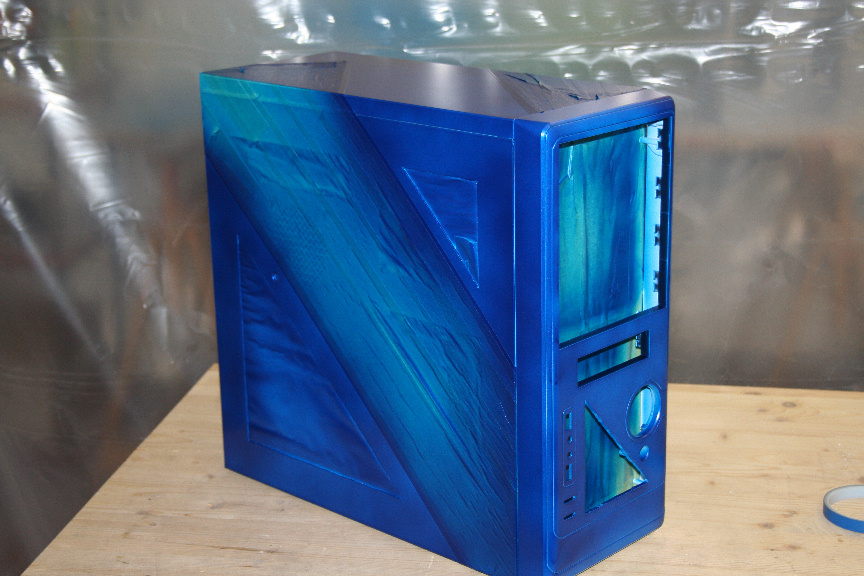
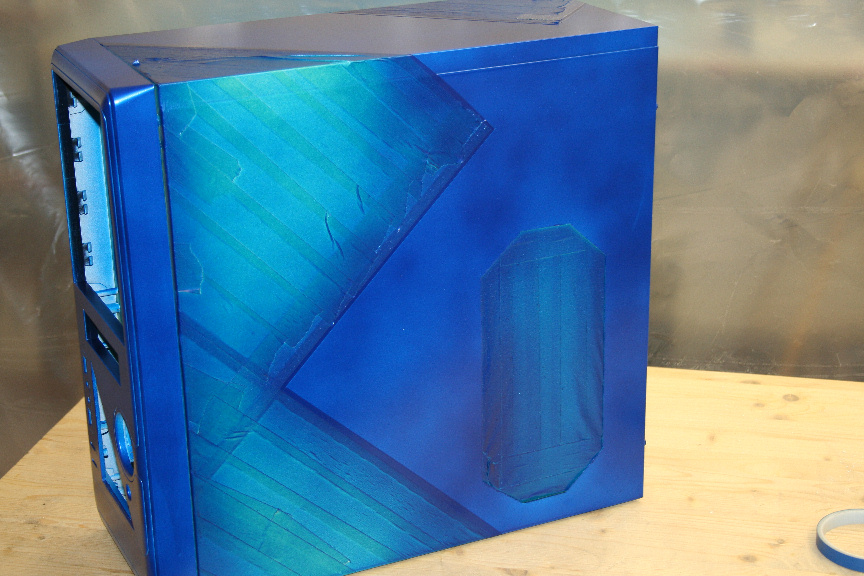
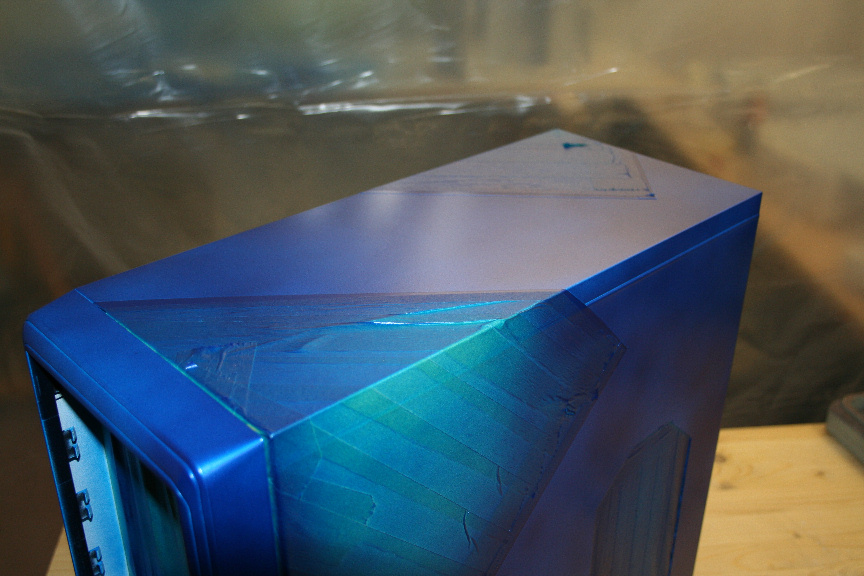
15-20 minutes later, I aplied the second and final coat of the blue. Notice how the light reflects on the pearl efect, making it look like there´s 2 tones.
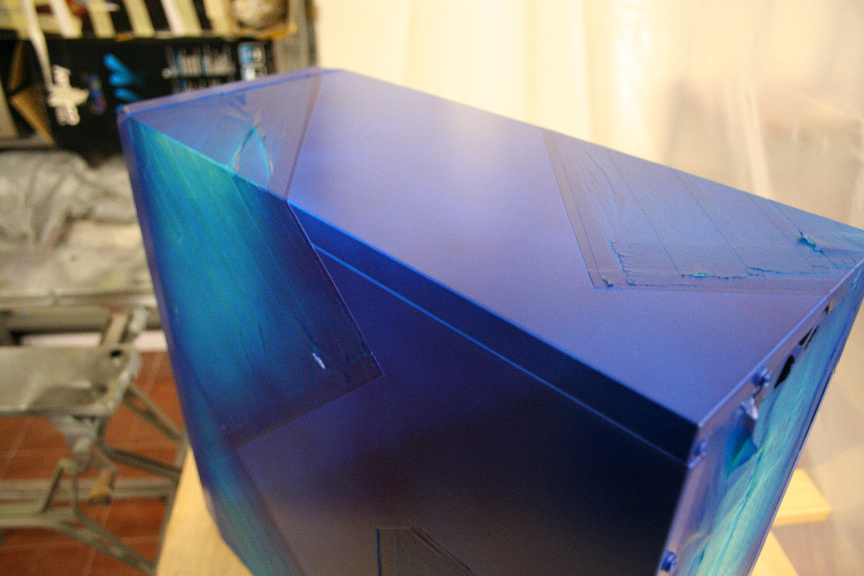
I let that cure for 4 hours before remove the tape. Now it´s safe for us to remove it (gently please!). I´ve taken several pictures with and without flash, on different possitions to try and show you the pearl effect, though the pictures really don´t do it justice.
And that´s it for today really. There´s not much more to do on the case other than mounting the windows. In the next few days I´ll be posting the mini tutorials on each component and then finish it all in this thread mounting it all in the case.
Thanks for reading/watching!Last edited by Luciel; November 14th, 2012 at 01:46 AM.
November 14th, 2012 01:38 AM #5Elite


- Join Date
- Jul 2011
- Location
- Nowhere
- Posts
- 947
- Mentioned
- 0 Post(s)
- Tagged
- 10 Thread(s)


- Sex:
Man, this is great!---Just the kind of thing VC needs!--Thanks so much for sharing your unique skillz and tricks with us bro!
I for one will be checking out them all!
November 14th, 2012 01:45 AM #6
Skilled
- Join Date
- Sep 2012
- Location
- Malaga, Spain
- Posts
- 88
- Mentioned
- 0 Post(s)
- Tagged
- 28 Thread(s)
- Sex:
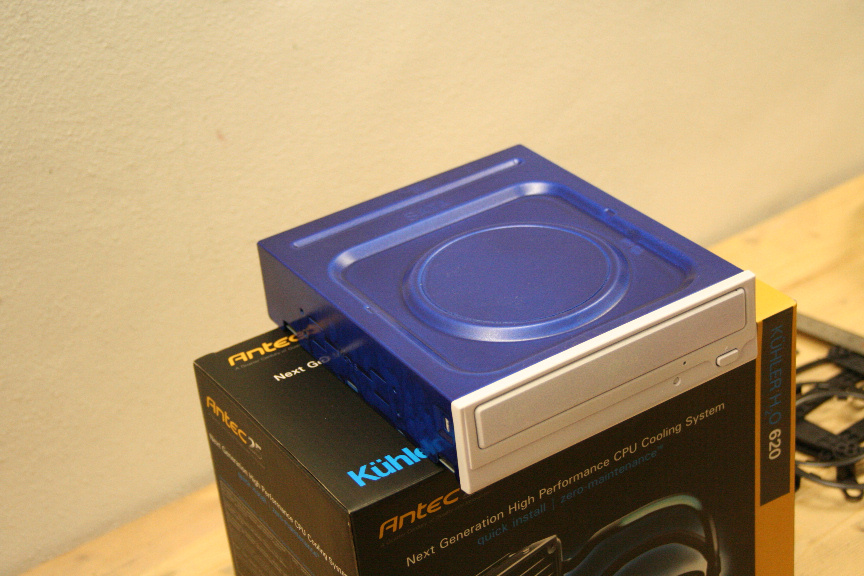
I´ve now started with the interior components, you can follow details on how to do them over at the following thread:
https://virtualcustoms.net/showthread...int-components
Here is the finished CD/DVD drive:
Thread Information
Users Browsing this Thread
There are currently 1 users browsing this thread. (0 members and 1 guests)
Similar Threads
-
WSB Tutorial please....
By Nimbi in forum Help & SupportReplies: 51Last Post: July 31st, 2019, 04:41 AM -
Any tutorial?
By Barnack in forum General Windows 10 CustomizationReplies: 1Last Post: July 24th, 2018, 09:51 PM -
Tutorial Project: Nº2 - How to paint components
By Luciel in forum Overclocking & Mod RigsReplies: 5Last Post: November 14th, 2012, 01:42 AM -
tutorial help
By Big V in forum General QuestionsReplies: 4Last Post: August 29th, 2010, 12:27 AM -
need tutorial please
By Buster67 in forum RequestsReplies: 0Last Post: February 11th, 2010, 04:07 PM
 Posting Permissions

-
 Latest Forum Posts
-
-
 Latest Themes
-
-
Popular Recent Themes
-
-
Forum Threads
-
-
Latest Wallpapers
-

 Reply With Quote

Update - July 2, 2024 New discord server created to make up for the old being shut down Post updated with the new link and details
Unofficial Discord Server