
Results 1 to 6 of 7
-
February 10th, 2013 02:11 PM #1
 Skilled


- Join Date
- Sep 2012
- Location
- Malaga, Spain
- Posts
- 88
- Mentioned
- 0 Post(s)
- Tagged
- 28 Thread(s)


- Sex:

Project: APASF ("A Post-Apocalyptic Steampunk Future") (Final Pictures 29-03-2013)
Hello everyone.
This is my new "Main" project, after two small projects, one for a client and the other one being the tutorial project, this being the first main project since Fallout Cause SP back in December 2011.
I´ve had this idea in my head for years now, and you could say all of my projects in the last year and a half have simply been "tests" for techniques, both paint and structural modification in order to get ready for this one.
The concept is as far as I know something that has never been done before. Mixing the post-apocalyptic style with the steampunk style in a small slimline case (the same model in fact as I used for the fallout cause sp project). The reason for this is that it gives me a compact canvas to concentrate details and because the parts do not fit, they give me a modular look that I´ve always liked since I saw the original thermaltake Level 10 case (the first one, not the redesigned GT version).
This project is being sponsored by:


Some are new and some have been with me since the begining, either way I´d like to thank all of them for their support and amazing products!
I don´t normally list the hardware I will be using on my projects, but for the first time, this project will actually become my main PC so here are the basic details.
ASUS Maximus IV Gene-Z/GEN3
Intel i7 2700K
Kingston HyperX 16Gb DDR3 1866Mhz
2x Kingston HyperX SSD 240Gb in RAID
2x MSI GeForce GTX 560 Ti TwinFreeze OC 2Gb in SLI
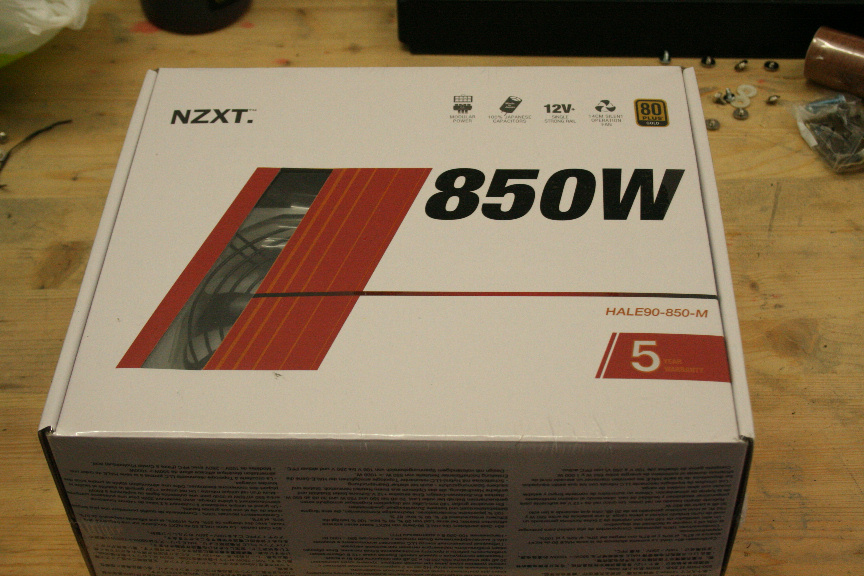
NZXT HALE90-M-850w
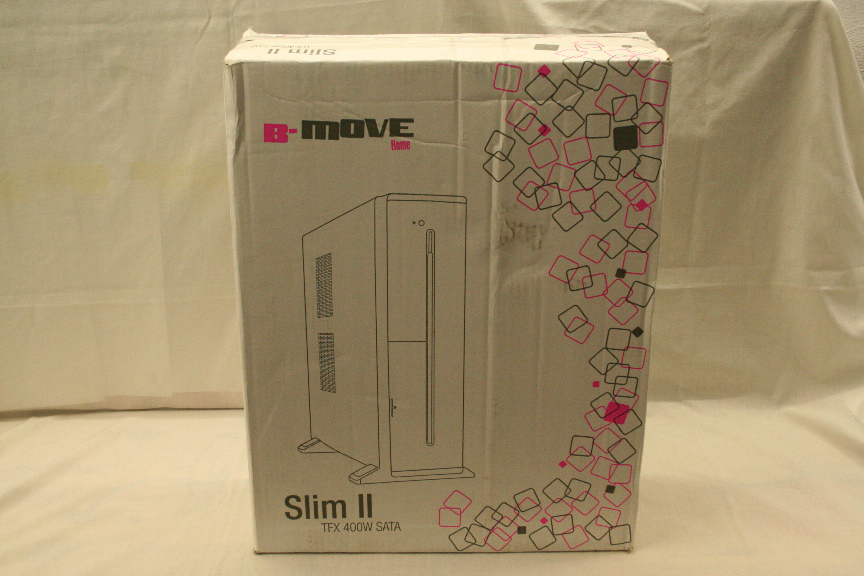
B-Move Slim II Case
As for the rest of componentes, cooling and accesories, you´ll see them as they get mounted.
Let´s start then.
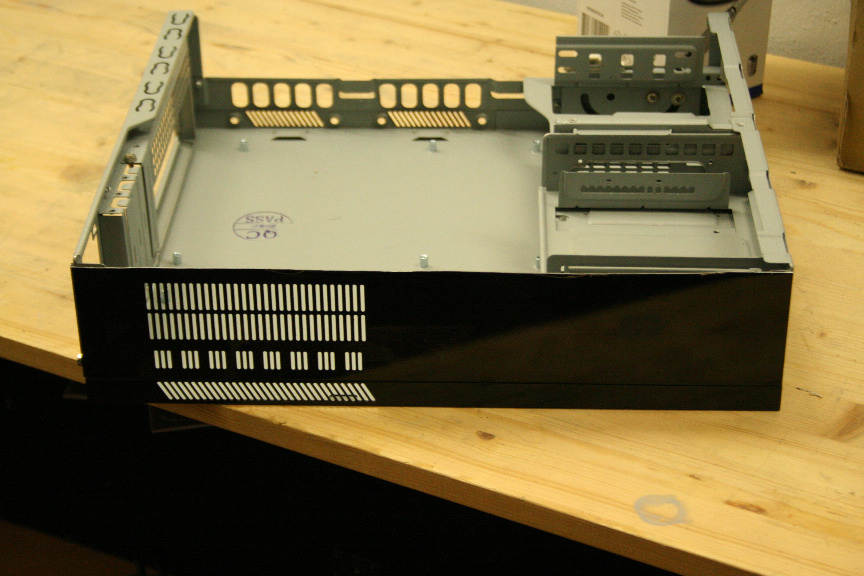
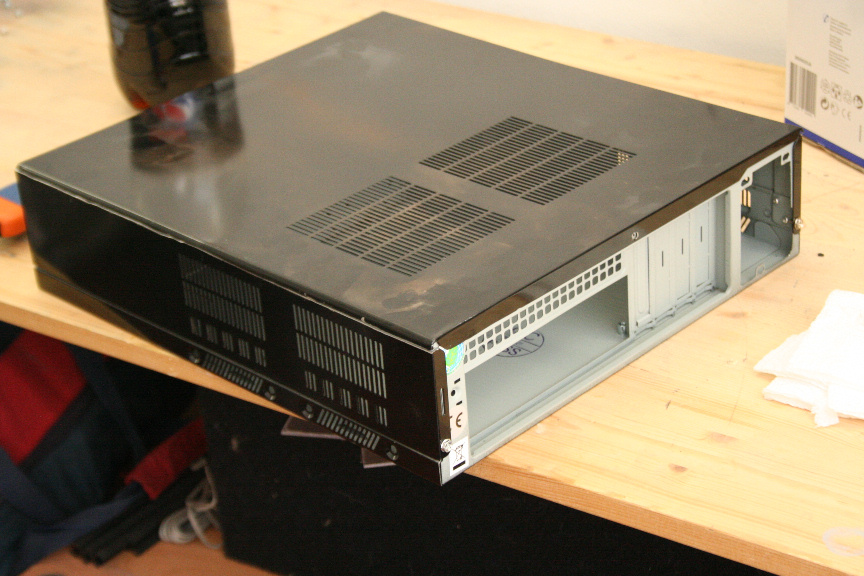
I´ve started with the structural modifications I need done on the case, the B-Move Slim II. I really like this case, it´s small, simple yet stylsh.
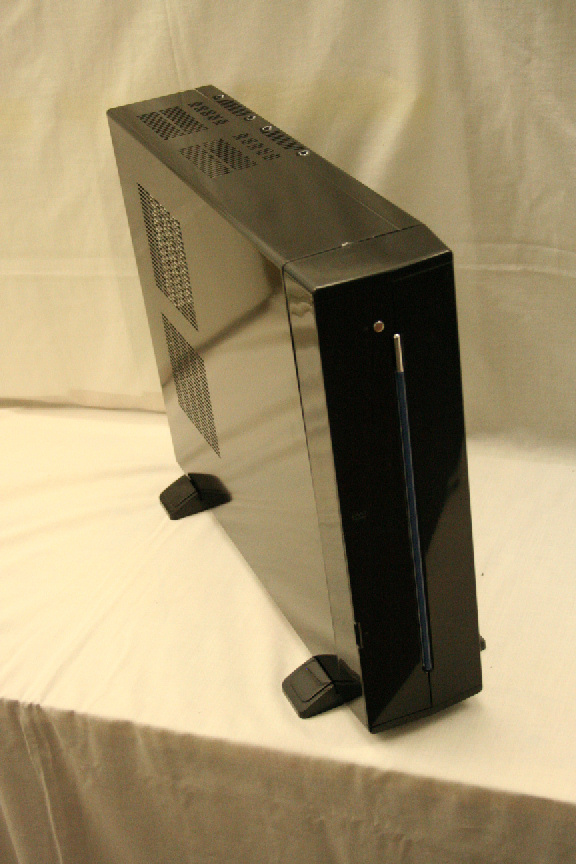
I´ve taken it all apart, I won´t be using any of the frontal conectors (except frontal USB & Audio) nor buttons or led.
For the design I have in mind to work, I need to cut the cover in parts, fit the upper and lower parts permanently to the case so the door is just the side, so here goes.
First part done:

And the second:
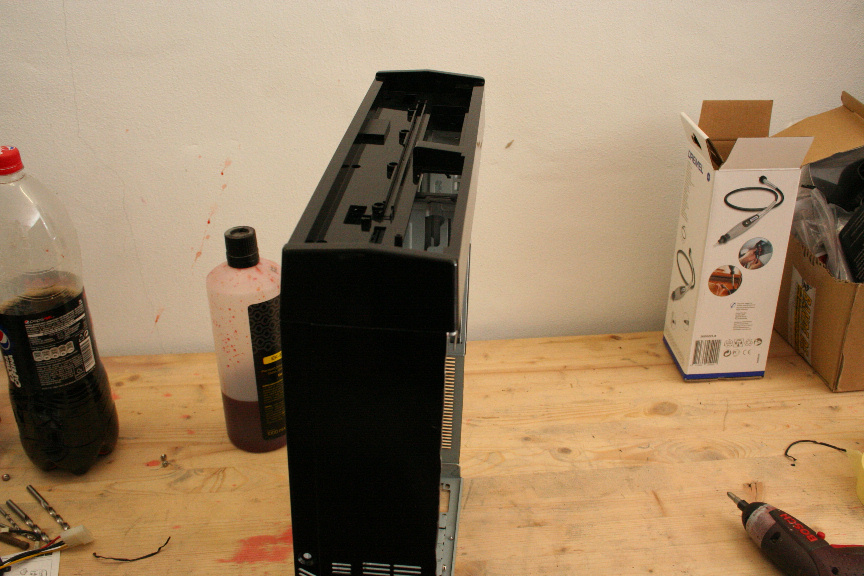
And now a test mount of the side panel:
It all fits fine, mostly because they have grips underneath that grab the frontal side of the case. This way it doesn´t become flimsy or weak.
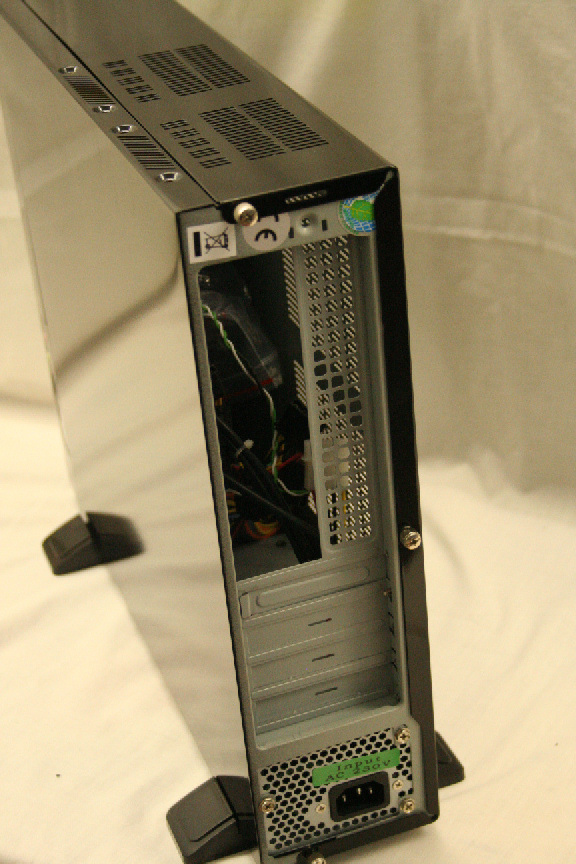
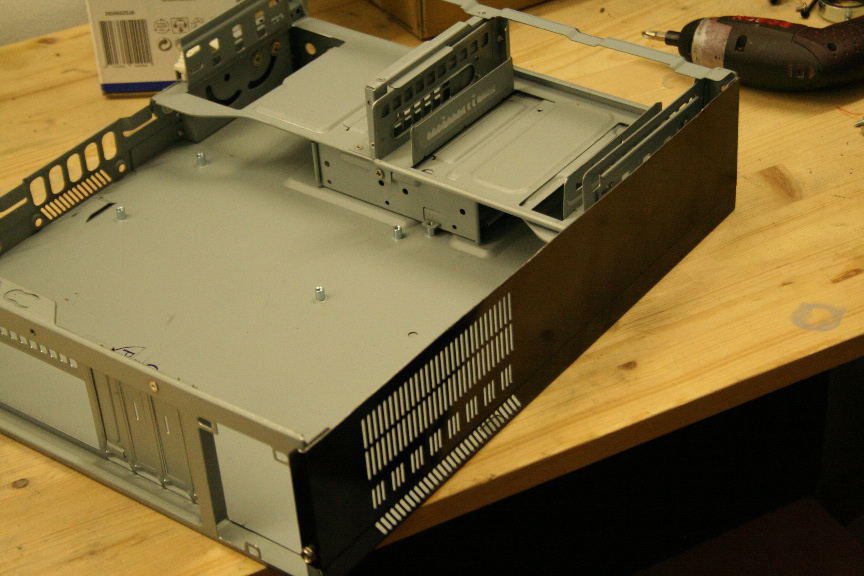
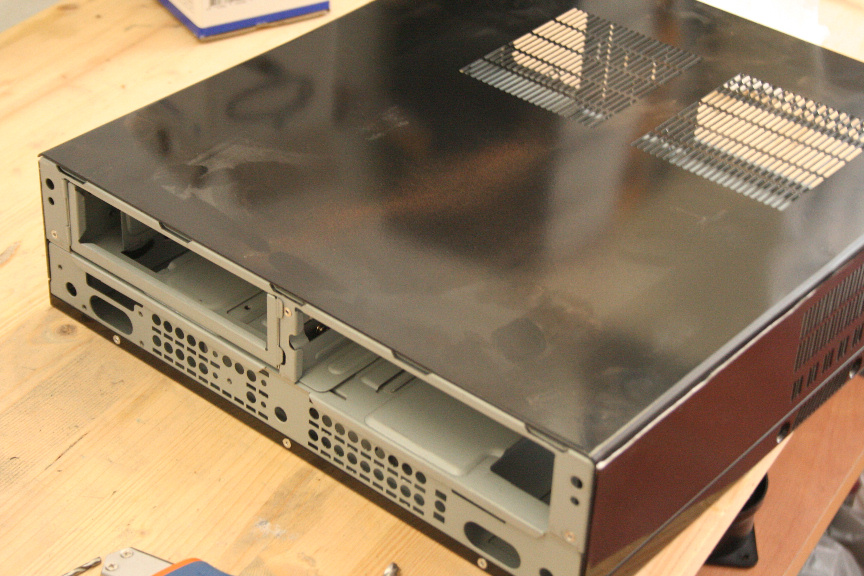
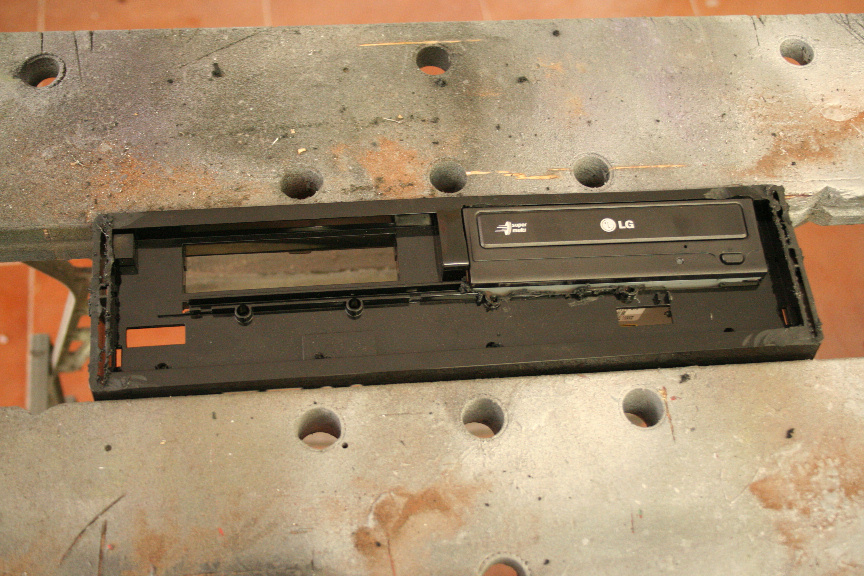
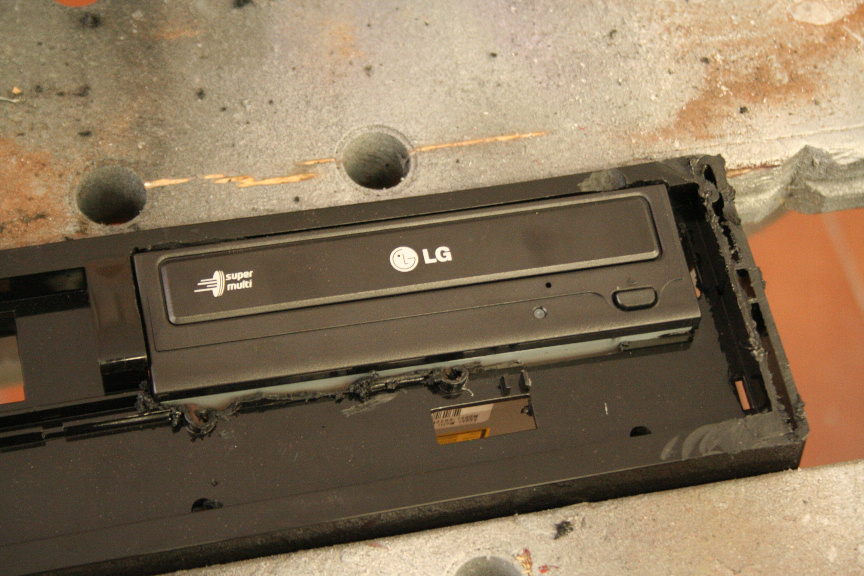
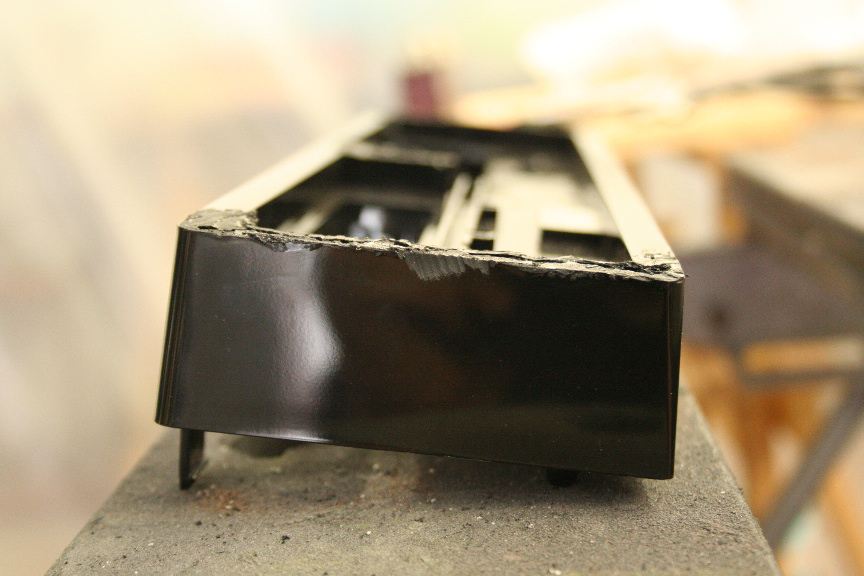
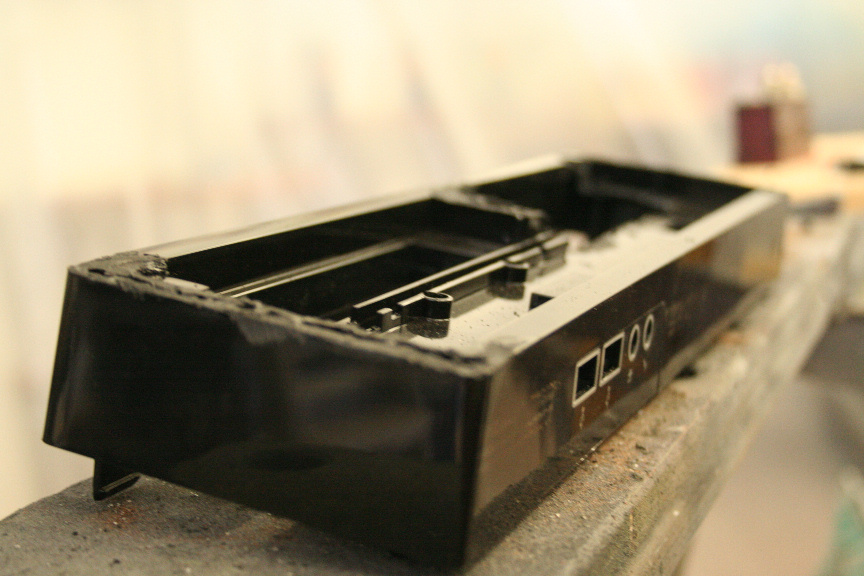
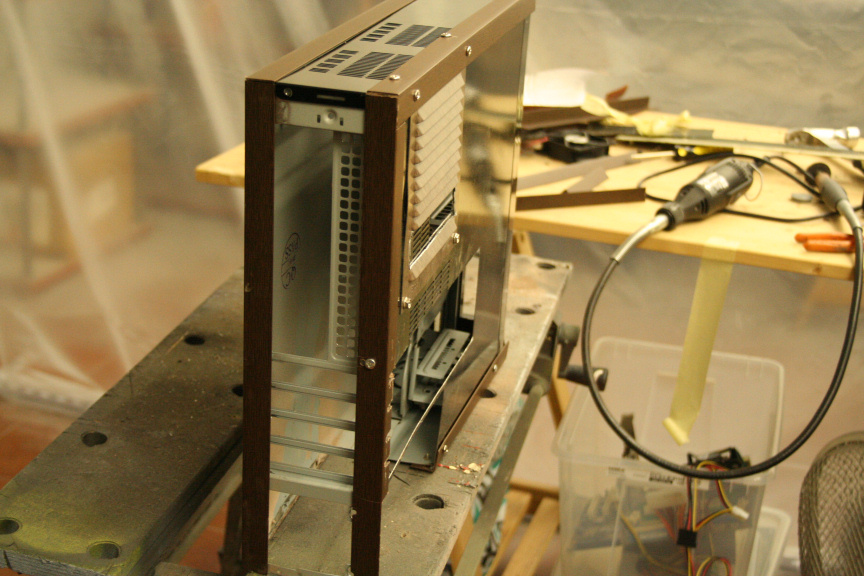
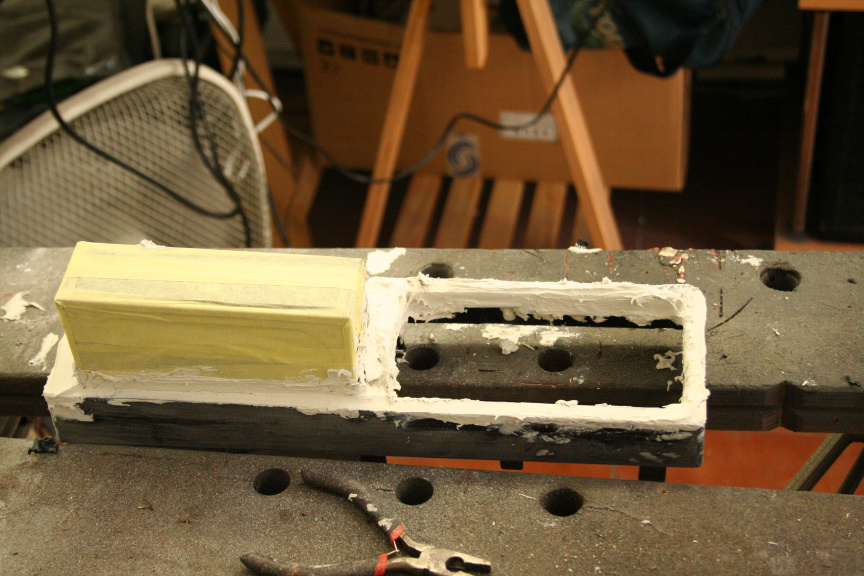
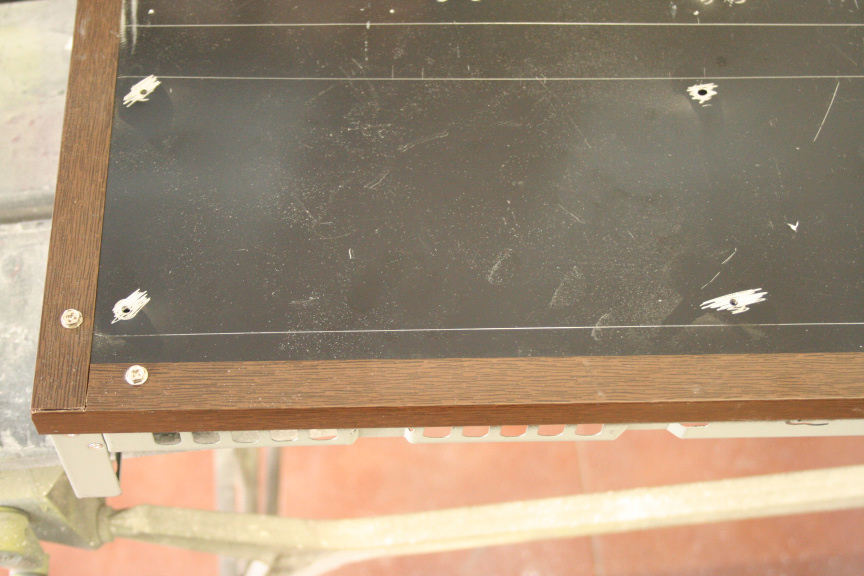
Now the frontal of the case. I´ve removed everything from it as it has to be cut down in order to be made completely square and straight (which will later be filled to suit my frontal design).
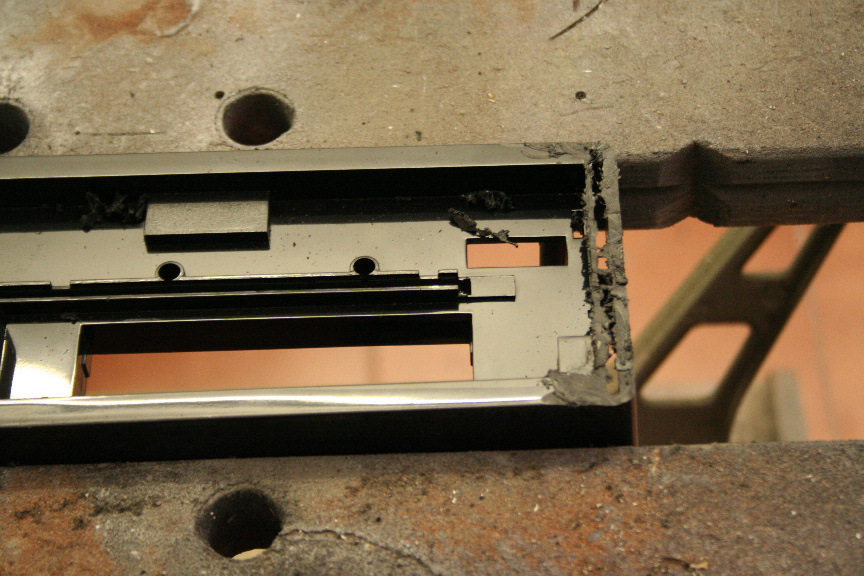
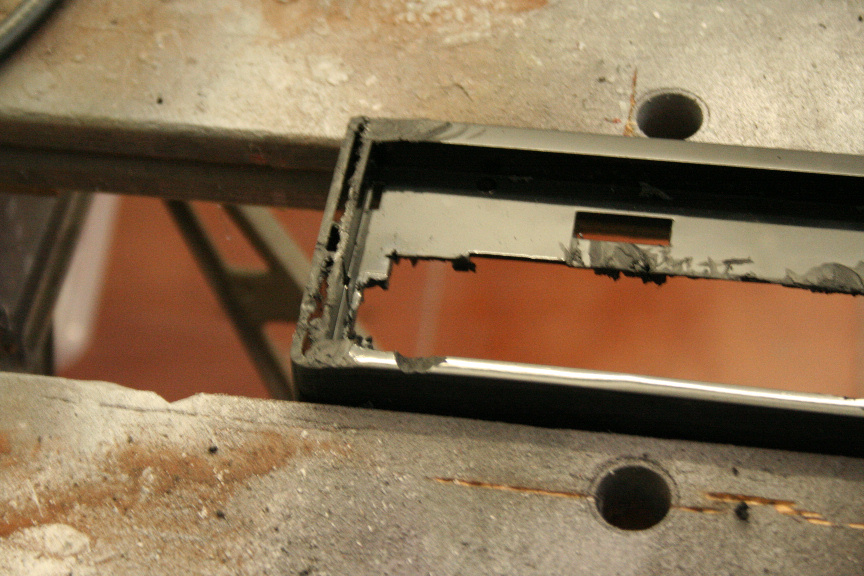
First, cutting the left side so that a drive sized device can fit through it (originally it´s designed not to as it has a trap door with a open close button). Second is cutting all the elevated parts in order to make everything perfectly staight and squared. It will later be sanded down, and filled up to make it a solid block.

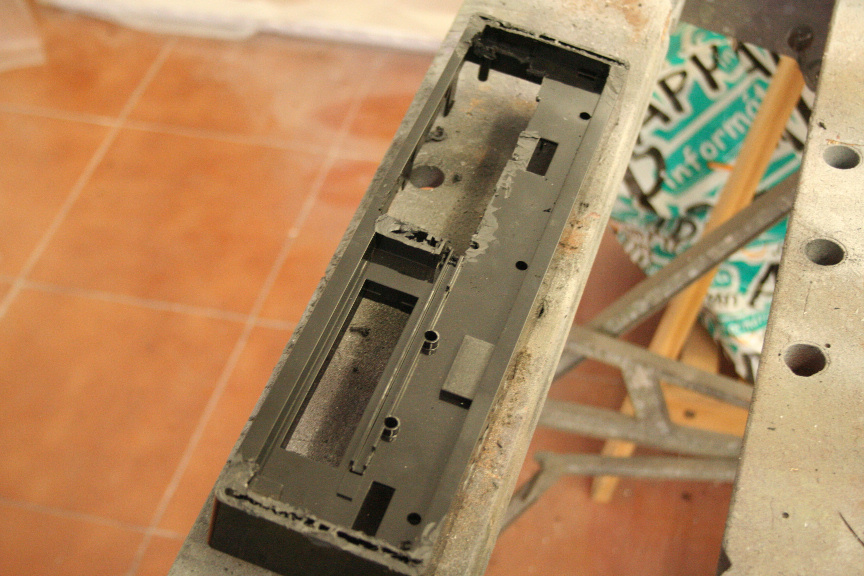
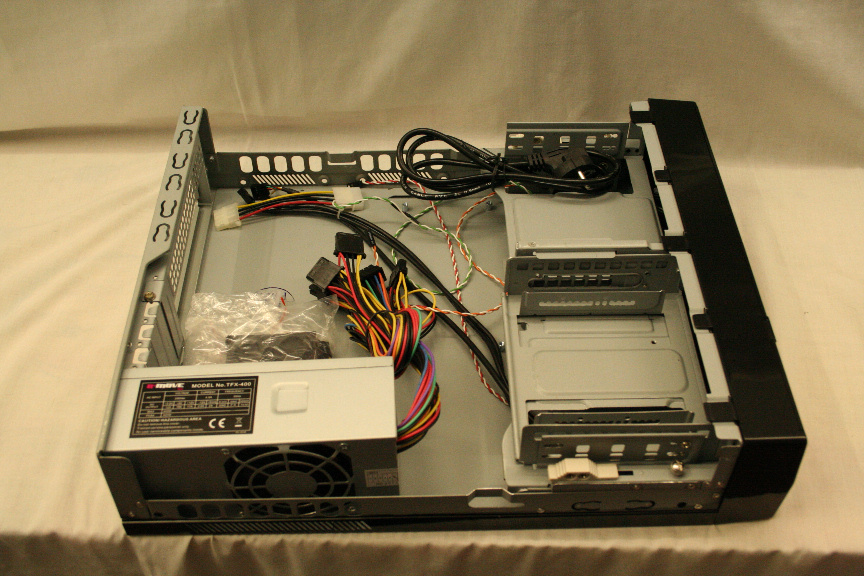
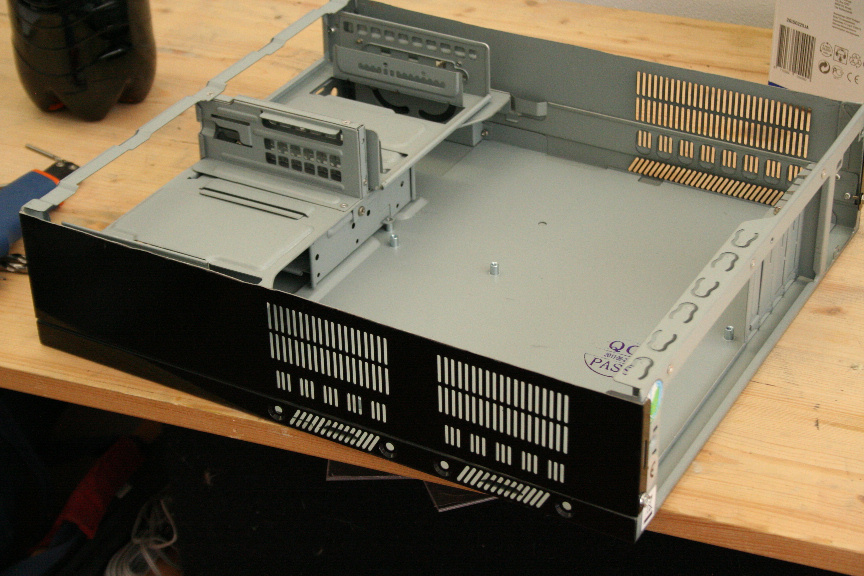
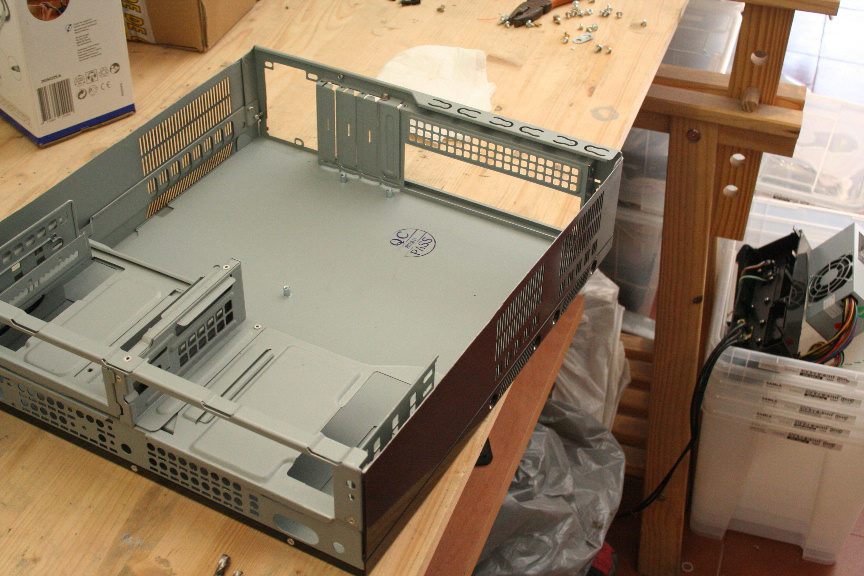
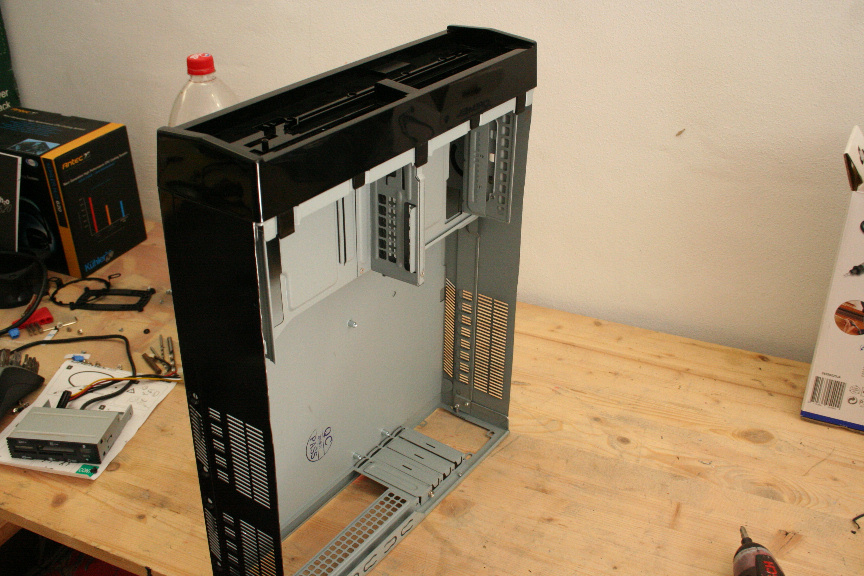
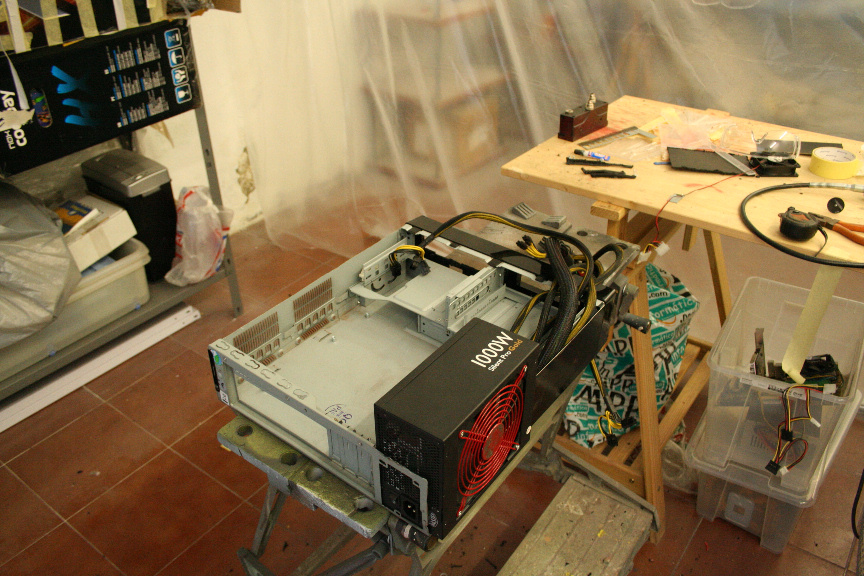
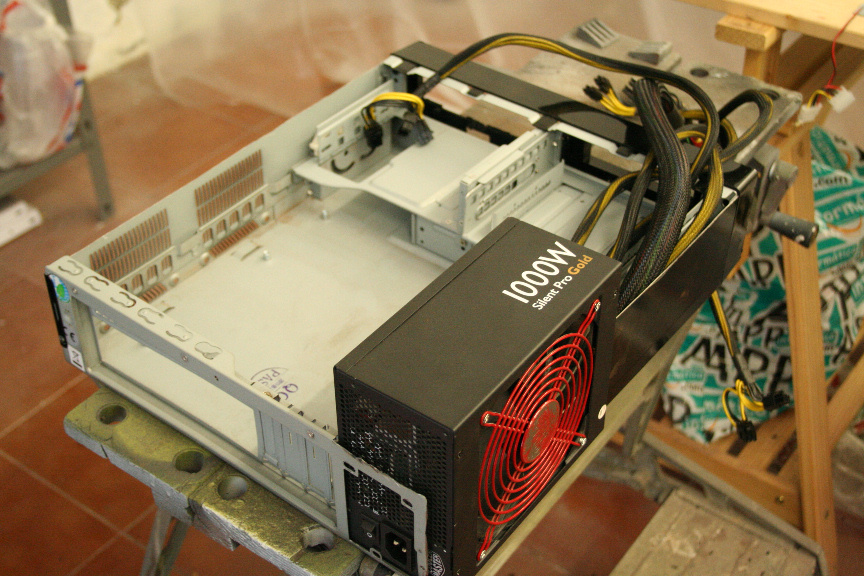
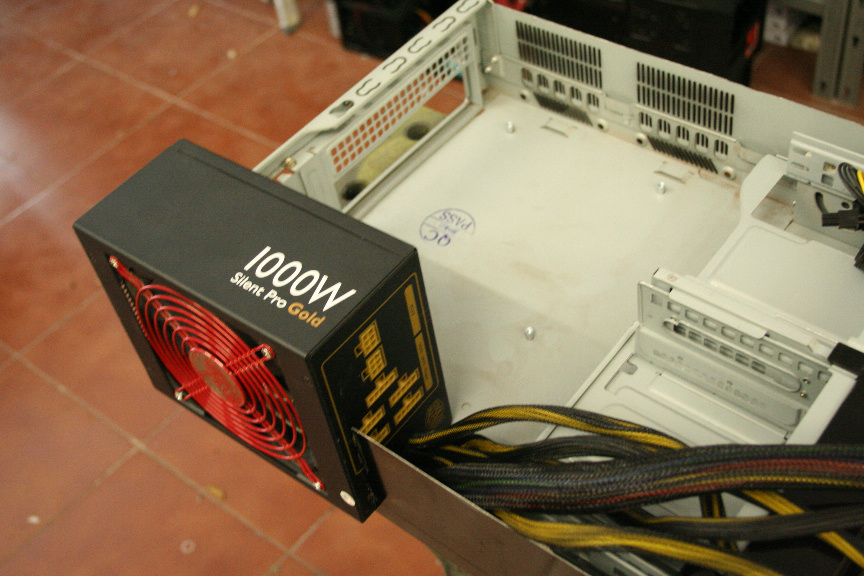
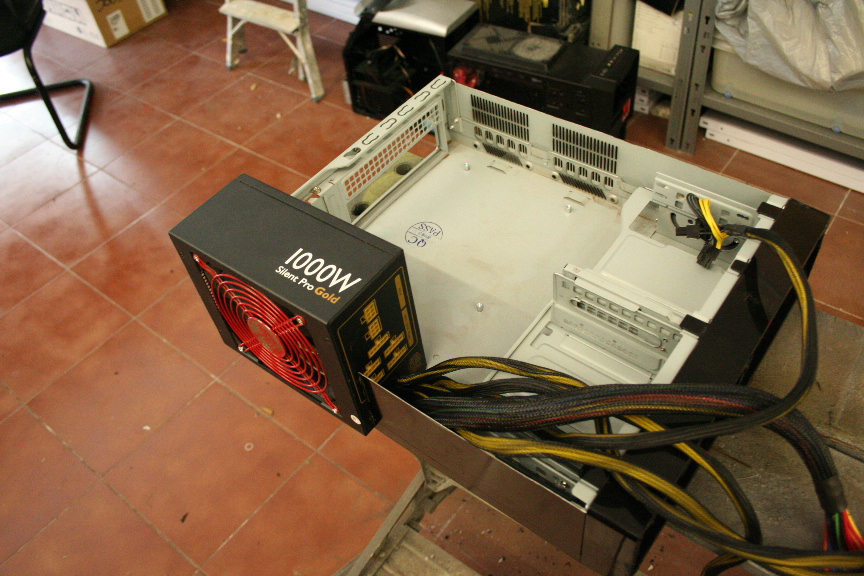
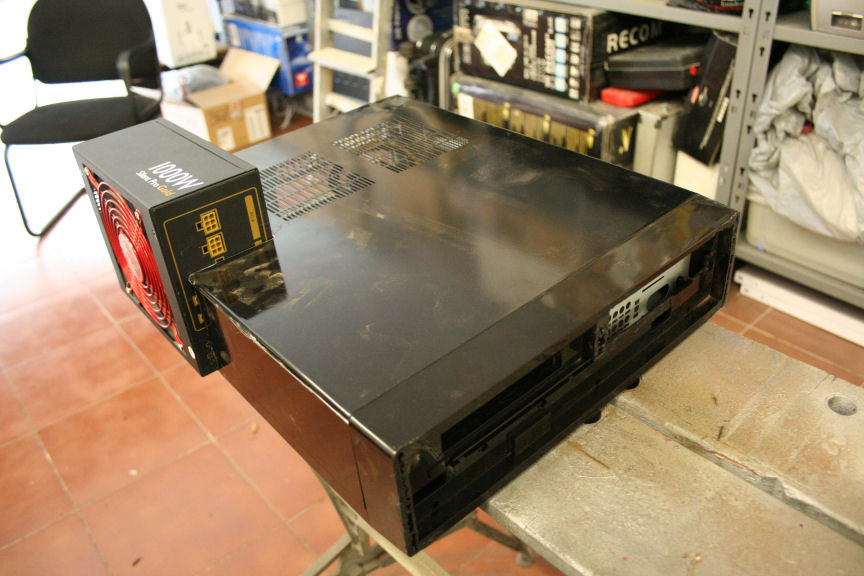
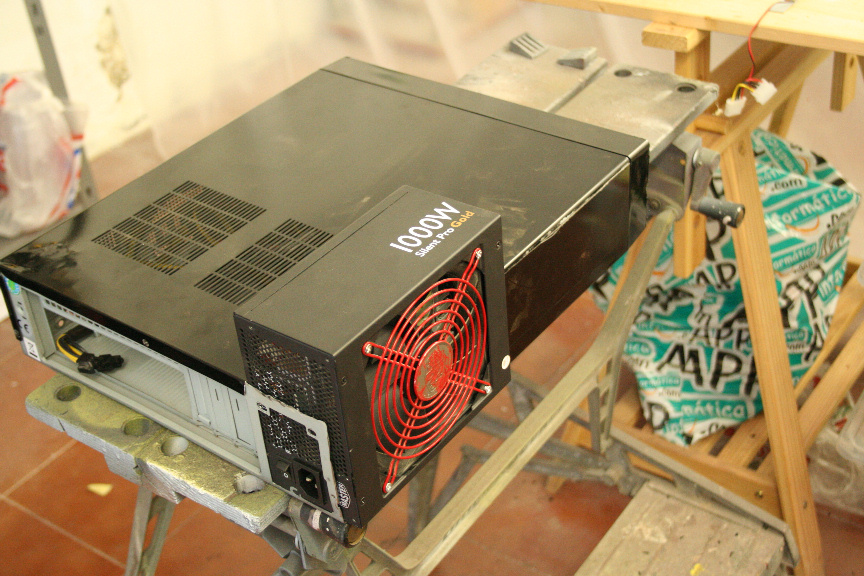
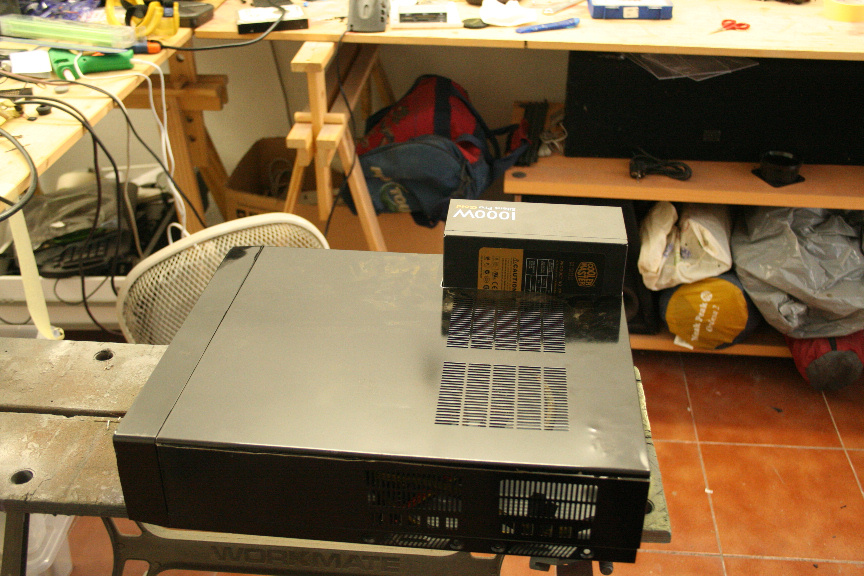
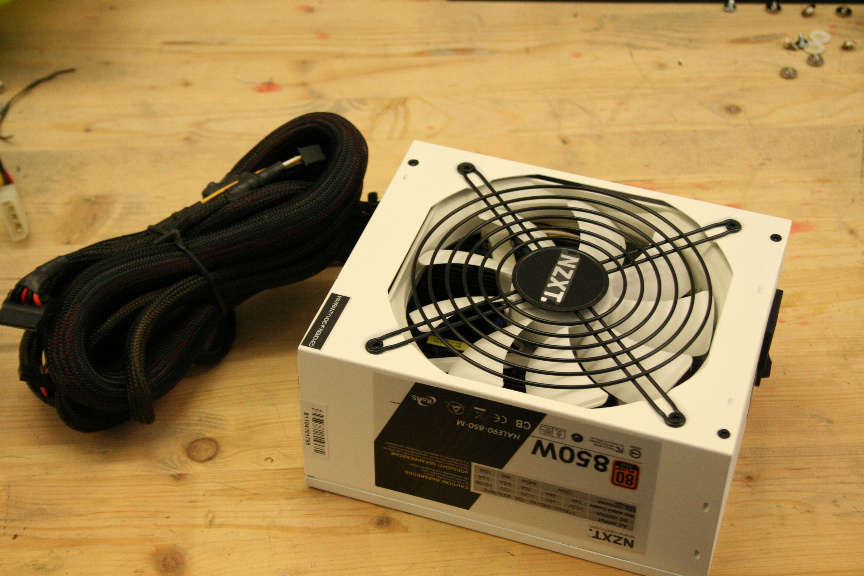
Now I´m going to be modifying the lower part of the case to suit the power suply, I´m using a used PSU for refference as it´s exactly the same size as the NZXT psu that will go in. In order to accomplish this I need to cut part of the lower section and modify the grip on it so I can still be fitted without the rear screw.

And done.
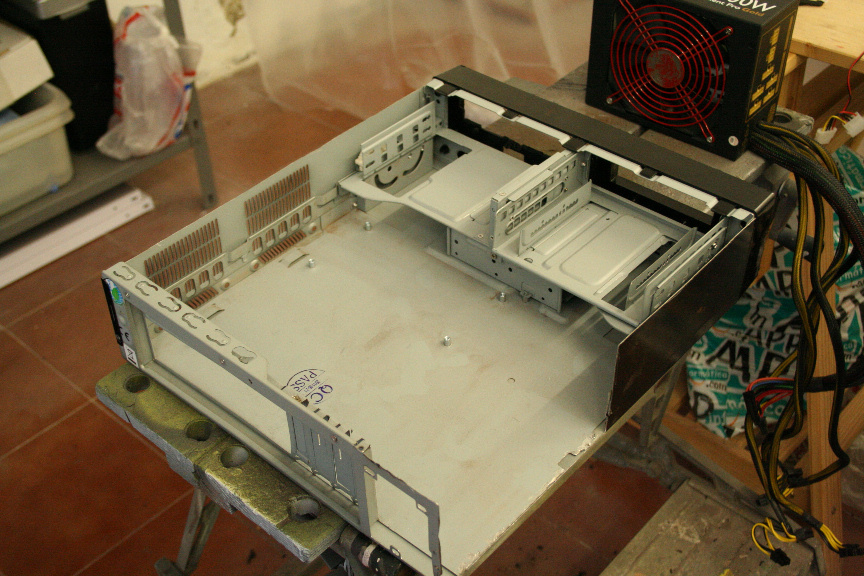
and the PSU fits nicely now.

Last edited by Luciel; March 29th, 2013 at 10:48 PM.
-
February 10th, 2013 02:12 PM #2
Skilled
- Join Date
- Sep 2012
- Location
- Malaga, Spain
- Posts
- 88
- Mentioned
- 0 Post(s)
- Tagged
- 28 Thread(s)
- Sex:
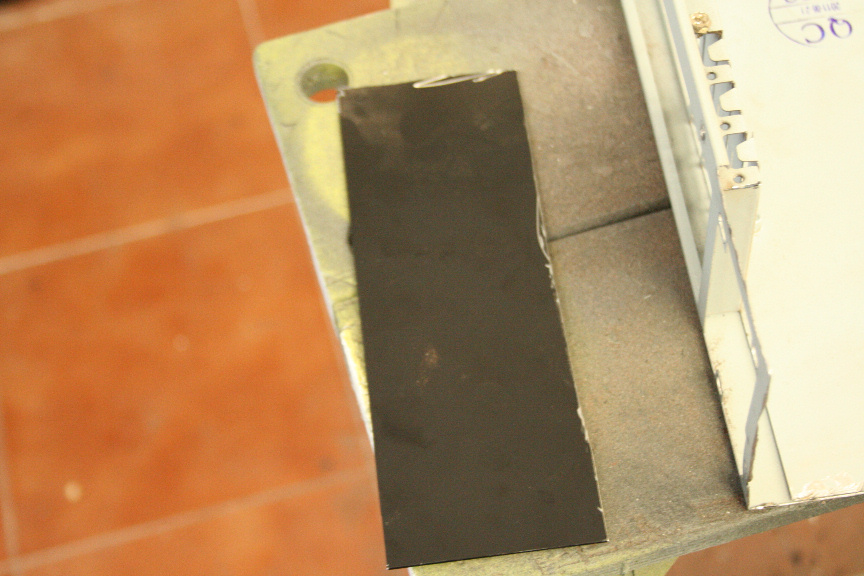
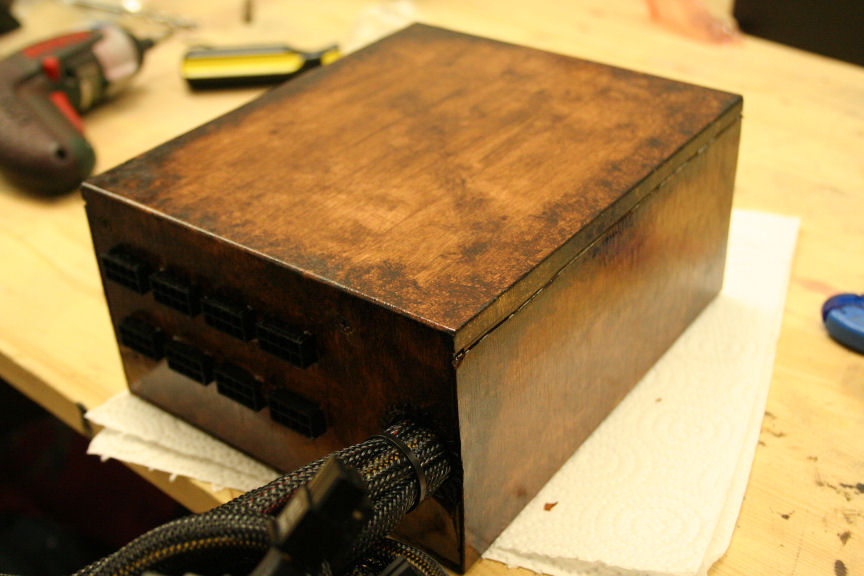
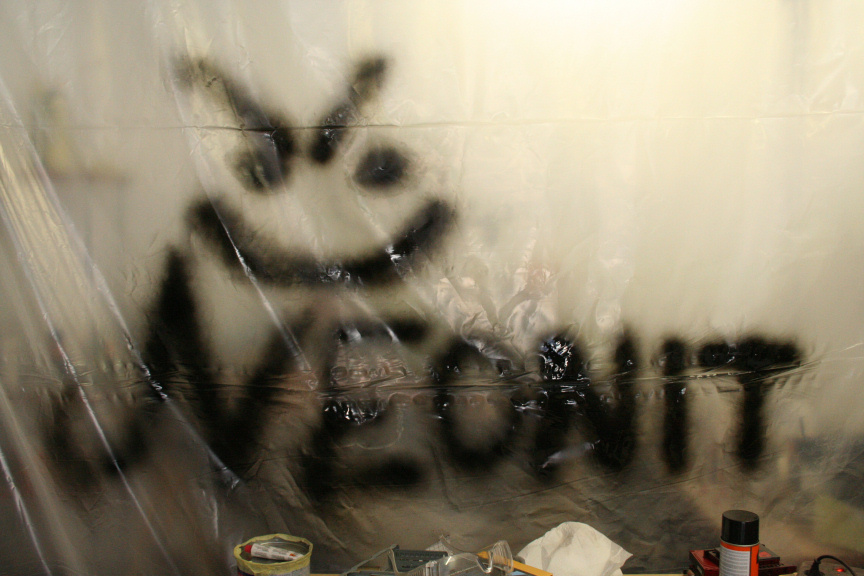
Now I´m going to start customizing the PSU.
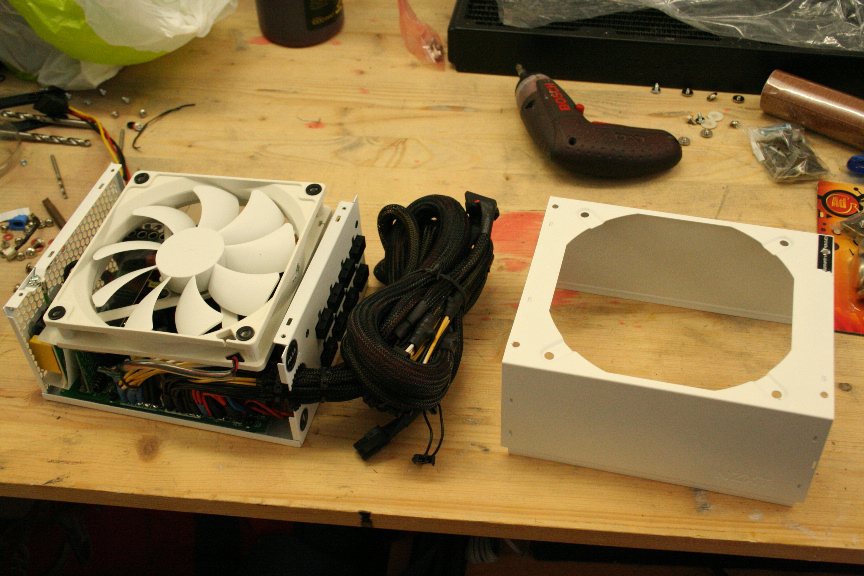
I´m going to be using a wood "look" vinyl, mostly as a design base so I have the lines and typical look of wood to work on.
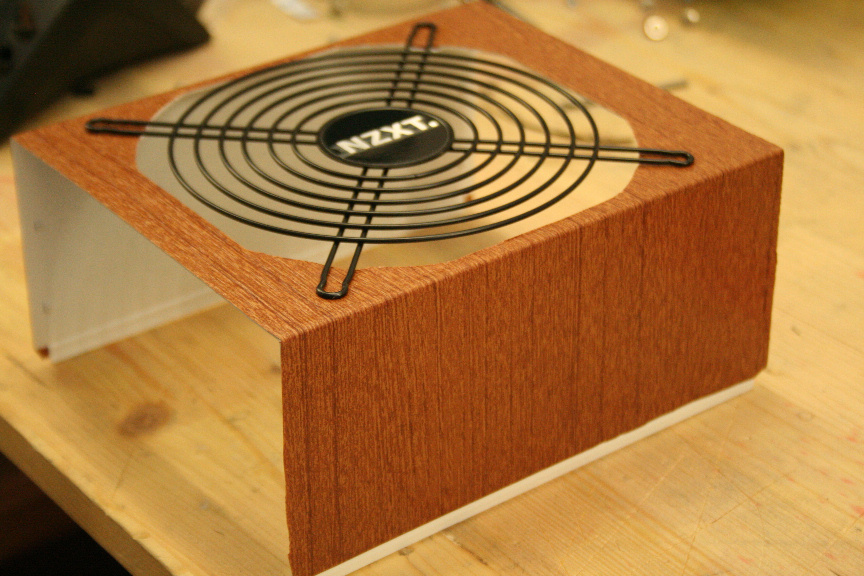
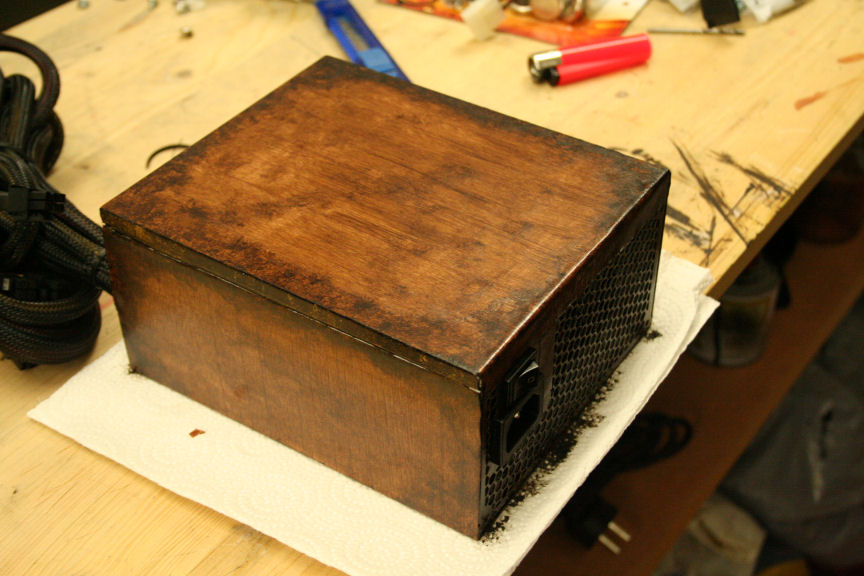
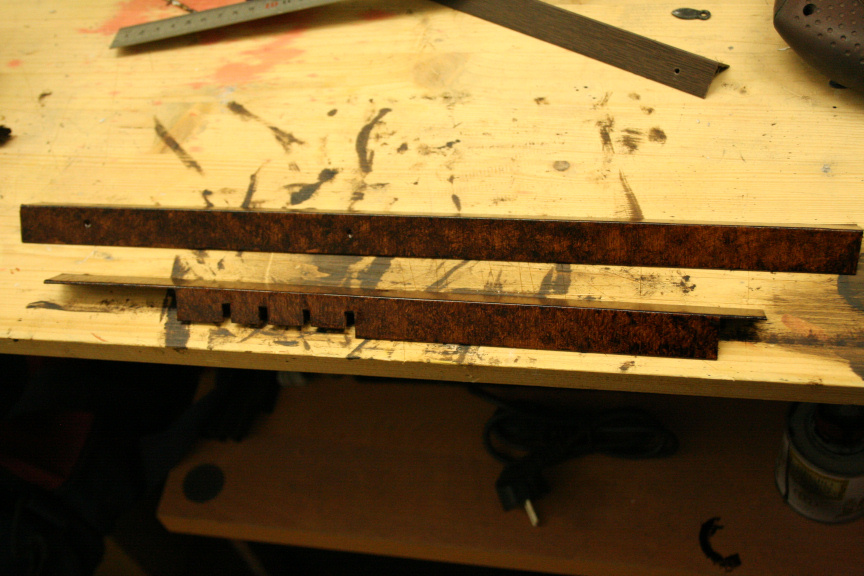
And now the first stage of it´s paintjob, which in this case is mostly a mixture of inks, and ageing effects. Here´s the first stage:
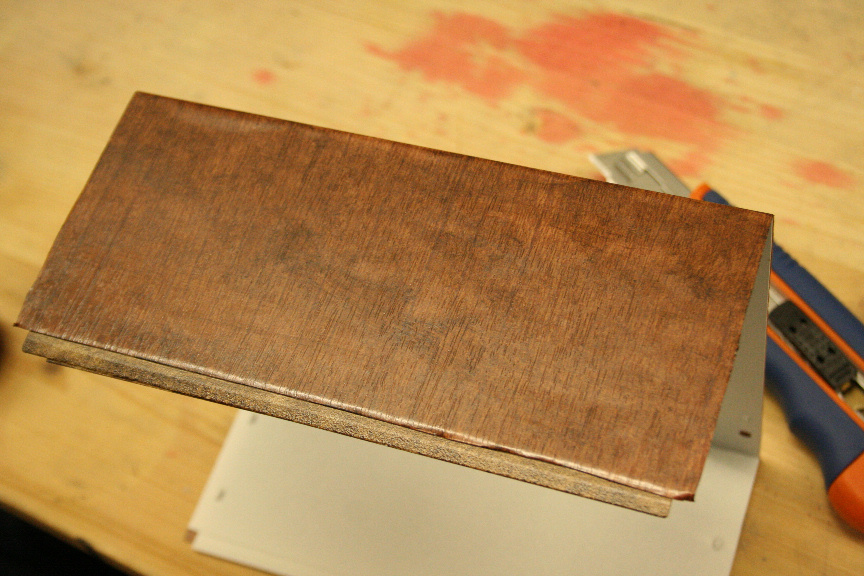
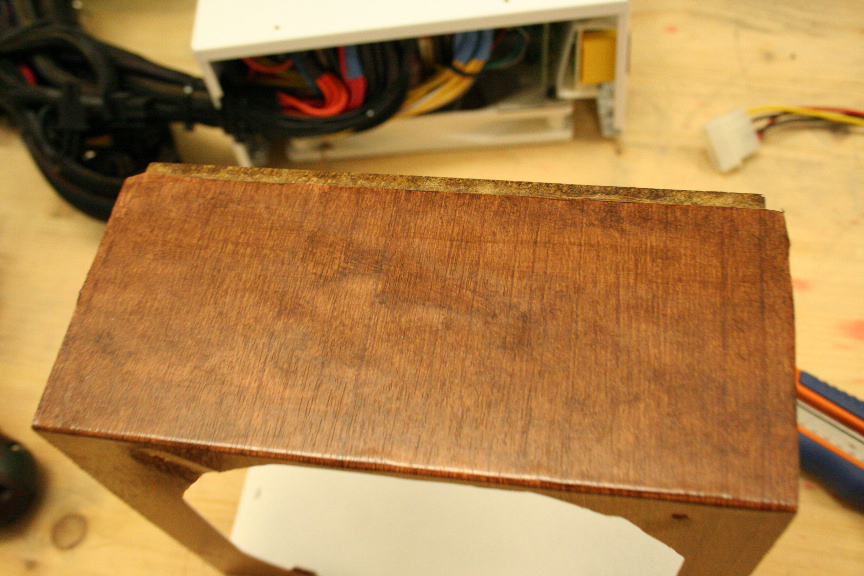
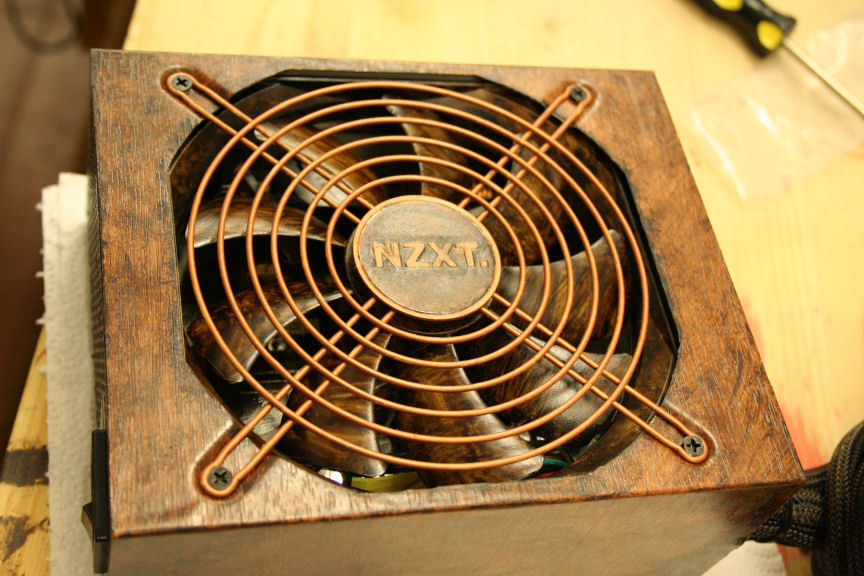
And the final stage:
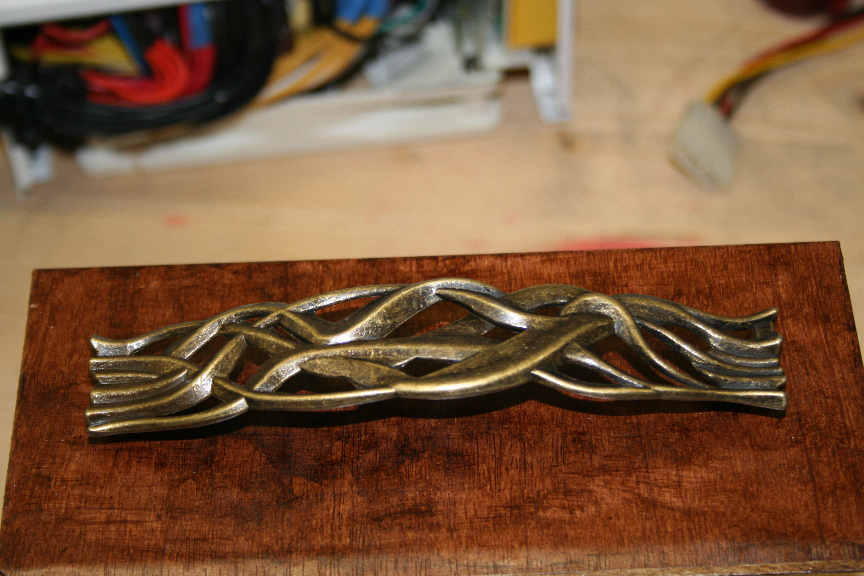
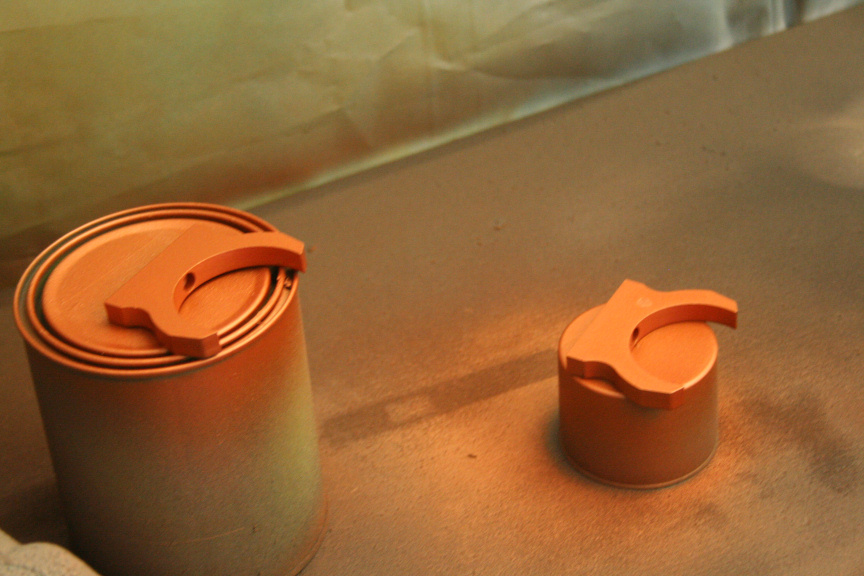
And the brass detail on the side that will be poping out of the case.
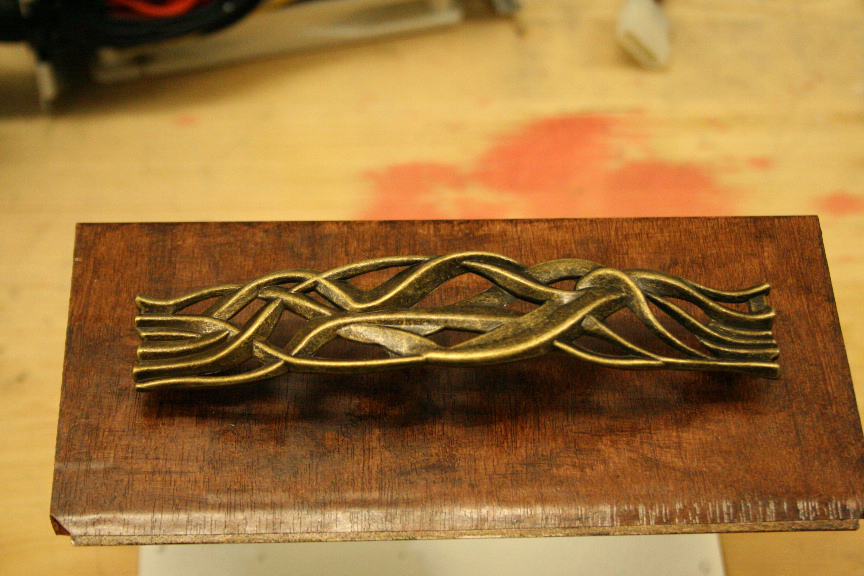 .
.

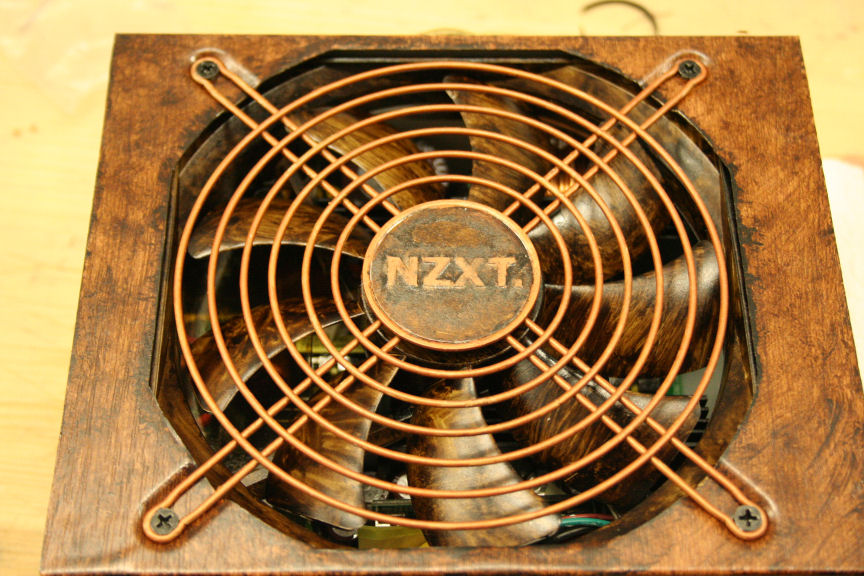
The camera flash shows what it actually looks like:
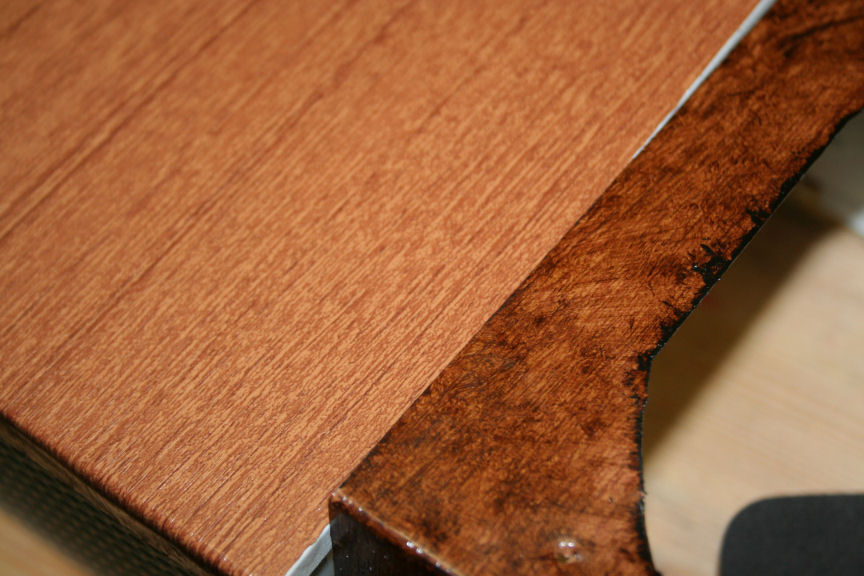
And finally a comparison shot between the standard vinyl and the "modified" one:
More to come soon!
////
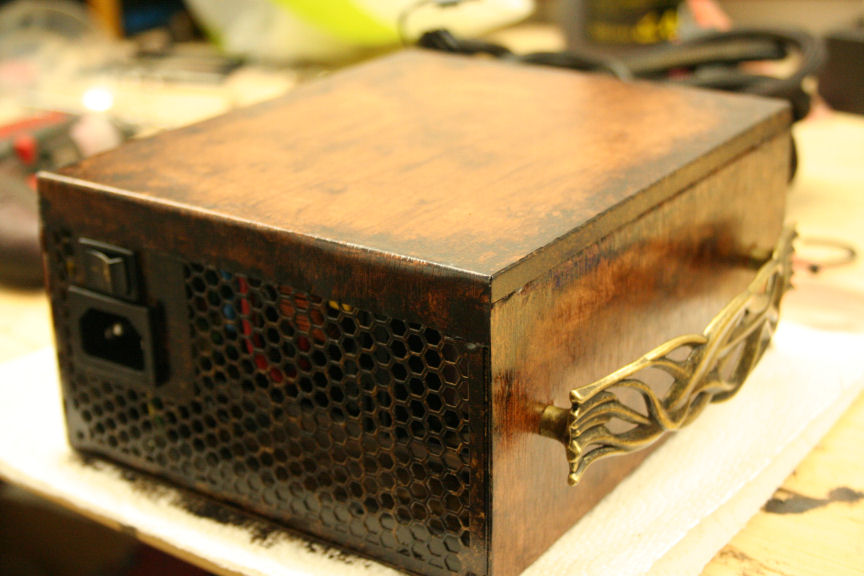
Today´s work. Power suply finished.
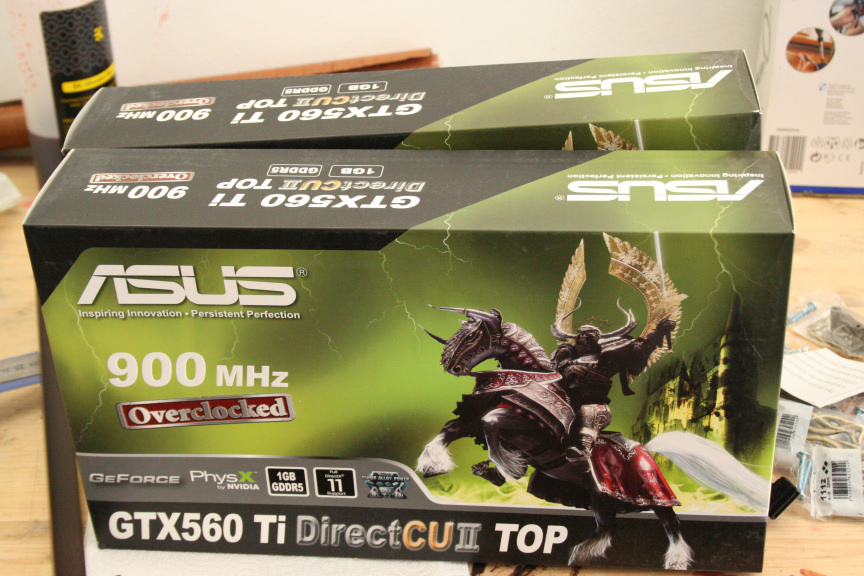
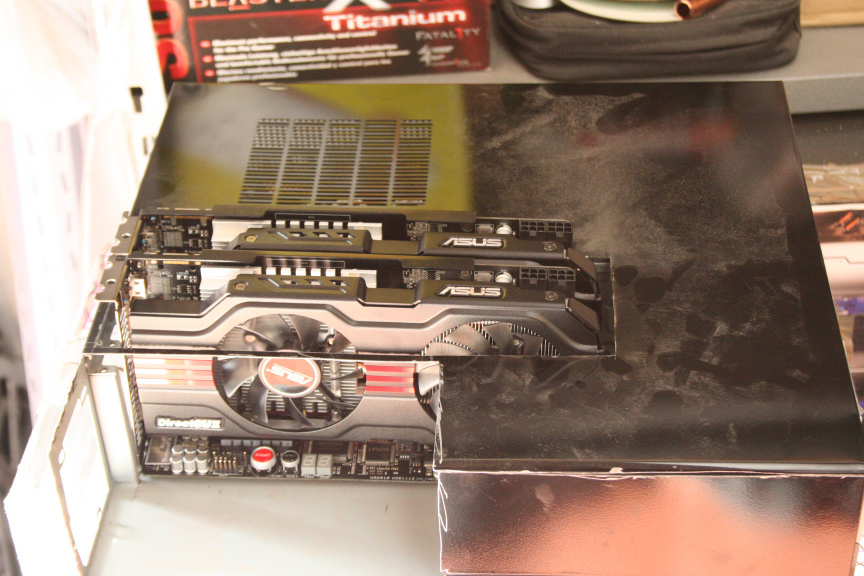
More tomorrow hopefully, also, last minute change, the MSI graphic cards where no longer avaliable so have settled for 2x Asus GeForce GTX 560 Ti DirectCU II TOP 1GB GDDR5, it seems that fate always brings me back to asus for one reason or another. In any case, hopefully delivered tomorrow and can fo more body work over the weekend.
////
Time for an update.
Unluckly the new GPUs didn´t come on friday so I couldnt do much on the weekend, but they came today and as luck would have it, it was only a half day at work as I did overtime on Friday.
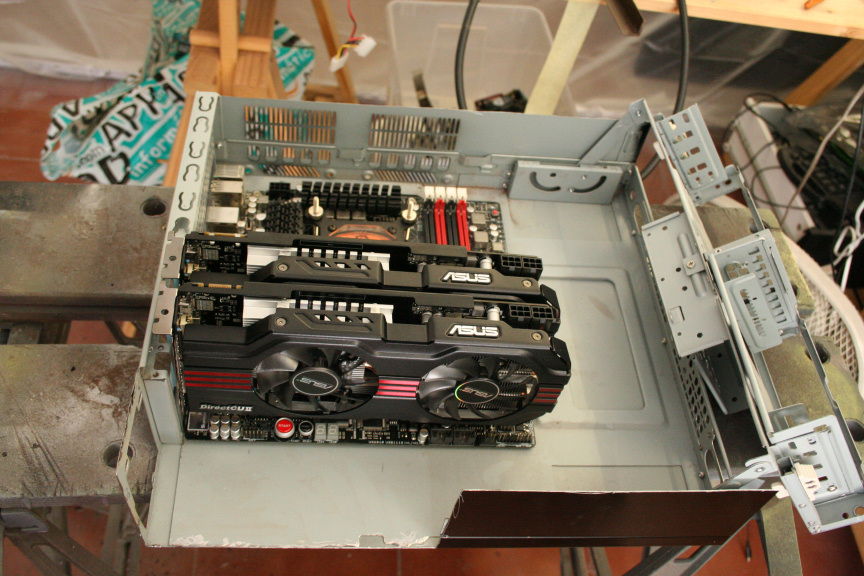
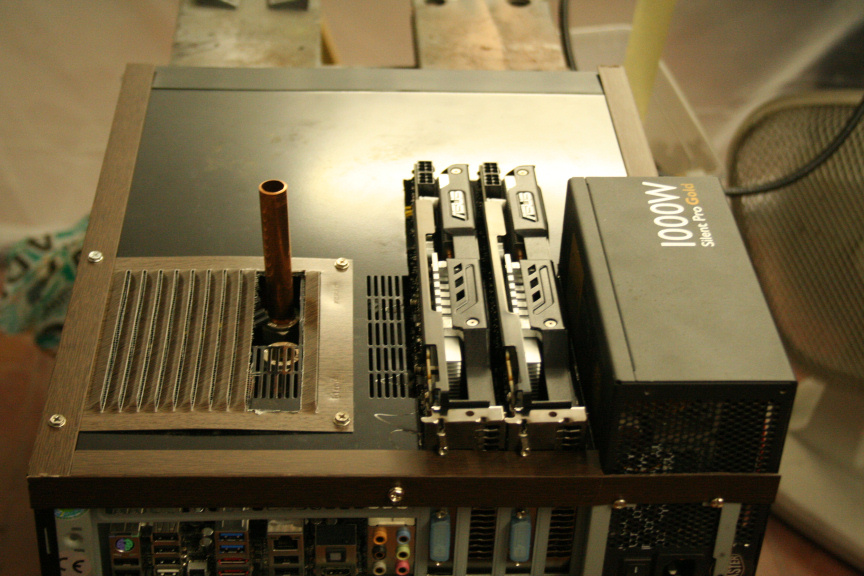
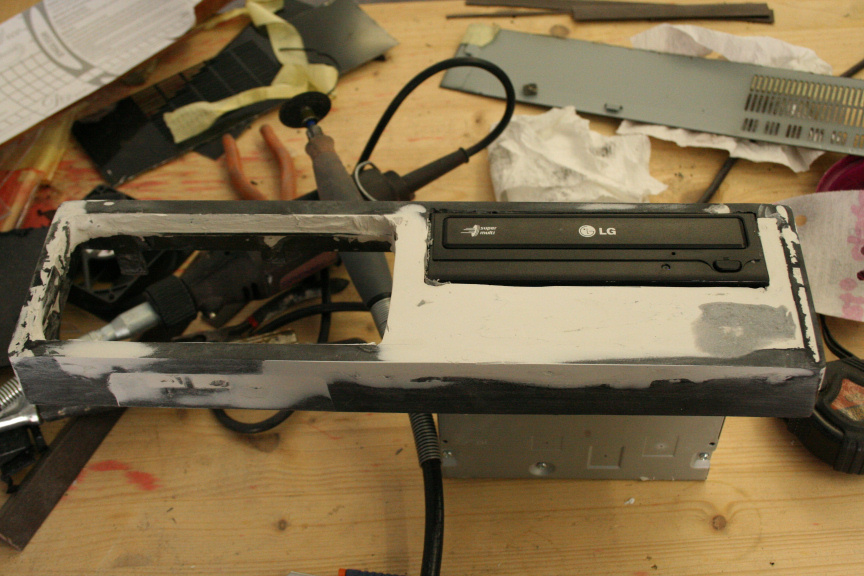
Right, time for a test mount.
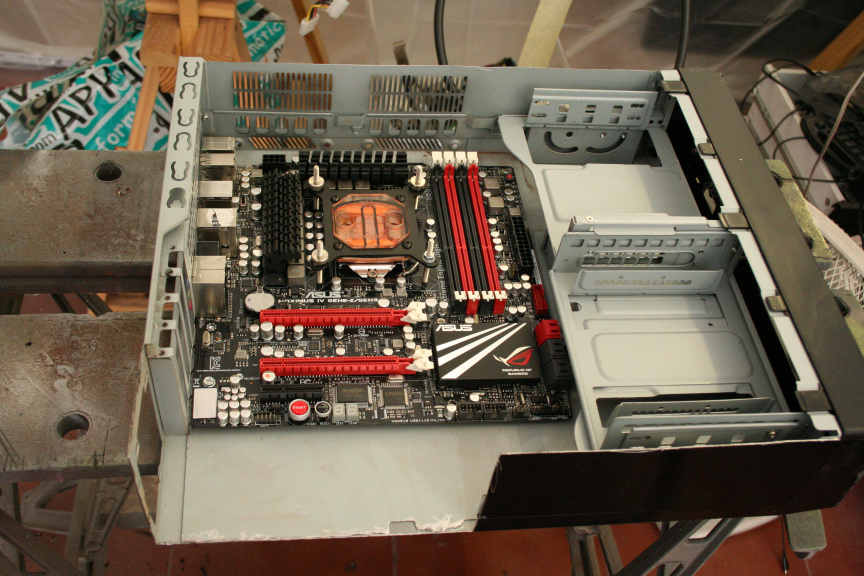

The frontal bay system does not close by very little, so I´ve trimmed down one of them so it does.
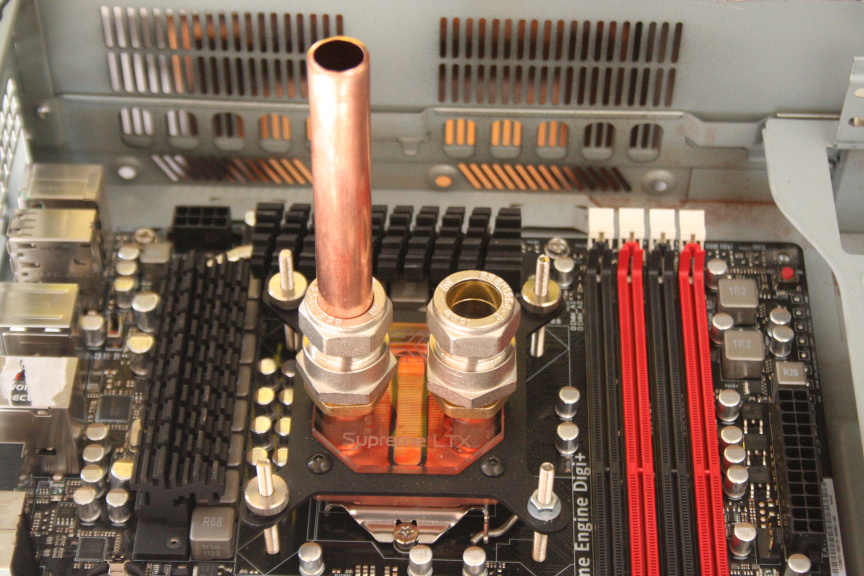
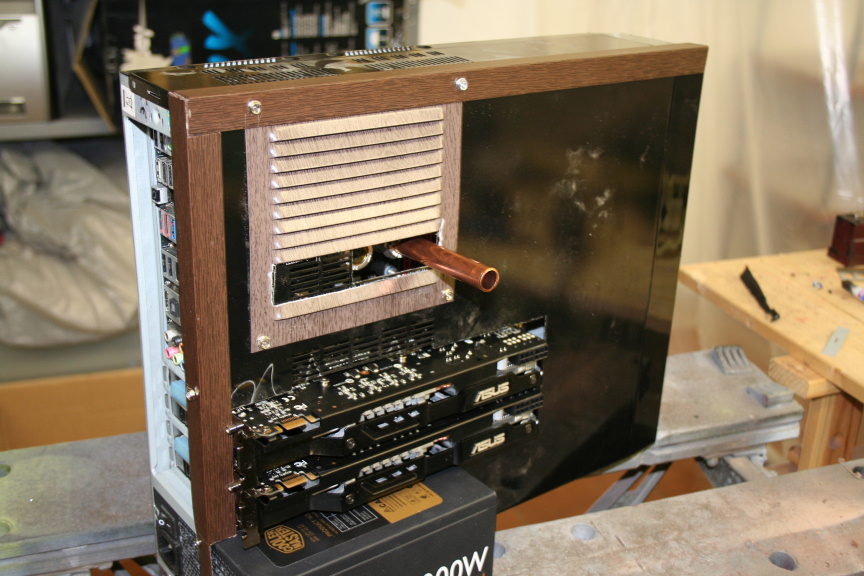
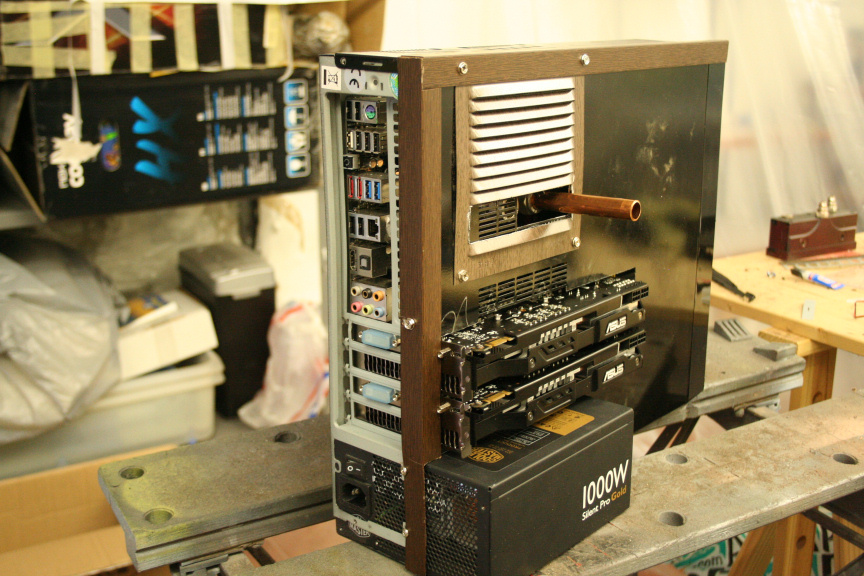
As for the watercooling, I will be using a full copper pipe system for this project, which while it looks really good is rather complicated for two reasons, first, I need plumbing fittings, luckily I found out that 3/8 is a common size for that, so i got some G1/4 to 3/8 fittings and problem solved.
The second problem, or not really problem just, complicated fact is that there´s no flexing, here, so all the measurements have to be exact at every point, so once all the liquid cooling bits and bobs are in their place I will get the pipes and cut them to size so everything fits, nicely. Meanwhile, here´s a preview:
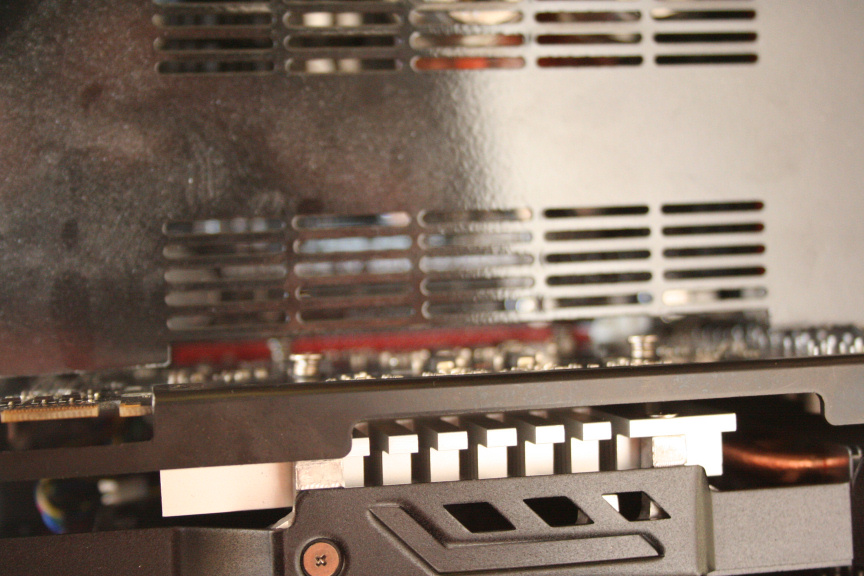
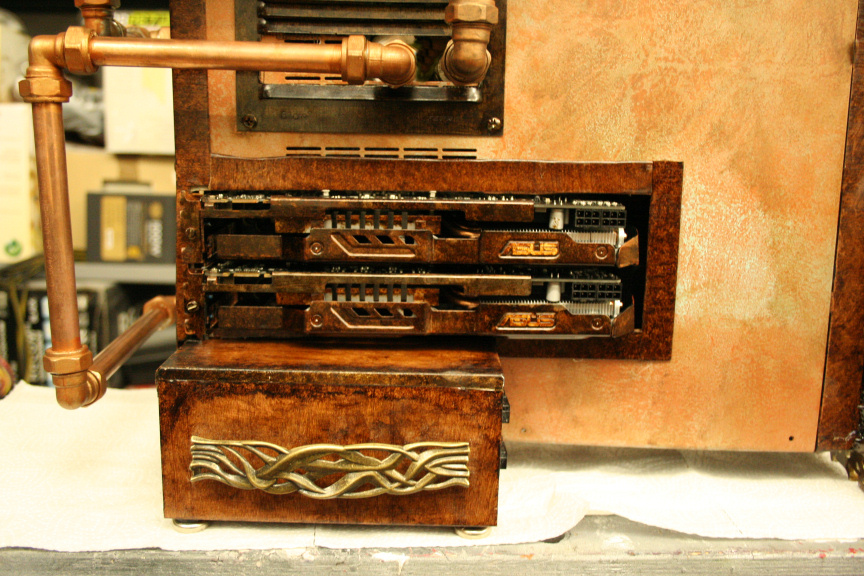
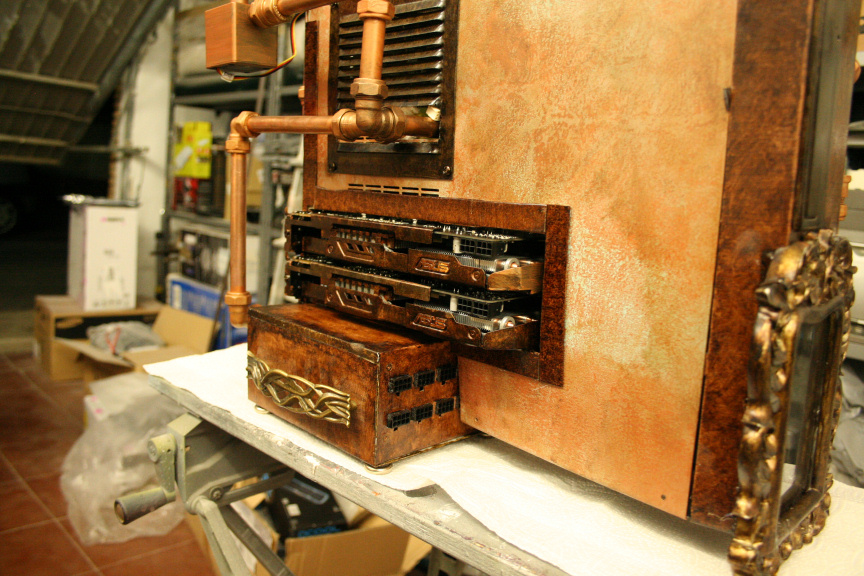
Right, now the case modifying for the GPUs.
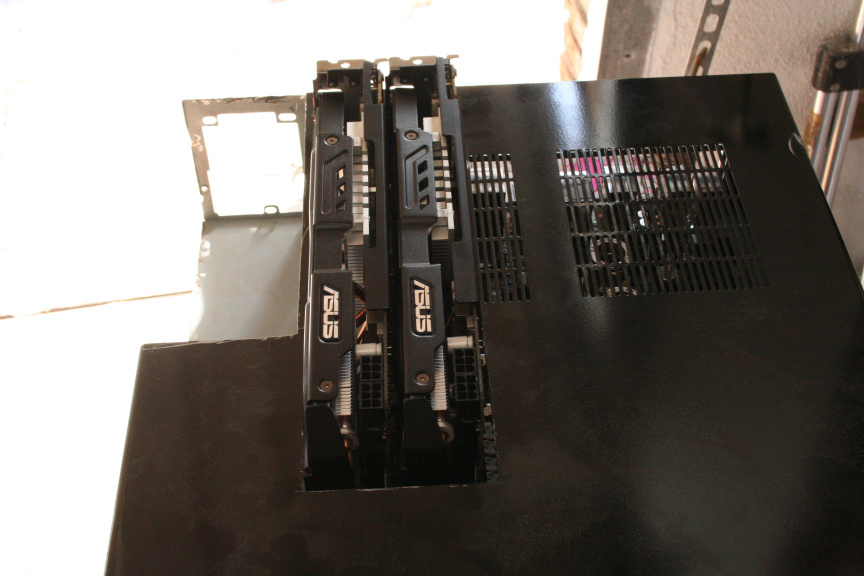

I trimmed this section a bit more to make sure there´s no contact, tomorrow I will clean up all the cuts:
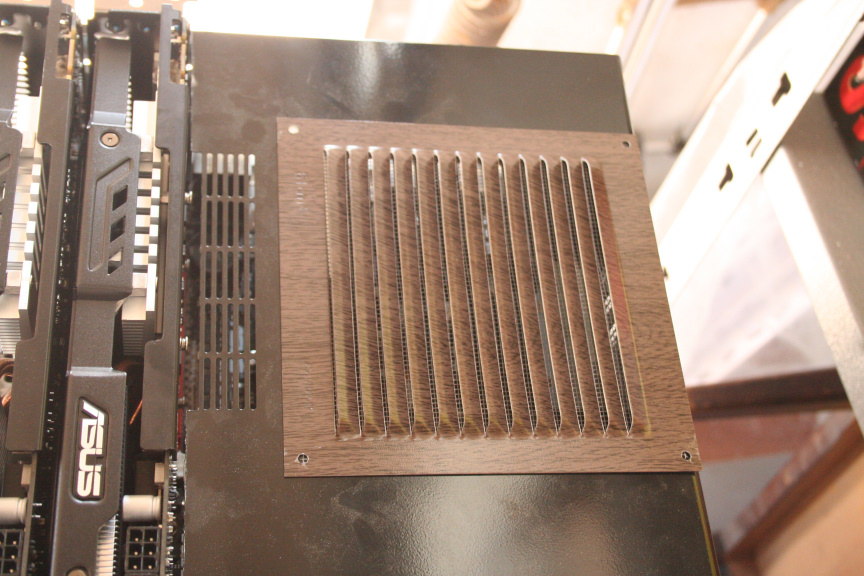
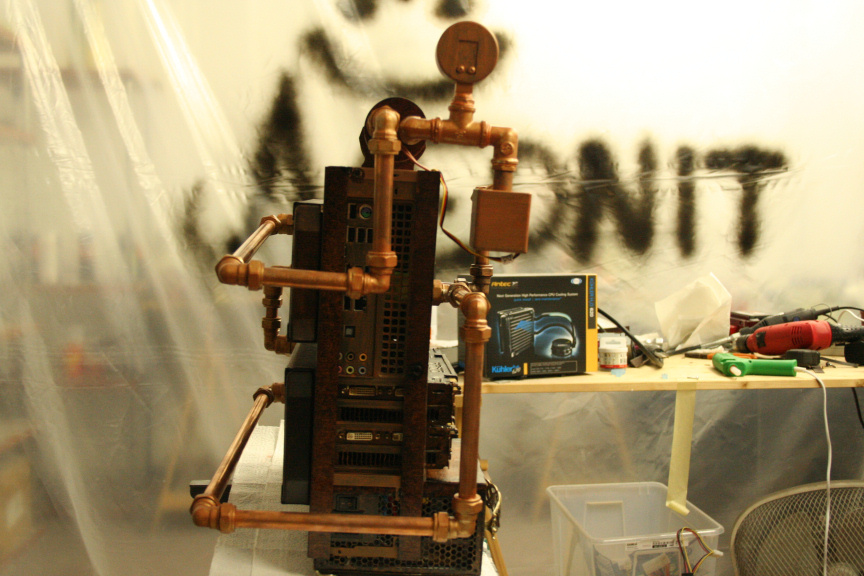
Right, because the fittings are so big, my original plan of taking the pipes out the back is scrapped and I have to come up with an idea to take them out the side panel and still be able to open the case as needed, so here´s the solution. I cut the side panel so I can unlock and slide downwards in order to open it.
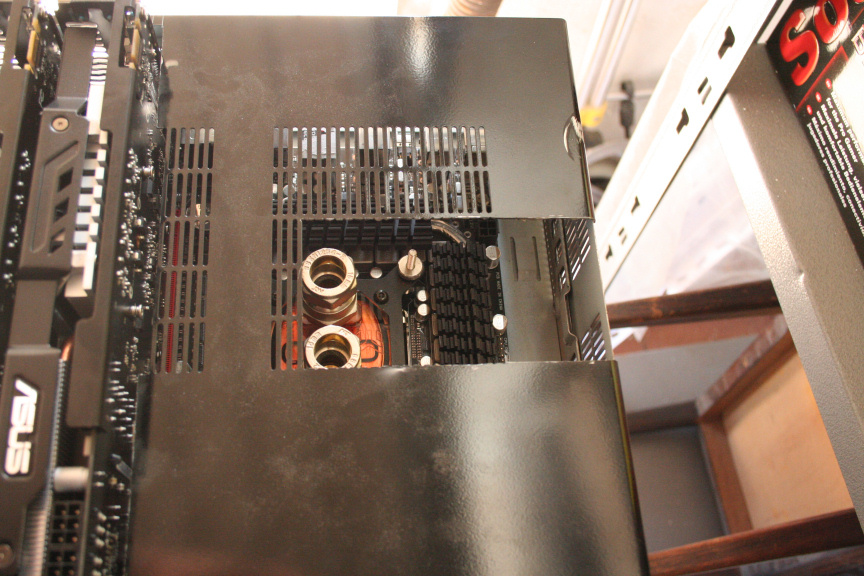
And to cover it up, and old school grill which I´ll cut to let the pipes through, this way in order to open it, I just unscrew the grill and slide open the side panel. Problem Solved.
More tomorrow hopefully.
////
Update.
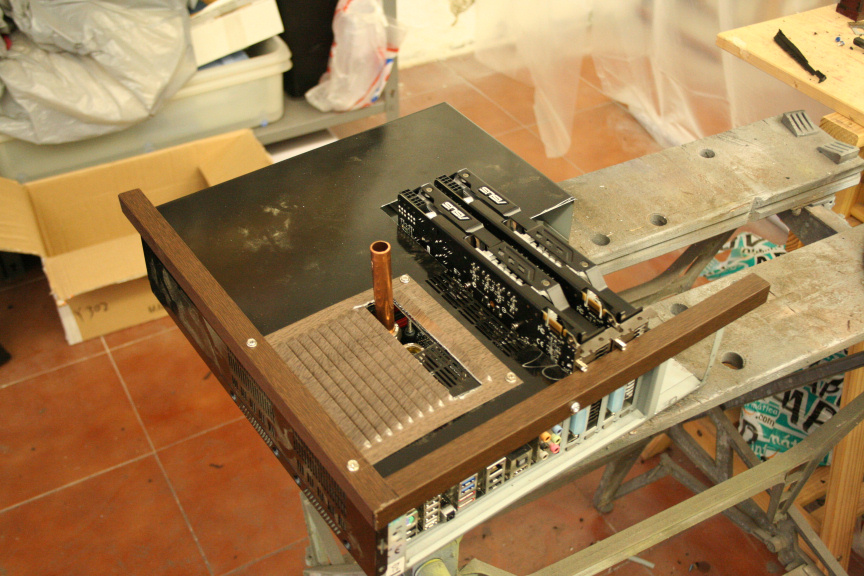
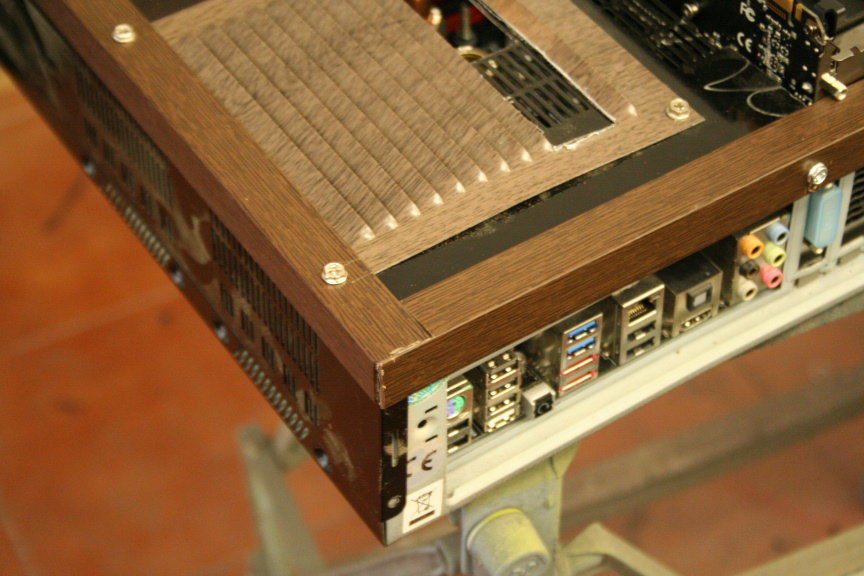
Today I´ve started to cut and test mount the side covers. While they look like wood, they are plastic and they are not the final look, they simply come like that from the store, I will be using vinyl and ageing process so they match the PSU. The same treatment will be done on both sides of the case.
Originally I was going to use rubber covers for the cuts so they don´t look sharp, however in order to add more "wood" to the design, I will be using the same parts cut in half as on the side, this should increase the wood/copper ratio of the final look.
I´ve also ordered all the liquid cooling stuff I need, and it will hopefully arrive on Friday so I have the weekend to mount everything and start and finish the front of the case so on Monday I can go to the plumbing suplies shop and cut, test mount and buy all remaining fittings and copper tubing to complete the loop.
If the parts don´t come by friday I´ll have to delay the plumbing details till tuesday or wednesday which will only give me a 2 day painting window to finish the project, so it´d definately cutting it short, but I feel confident at this point.
Aniway, photos!
Hopefully more tomorrow.
February 10th, 2013 02:14 PM #3
Skilled
- Join Date
- Sep 2012
- Location
- Malaga, Spain
- Posts
- 88
- Mentioned
- 0 Post(s)
- Tagged
- 28 Thread(s)
- Sex:
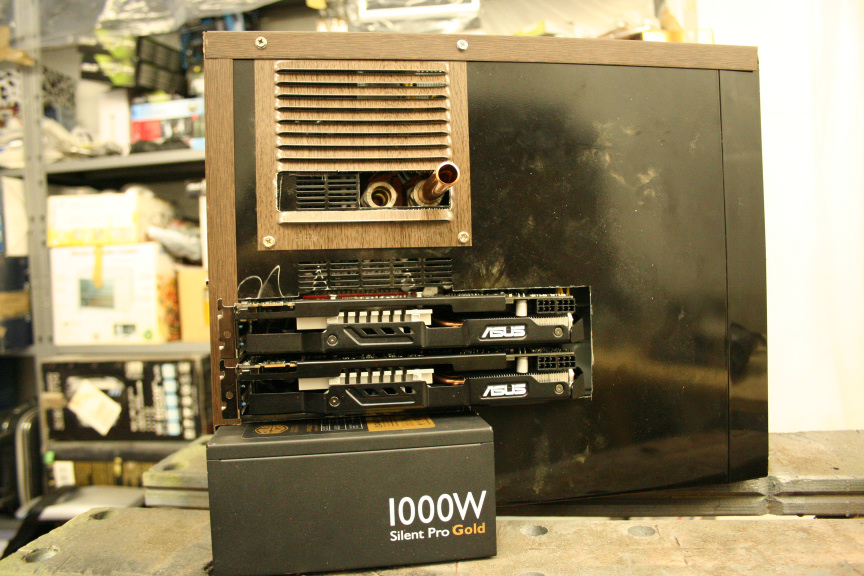
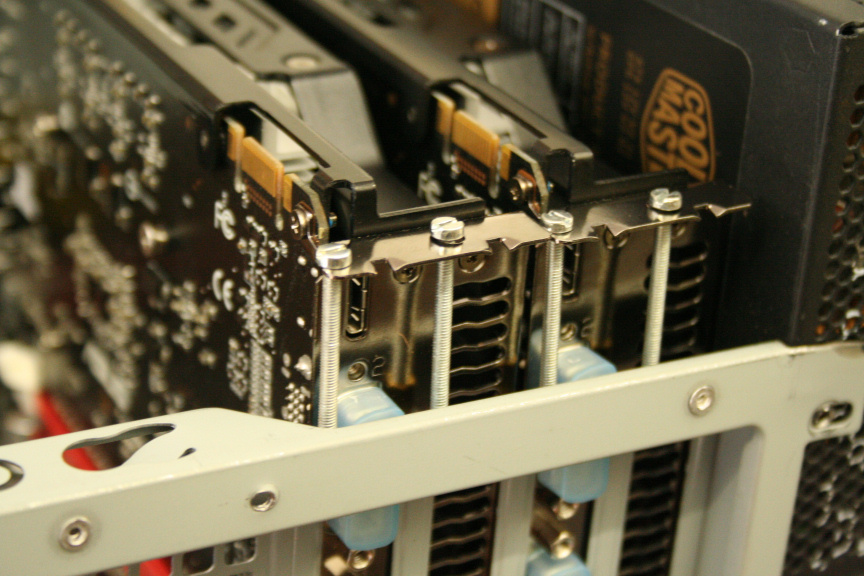
Quick Update.
It doesn´t seem like much but it took me all the time I had to spare today to do this, the steel on this case is really stubborn (specially on the back where it´s thicker)!
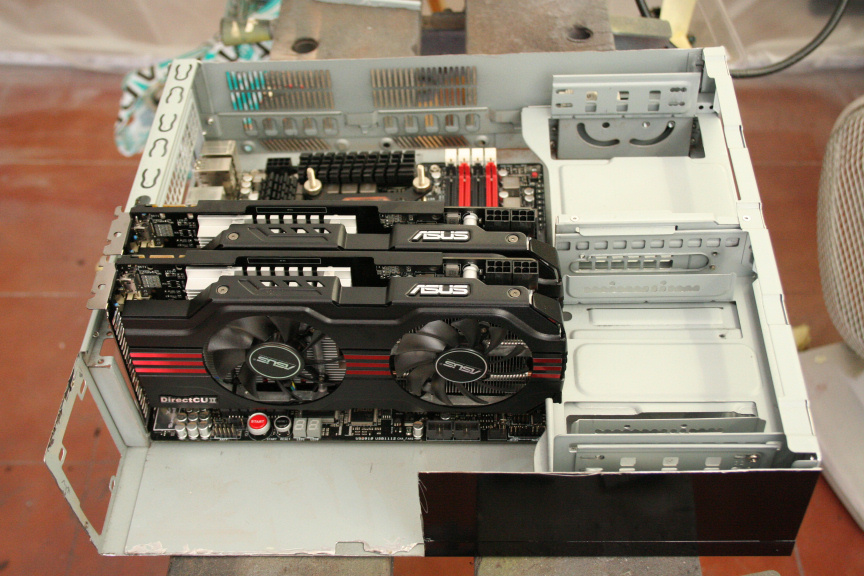
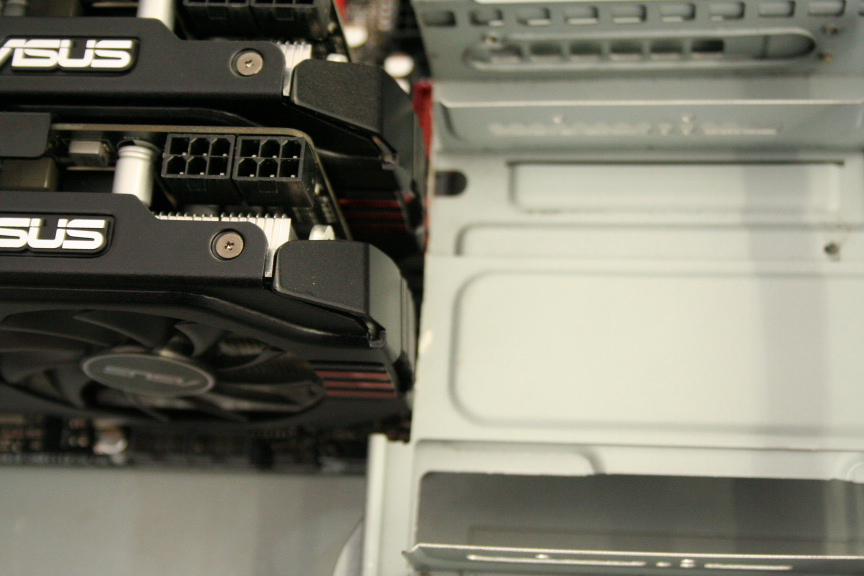
Aniway, the screws I ordered (yes I had to order them, it seems no one locally had 3mm x 50mm screws) arrived and I they did the job perfectly, now the GPUs are properly secured.
And all the borders have been cut to size and test mounted. Some trimming left to do on them and adjusting for a perfect fit, but it´s really starting to take shape now.

Aniway, more tomorrow hopefully.
////
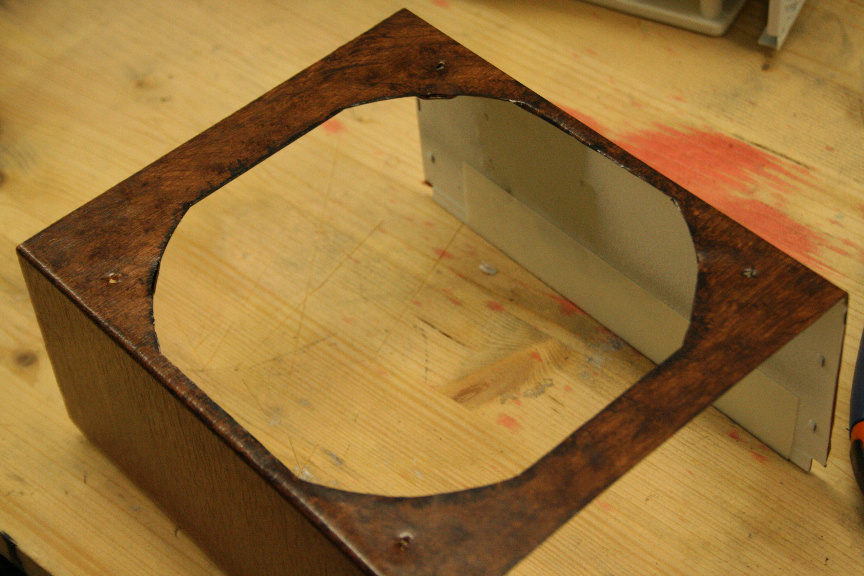
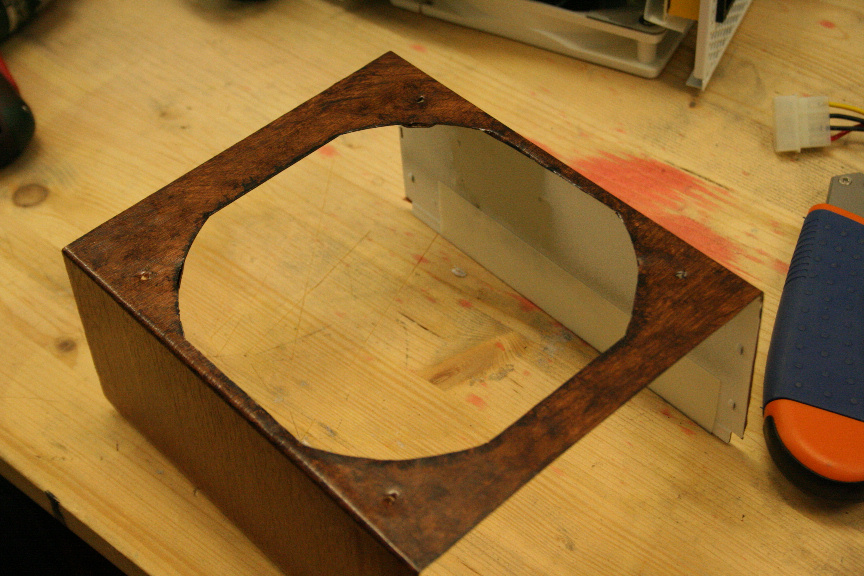
First update of the day...
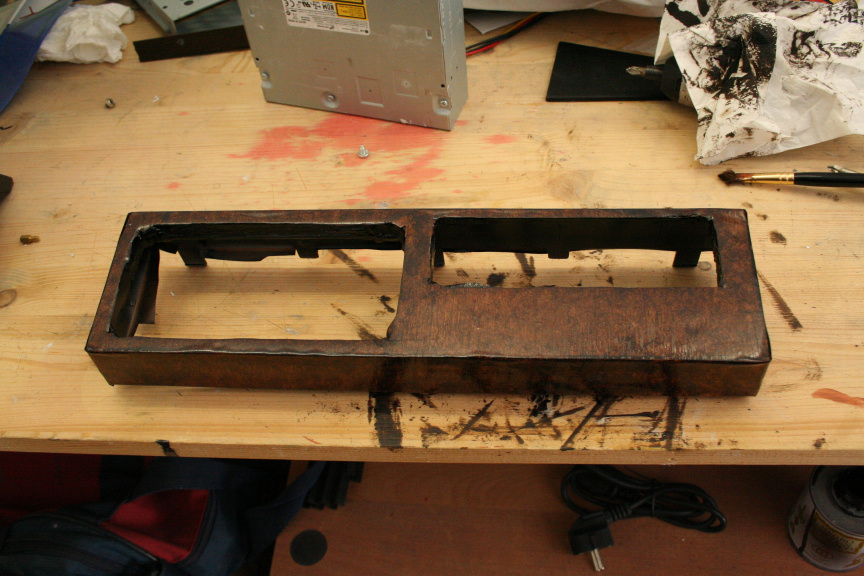
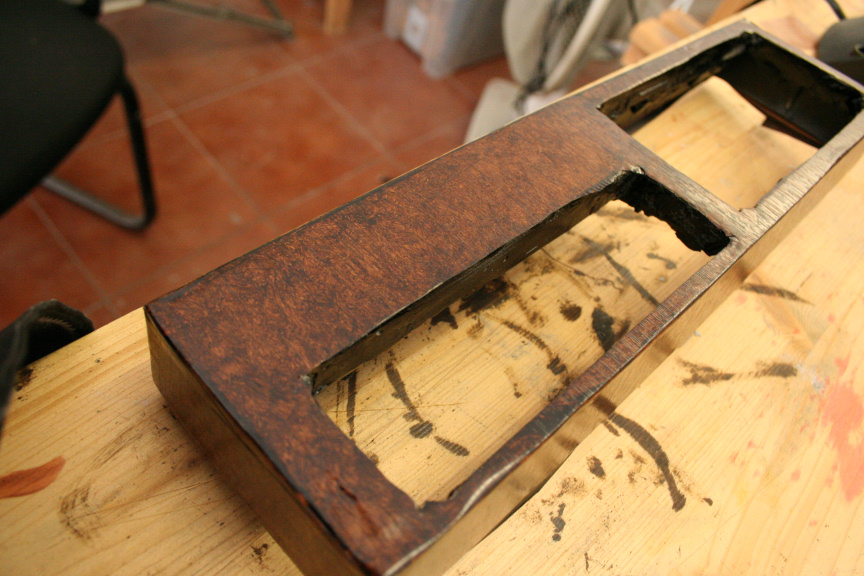
To freshen up your memory, this is what the front looked like once I had cut out everything I didnt need out of it, remember that originally it had 2 doors and all sorts of things.
So I cut a further section to incorporate a new idea I had for the front (which you will partially see by the end of this update but not completely by a long shot till, with a bit of luck, the second and final update of today (i.e. tonight).
I then filled it all up with epoxy filler.
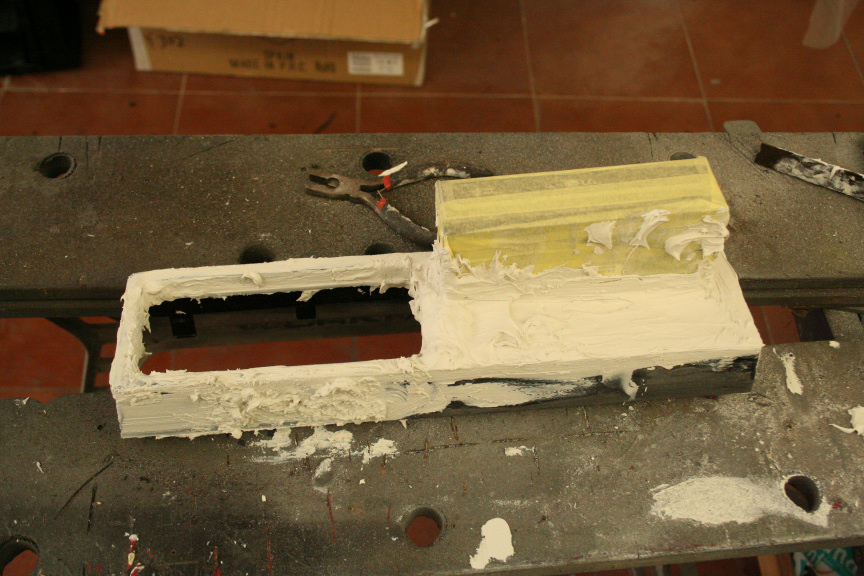
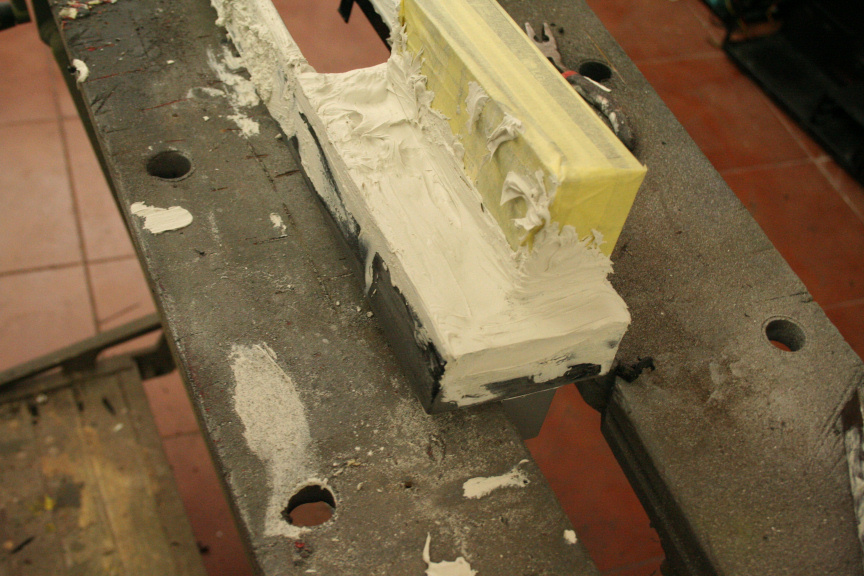
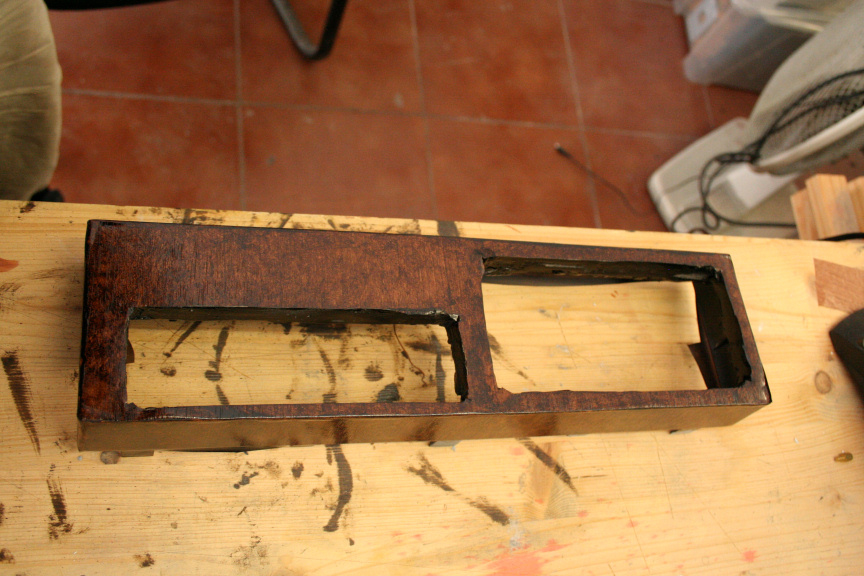
Once it was dry I started with what will become a couple of hours of sanding.
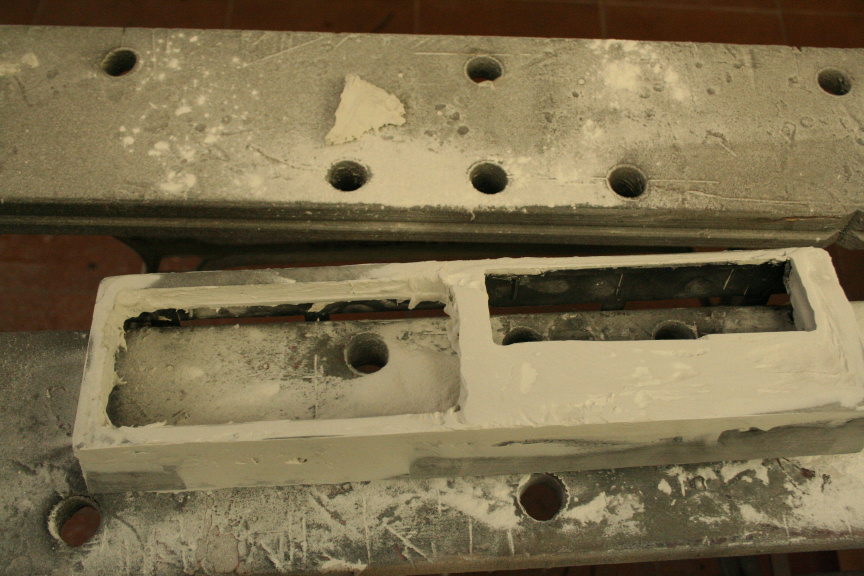
That´s how it looked yesterday before I called it a day and went out for a drink as I needed to disconnect badly.
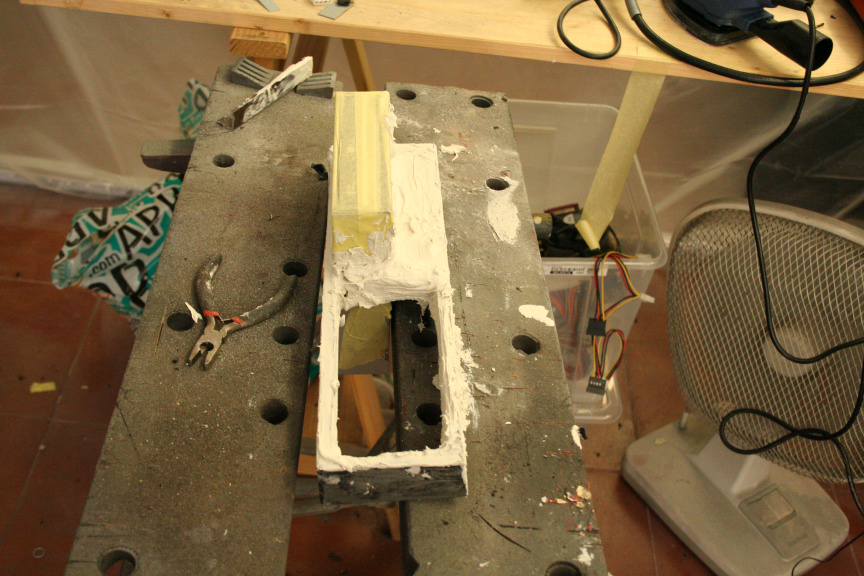
Today, I started fresh this morning at around 10am and continued sanding until it was ready.
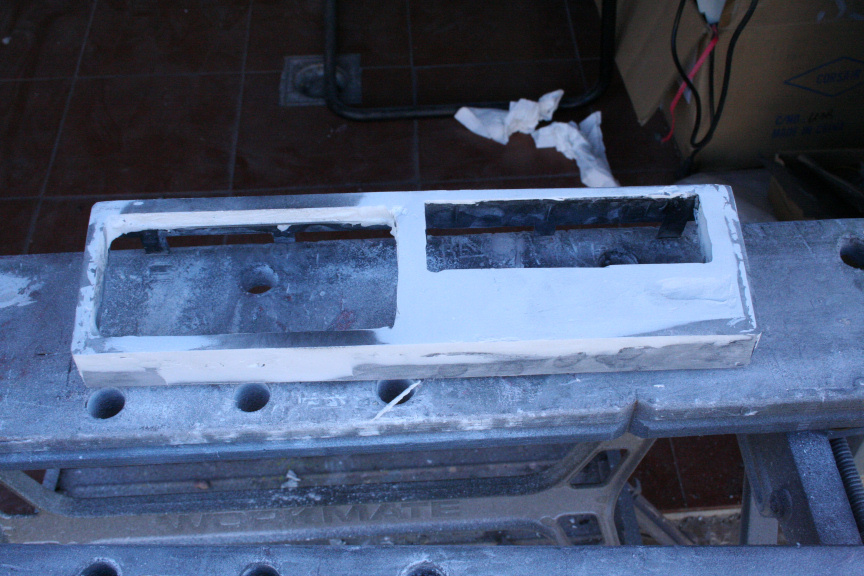
Next I used a bit of filler for the places where it had created air bubbles and ended up empty and continued sanding until it was as ready as it was ever going to be with the limited timeframe I have left (I no longer feel my hands ).
).
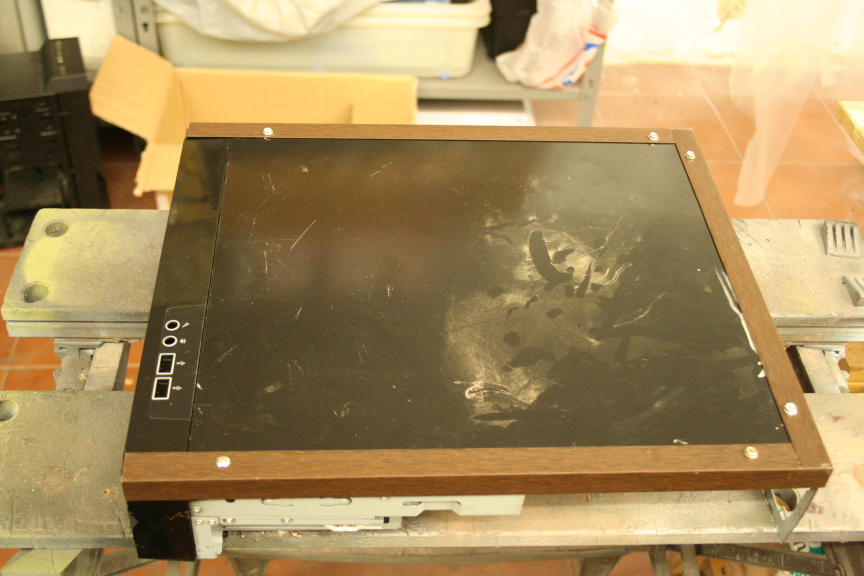
Next I cleaned it up and aplied the vinyl (yes the front will be going in that wood look, the same as the PSU).
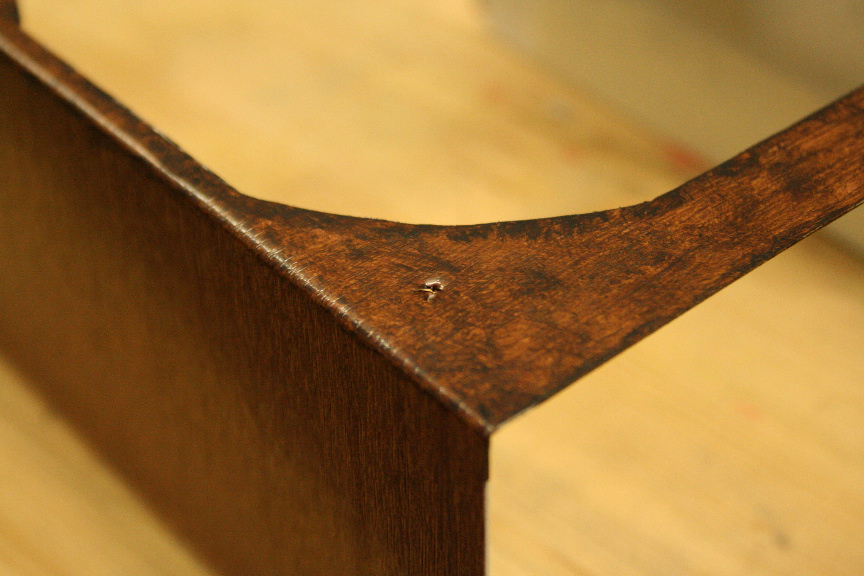
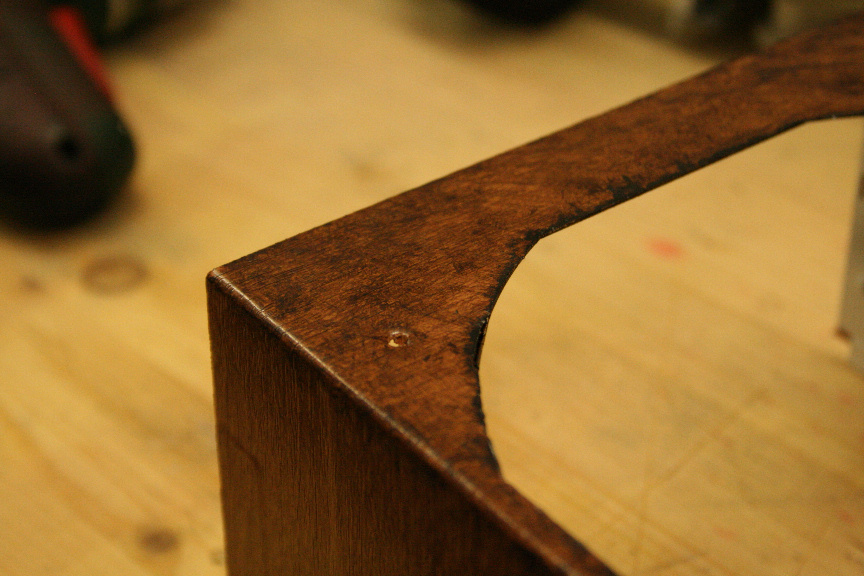
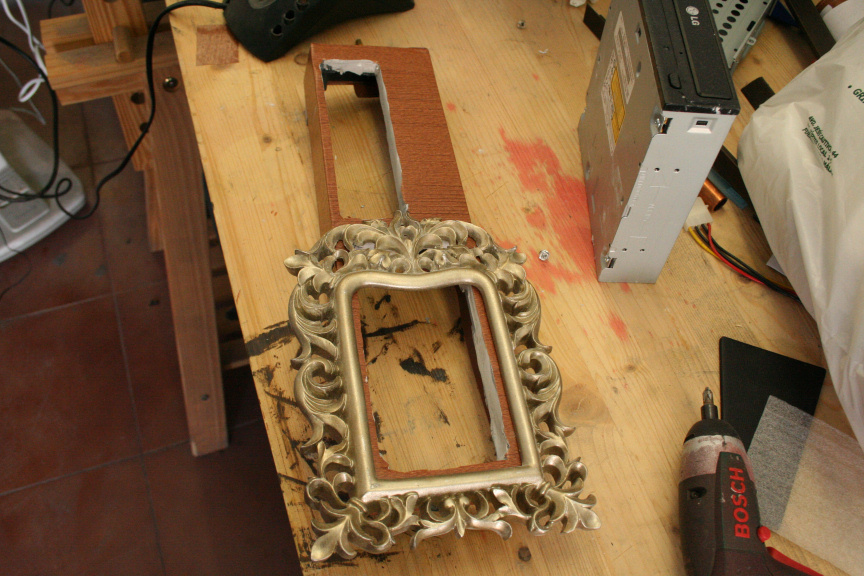
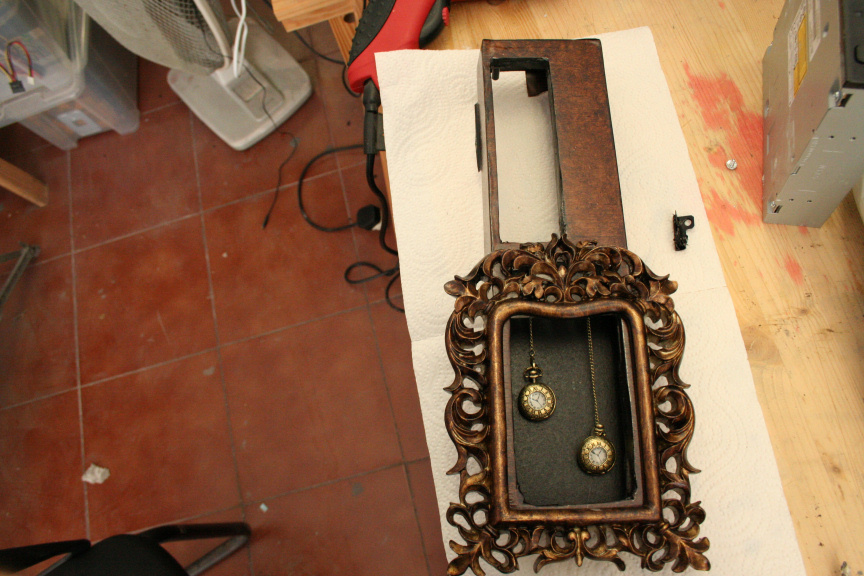
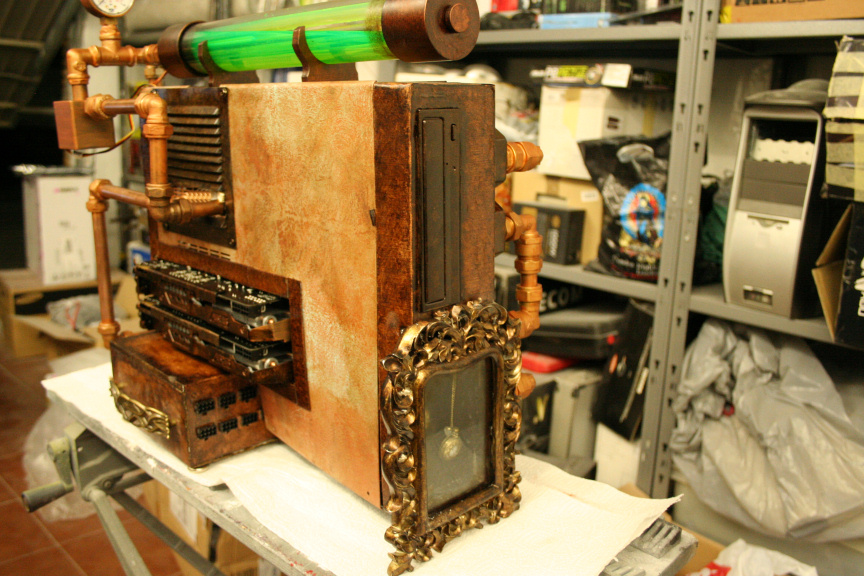
I thend modified the picture frame I had bought so it will simply slide in and "hug" the bottom and sides of the frontal.
 .
.
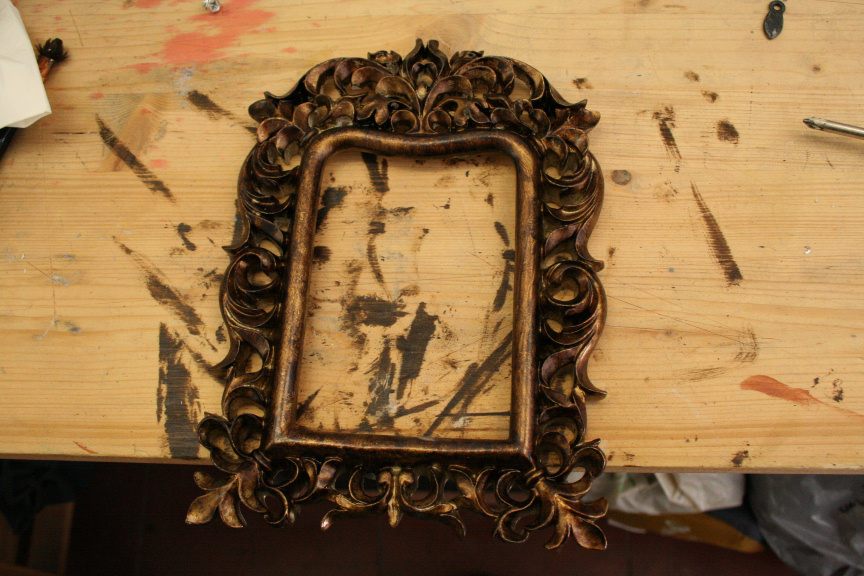
Lastly and more importantly, I aplied all the ageing effects to both the vinyl and the frame and put them togueter.
 .
.
 .
.
 .
.
 .
.
 .
.
Later today I will be triming the leftovers and keep on working on the rest of the design of the frontal.
Until then.
////
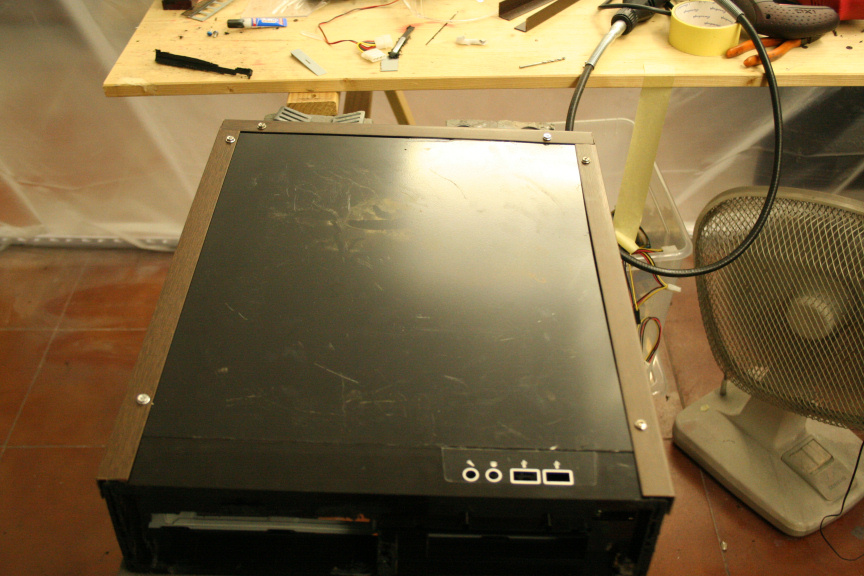
I know I said only one more update today... but I´ve just finished the front of the case, or at least until the package from Lamptron arrives, fingers crossed it arrives before friday or I wont meet my deadline.
Point is, I´m in love with how it turned out so I wanted to come upstairs and post it so you guys can see it.
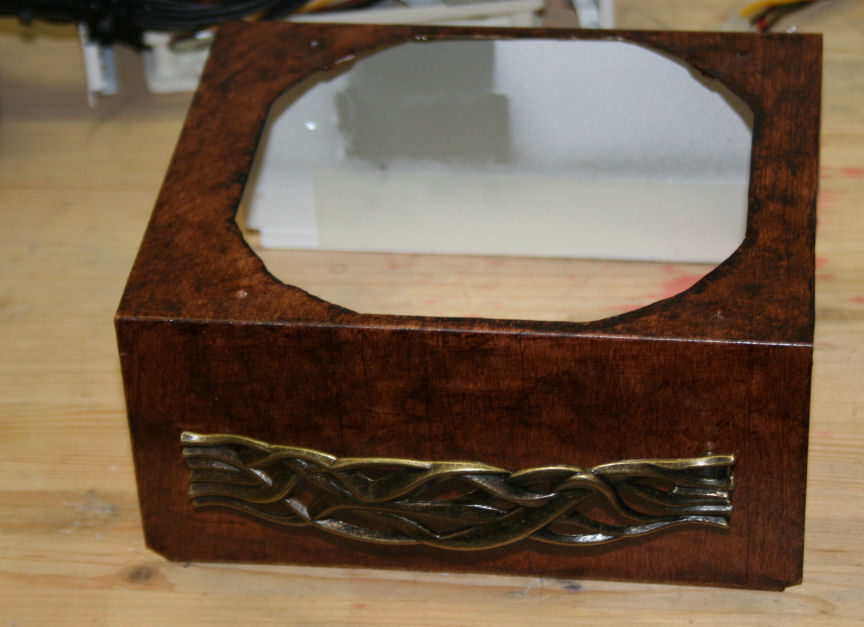
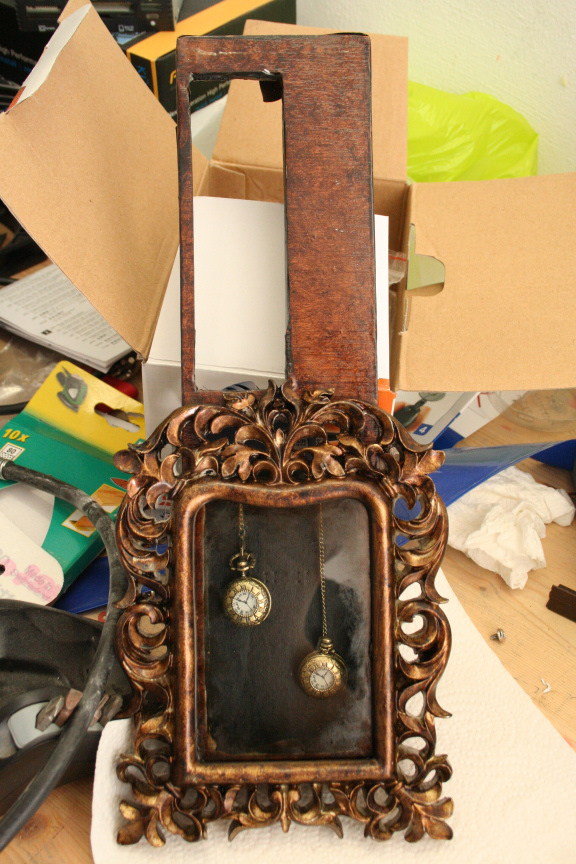
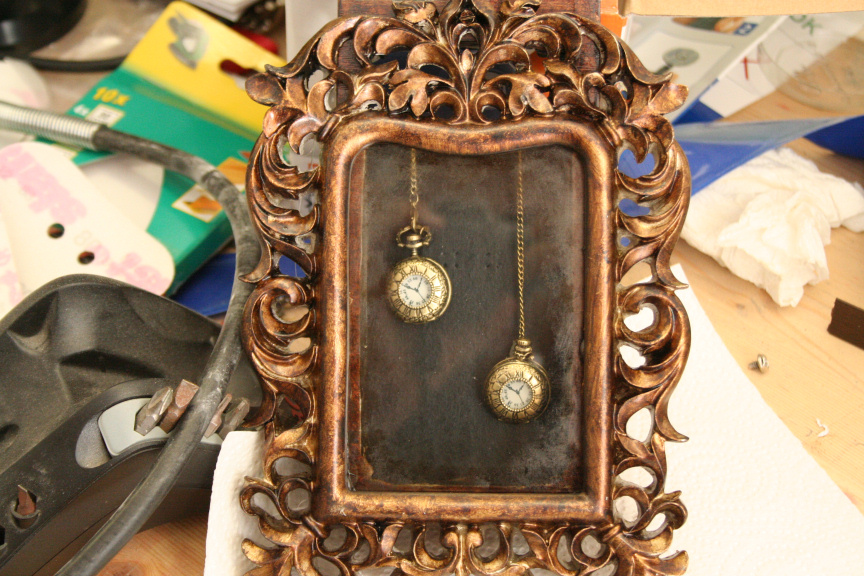
So what I did is, using the back of the back plastic of the frame, I sanded it down and throw some matt black paint on it. I cut it down to size and fit it in the opening. I then added two screws on the back of the middle of the frontal of the case to hang the 2 mini-pocket-watches from. I then stack them to the back plate using a bit of hot glue.
Mounted the frame on the case to make sure it all looked ok before I screwed the frame in (with it´s glass).
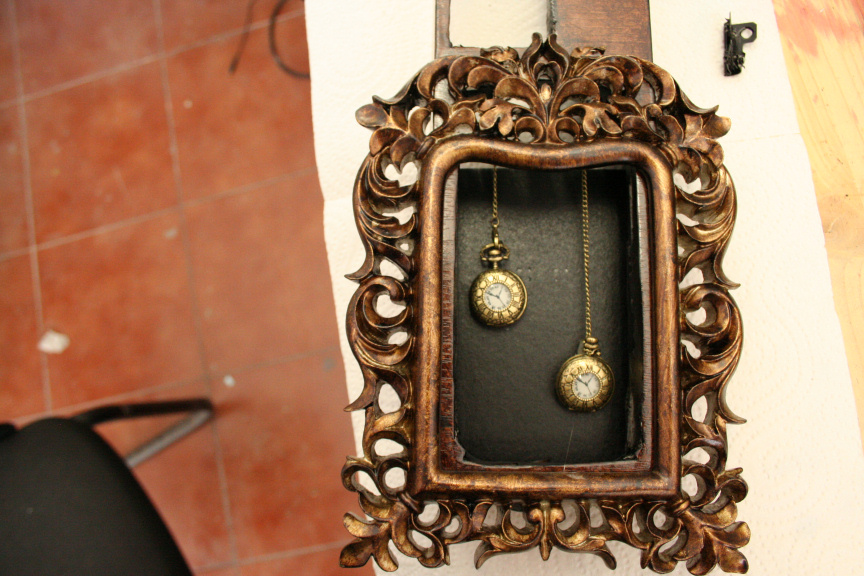
All good, then I put the glass in and screwed the frame on to the frontal and aplied the same paint effect to the screws so they would not be visible. I also added the same effect to the borders of the glass to make it look old and stained.
And the result...
3rd and last update for today later on.
////
Right, final small update of the day.
I am officially knakered, I need a shower, badly (), a bit of dinner, a movie, and bed, can´t believe the weekend is already over and work tomorrow 
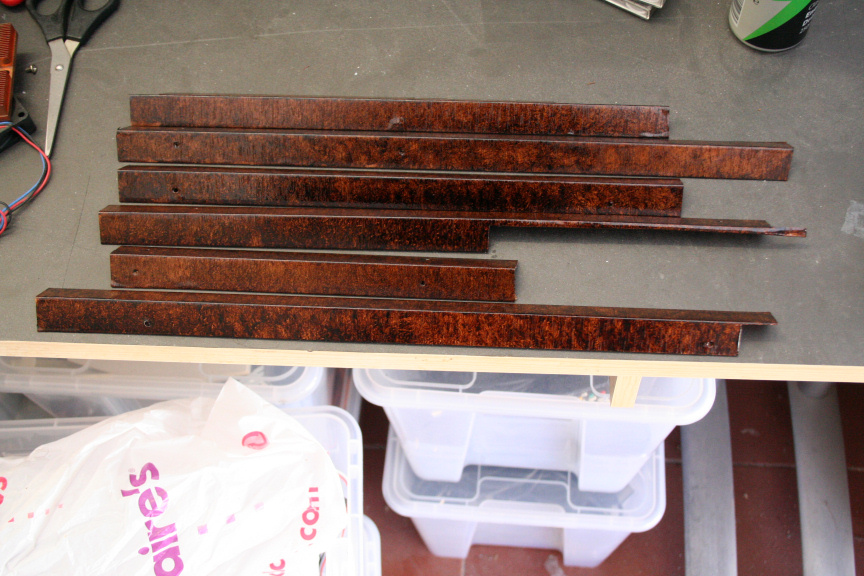
Aniway, I finished preparing two of the borders.
Vinyl:
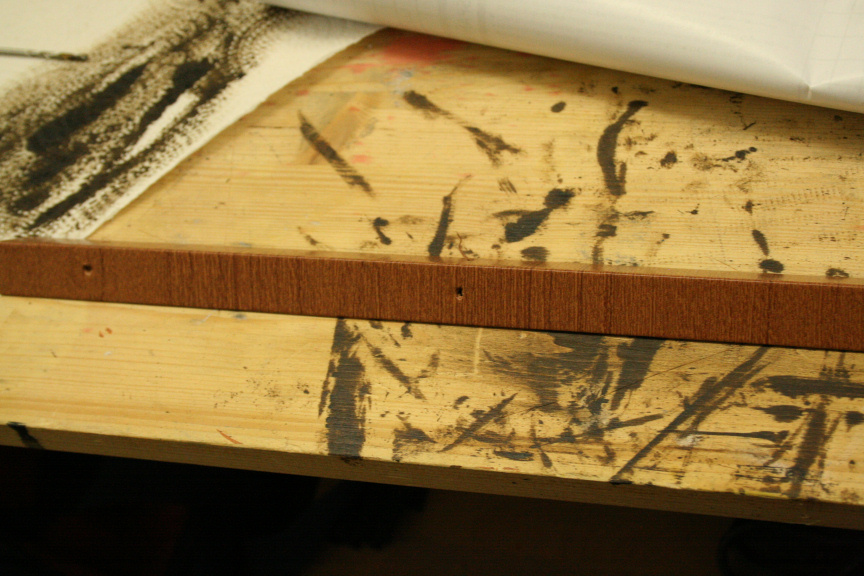
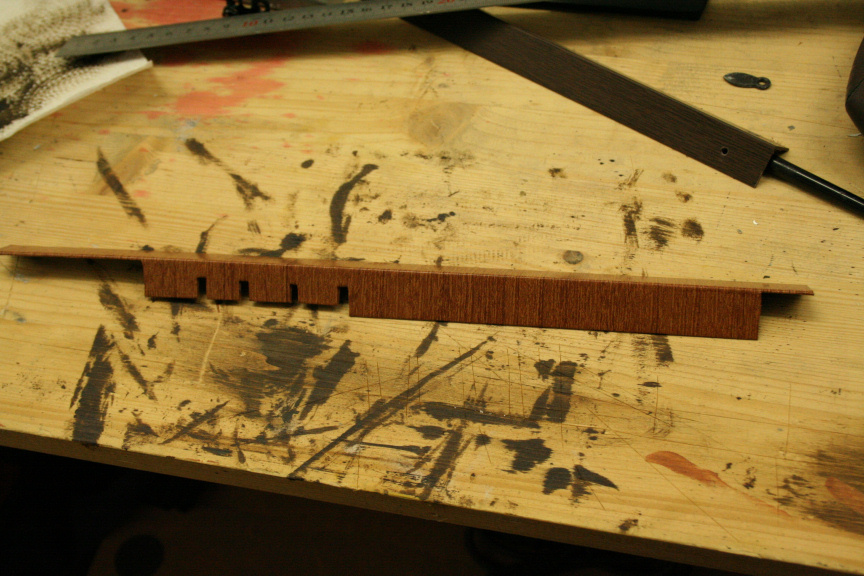
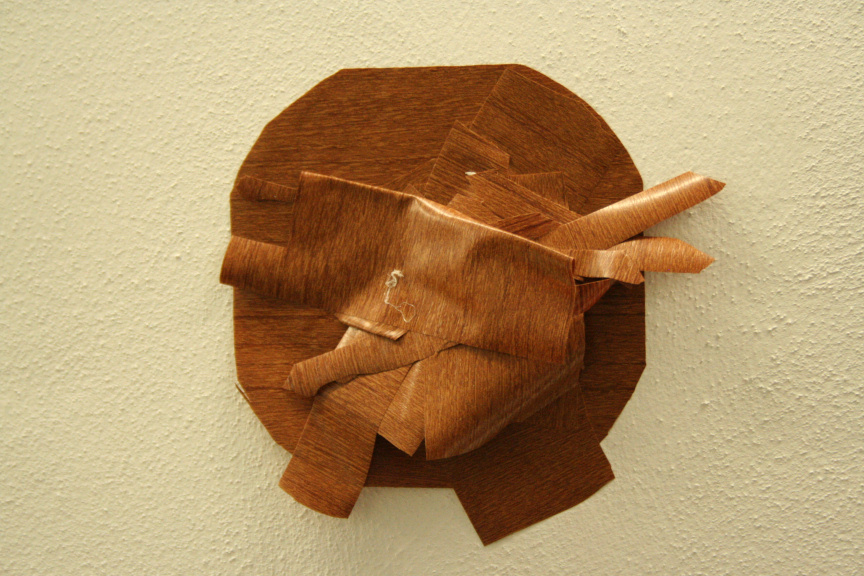
Leftovers on the wall, yep.
And the ageing proccess aplied, i.e. final result:
And with this we reach 99 pictures on the project! I hope you all have a pleaseant evening and again, thanks for reading.
More tomorrow.
February 10th, 2013 02:16 PM #4
Skilled
- Join Date
- Sep 2012
- Location
- Malaga, Spain
- Posts
- 88
- Mentioned
- 0 Post(s)
- Tagged
- 28 Thread(s)
- Sex:
Todays Update.
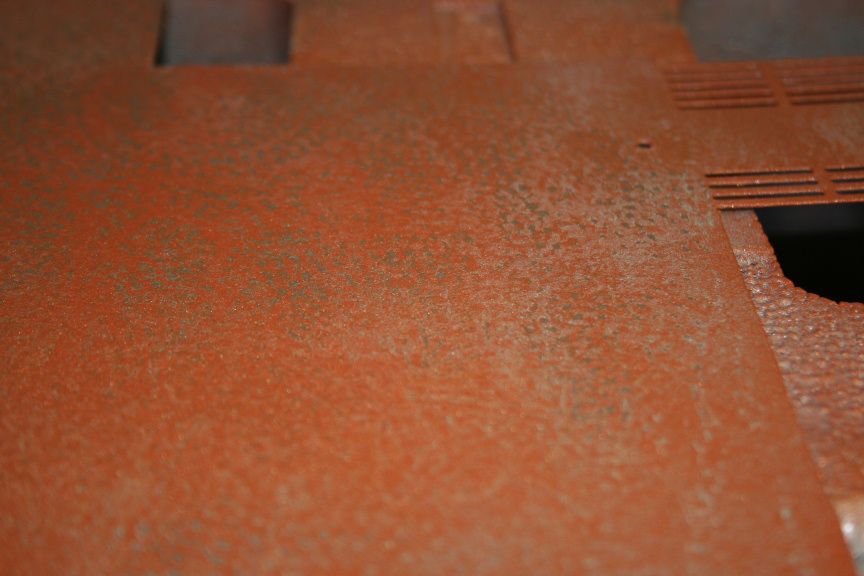
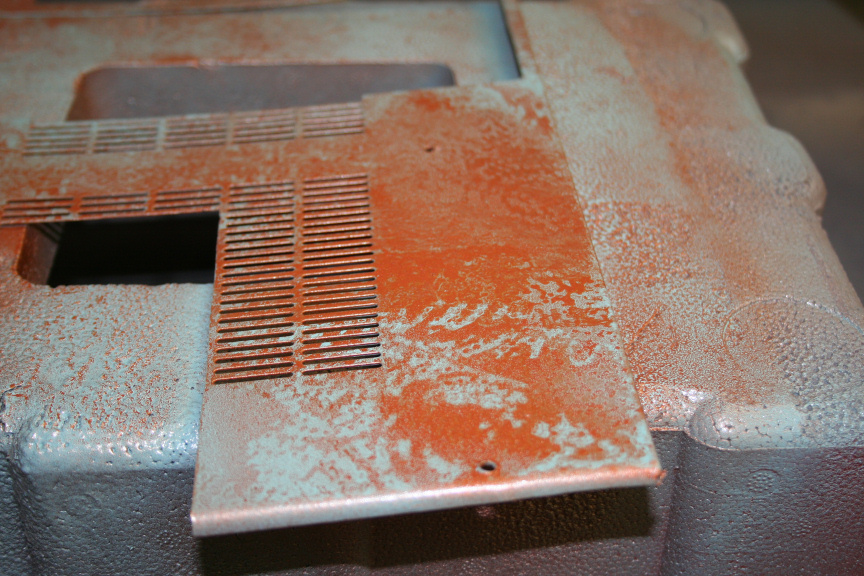
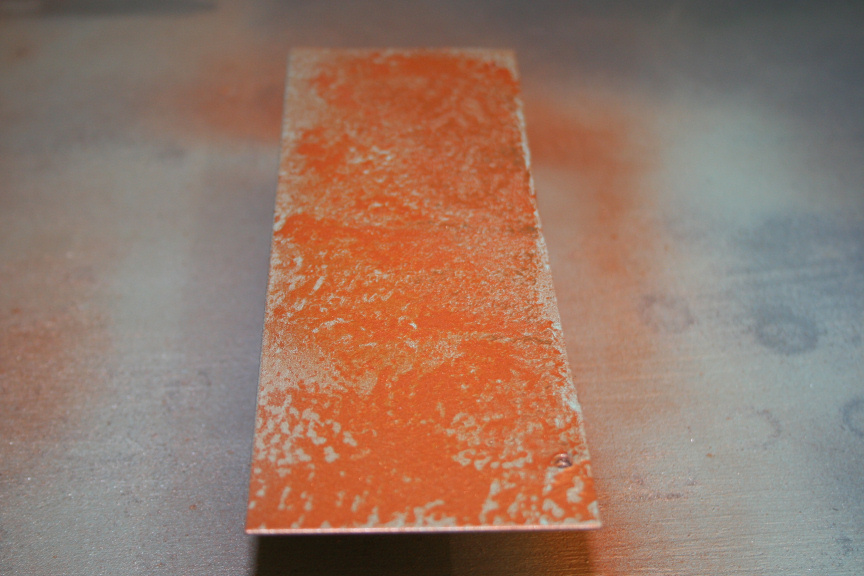
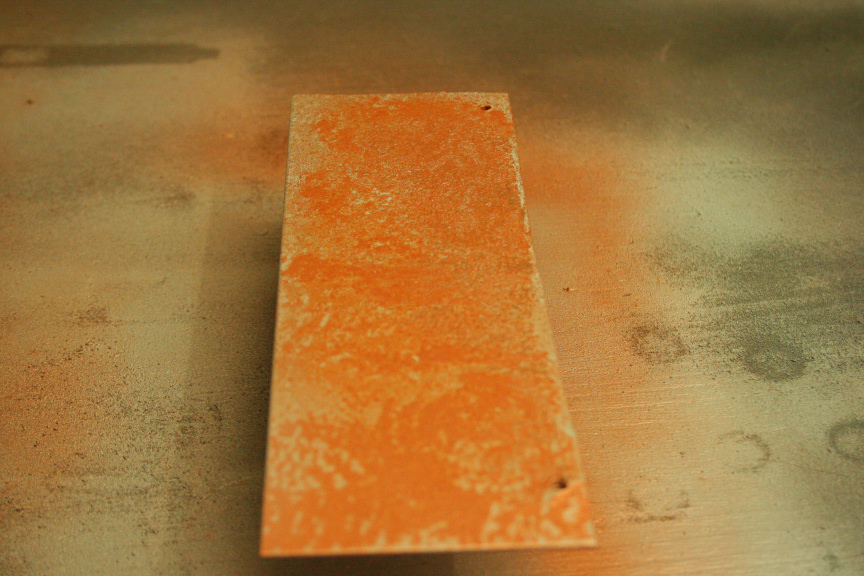
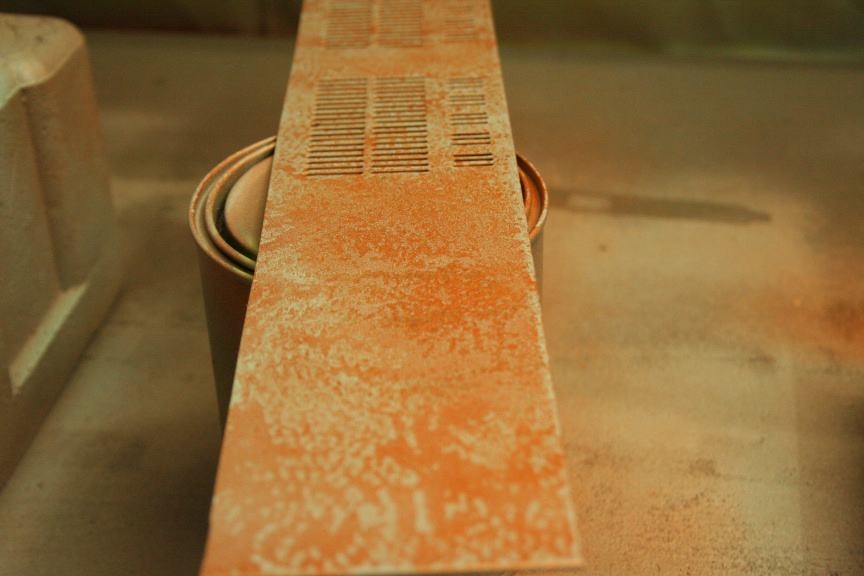
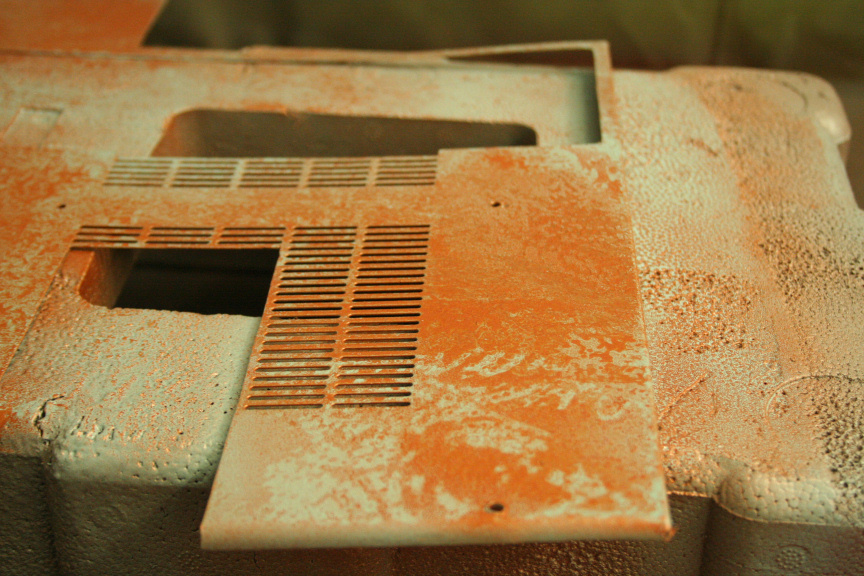
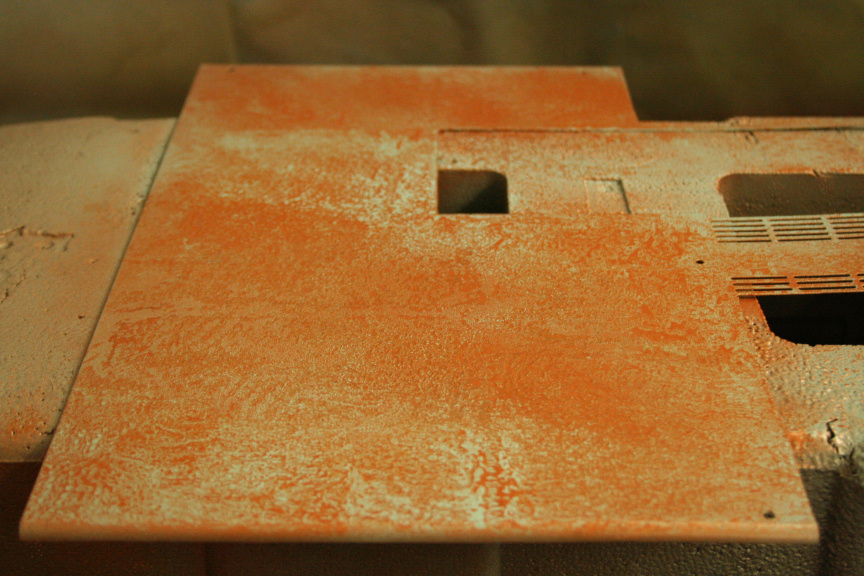
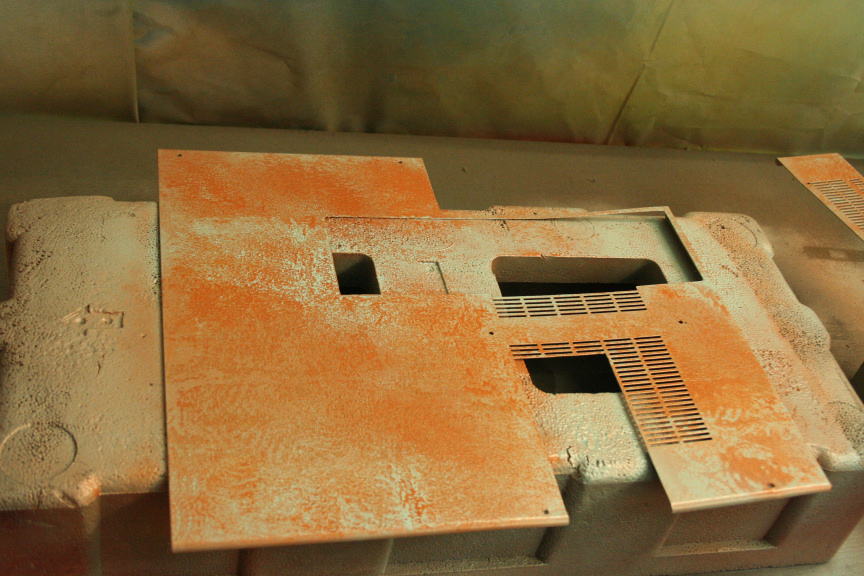
I´ve started with the paint. Basically everything that´s not wood, is copper, but adding the post-apocalyptic flavour in there. This technique I´ve been developing for a while and it´s the first time I implement it in to a mod.
By the end of this update you will not see the final product, you will see what it looks like before the ageing process, i.e. the copper goes in most places a lot darker, like real copper, the reason for the extra light copper color is to be able to have highlights once it´s ben aged. The turquoise is the opposite, it is very pale here, and it will have aged highlights once finished. The reason I can´t do this today is due to the fact that to get to this point requires quite a few coats and it needs a lot more time to dry, which it needs to be completely for me to aply the ageing process to this.
Without further wait, the process pictures.
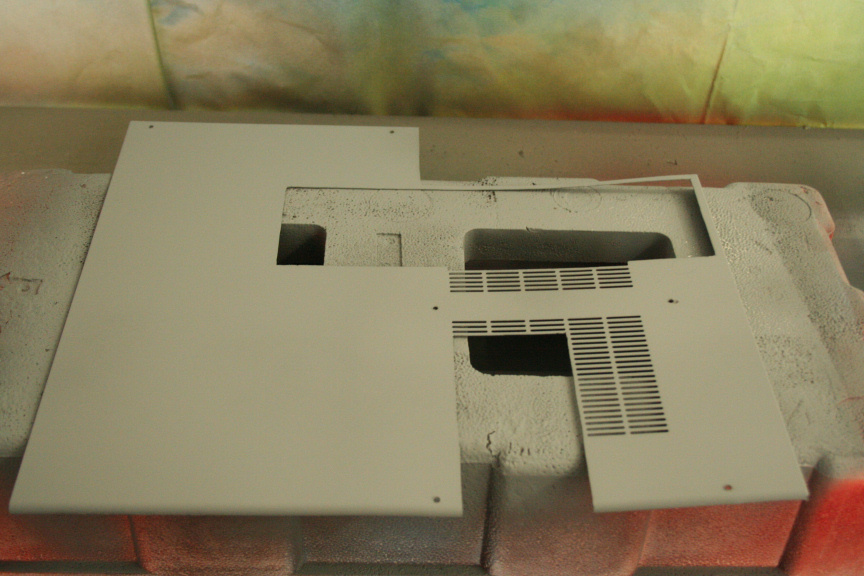
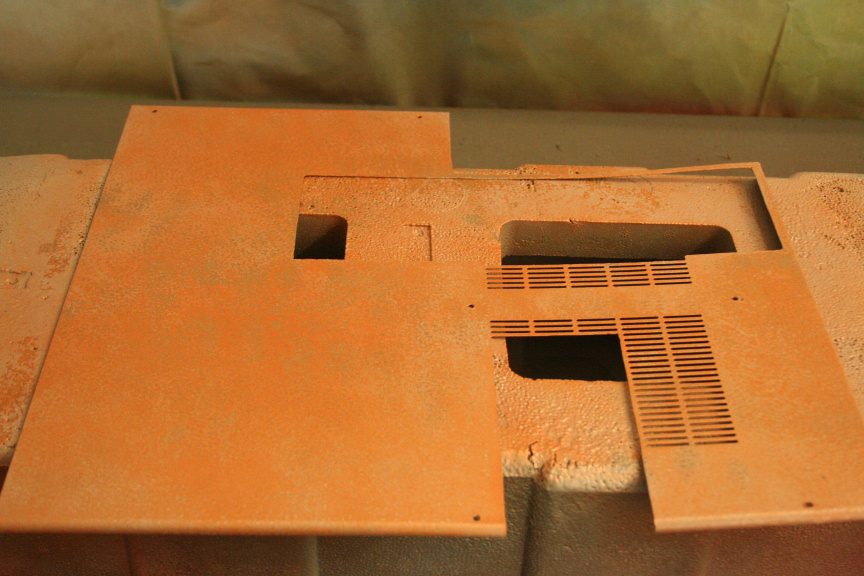
First, the primer.
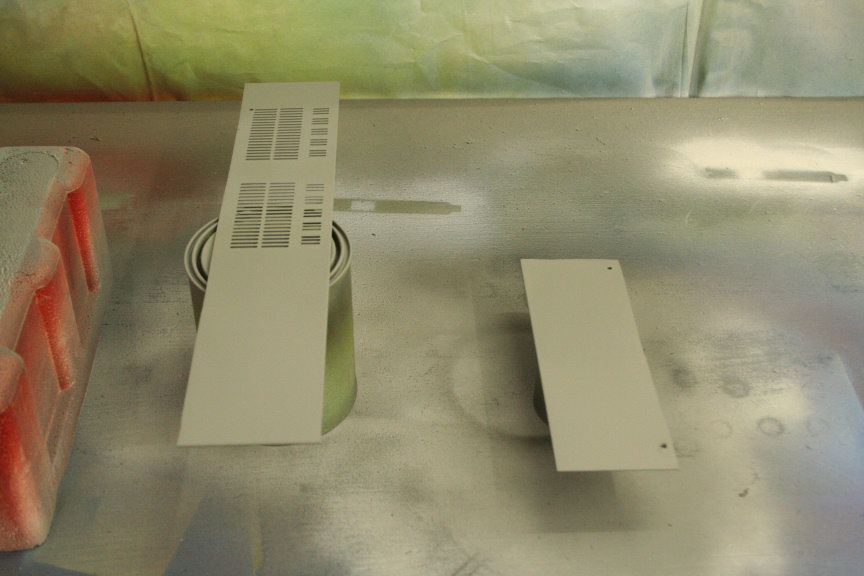
To continue, a solid coat of the orange-y copper and before it dries, a light coat of turquoise. Once aplied, using absorbant paper I go all over the fresh paint creating a non solid surface or color which will be the base.
Once dried, I aply a almost solid coat of the copper orange from further away than the usual, as you can see the dried paint uneven surface is doing it´s job by not allowing the fresh coat to reach every corner. I also further the paper usage to create a more uneven surface for the next coats.
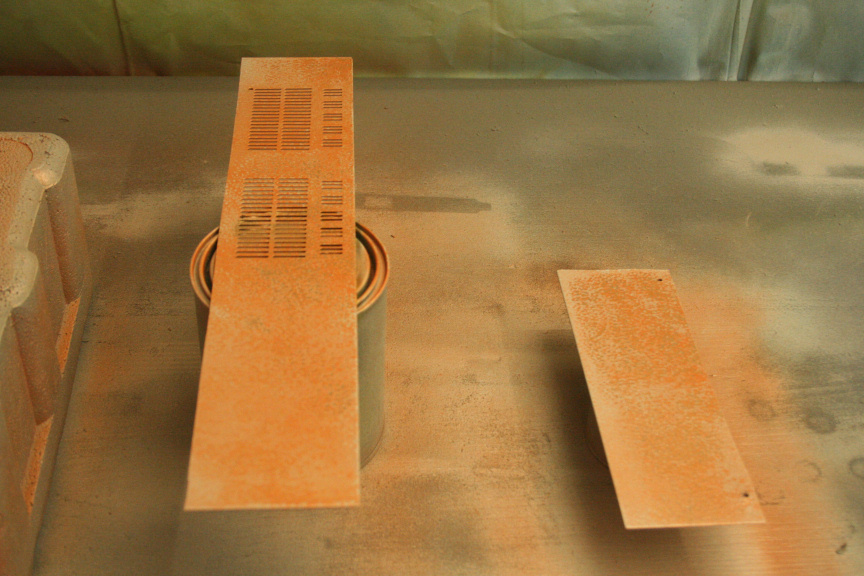
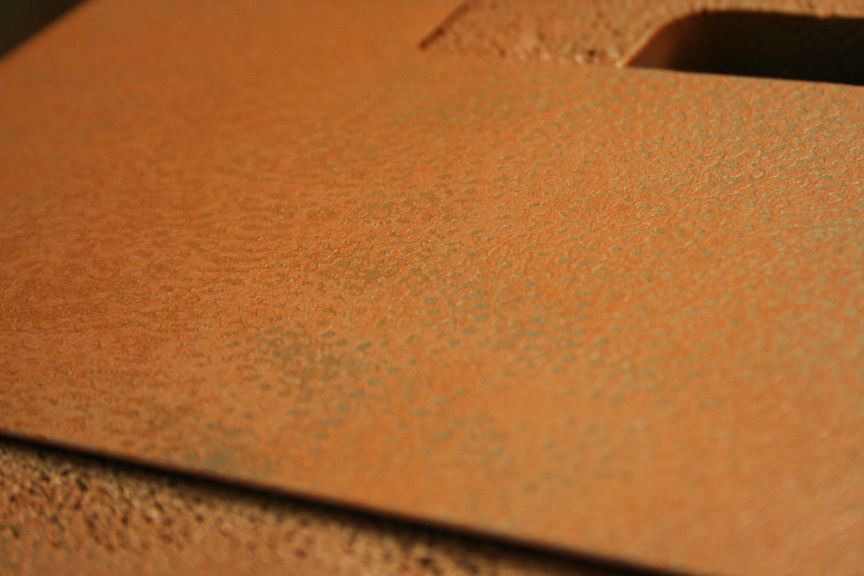
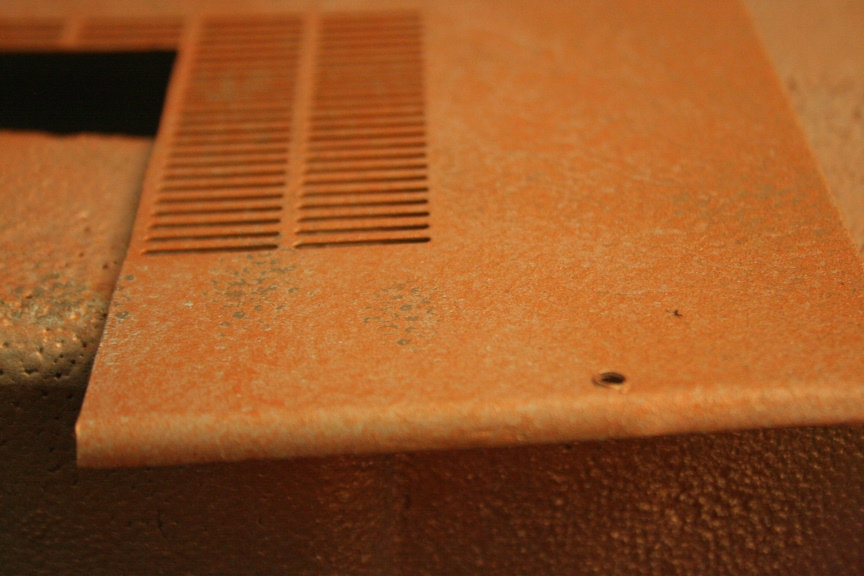
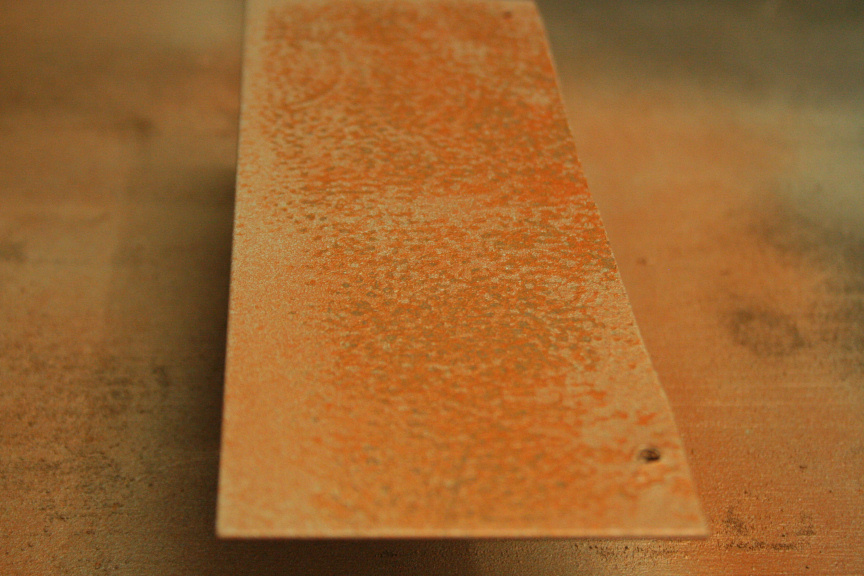
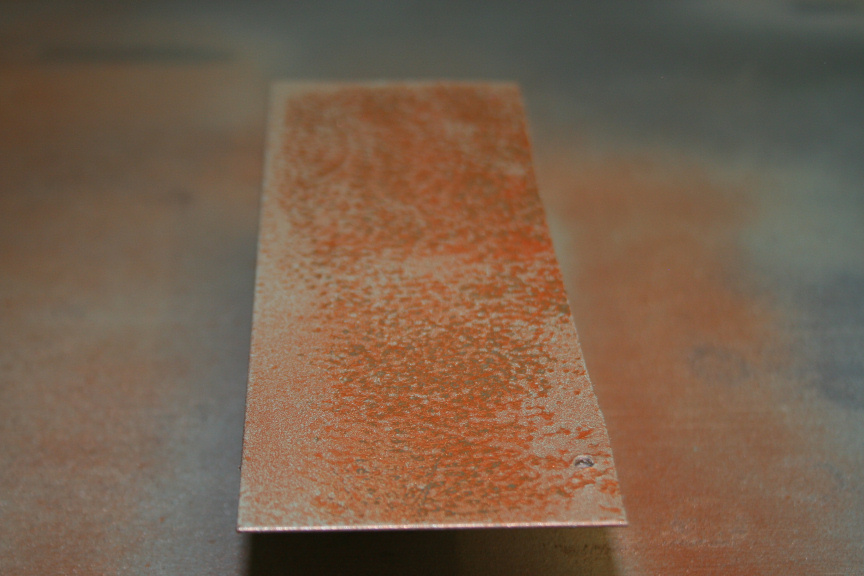
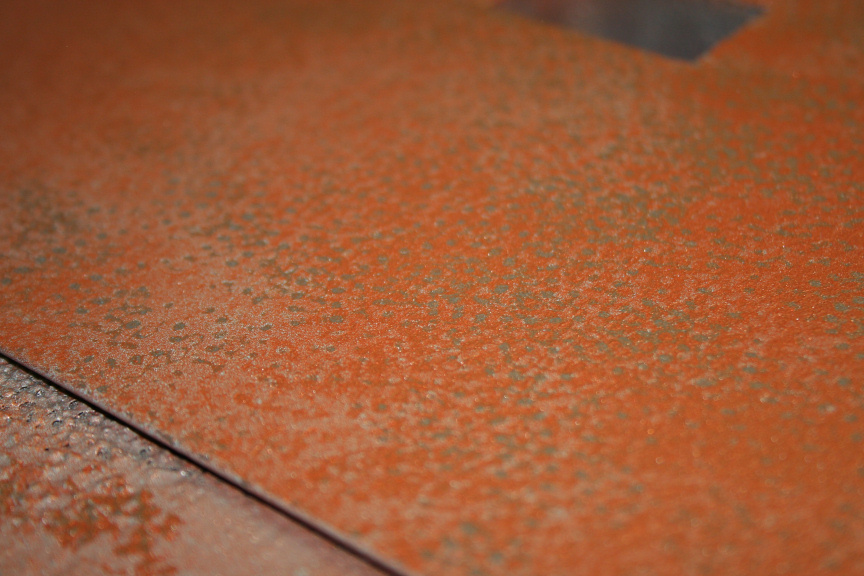
This goes on for 2 more coats alternating both colours.
To finish off, I give a completely solid coat of turquoise and very quickly another of the copper. The wet coats and the surface react with eachother giving me the final look before the ageing process.
Here´s a variety of pictures of it with and without flash.
The final rusted copper look coming tomorrow.
////
Update,
Had some internet issues last night so you couldn´t upload the pictures.
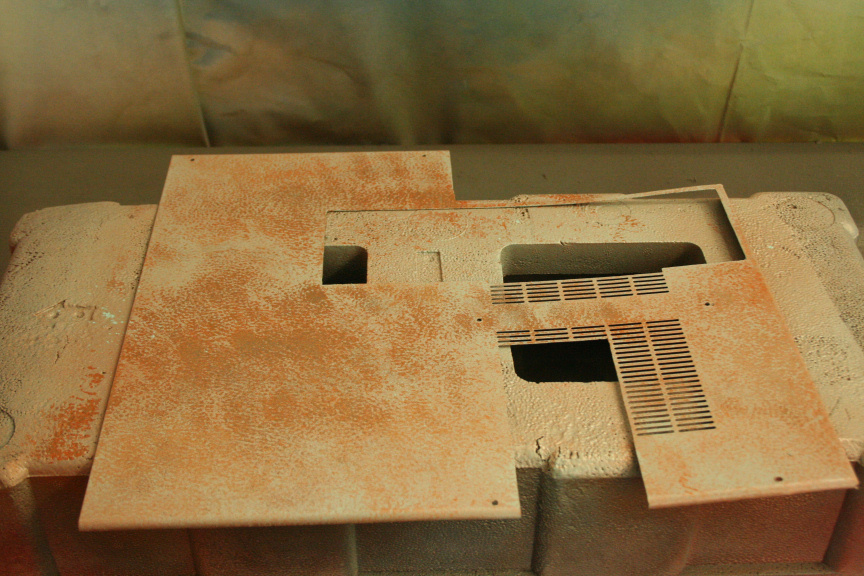
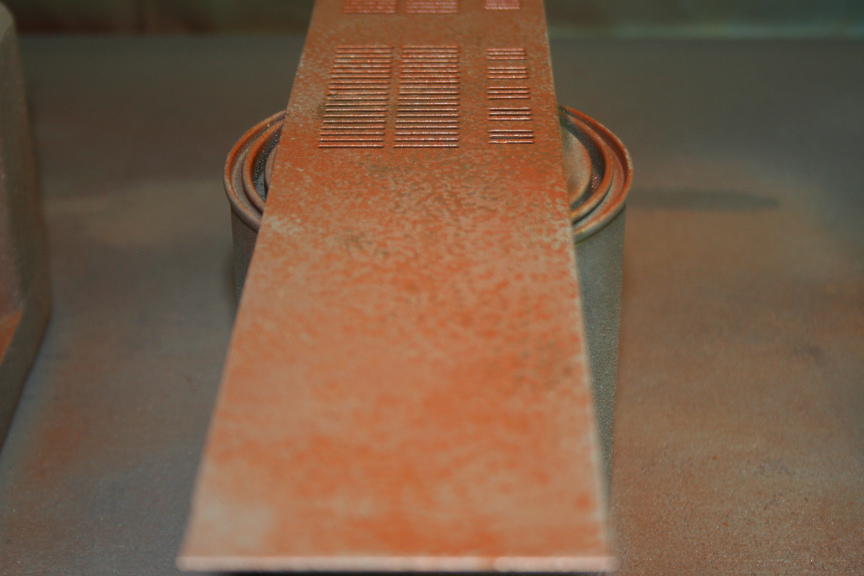
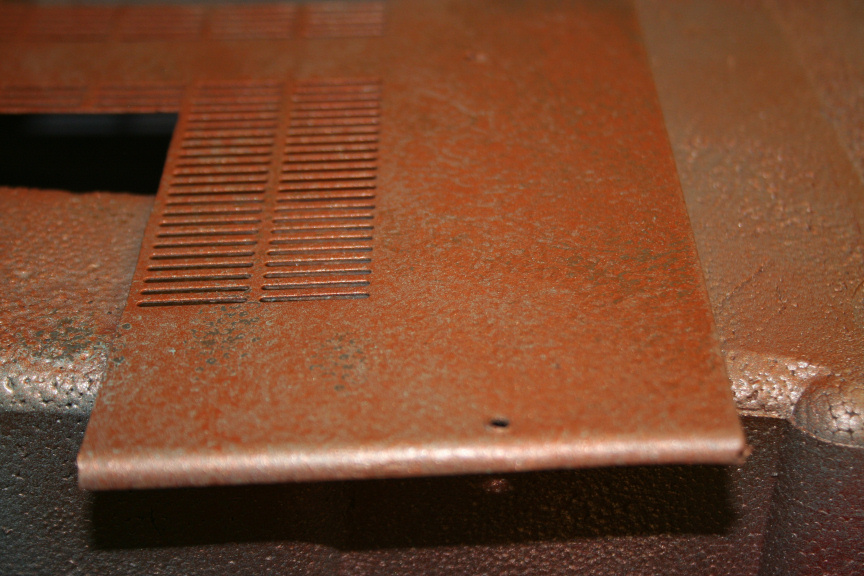
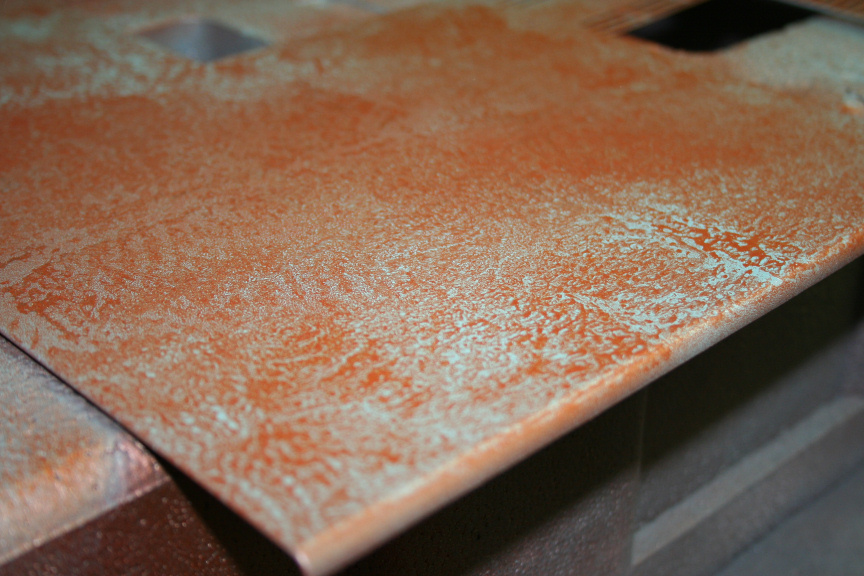
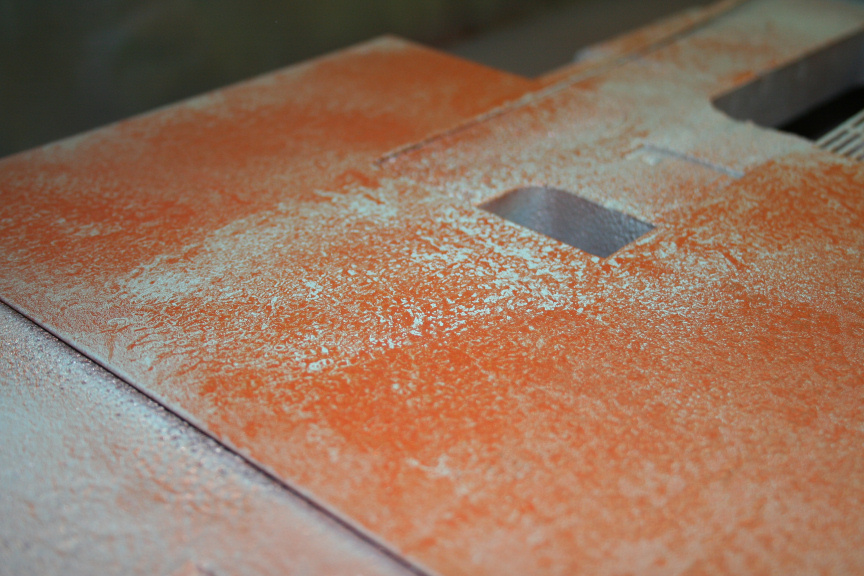
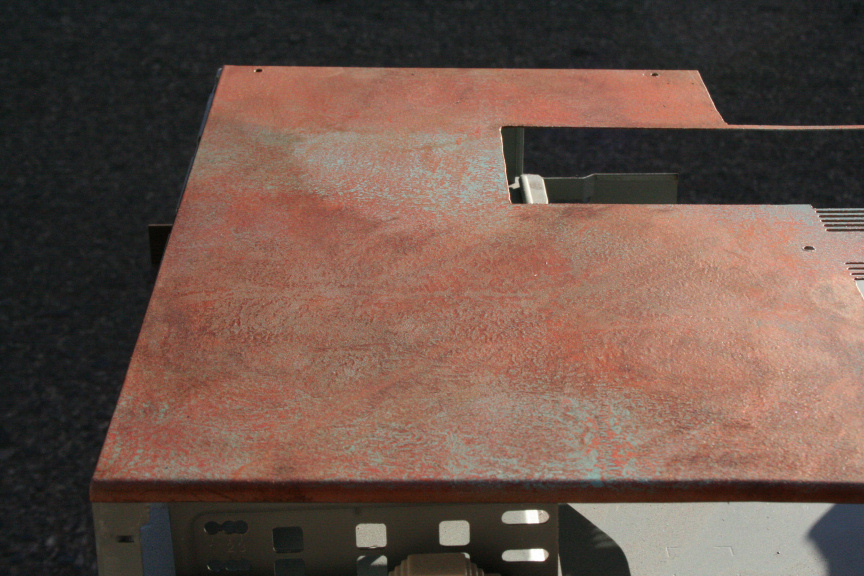
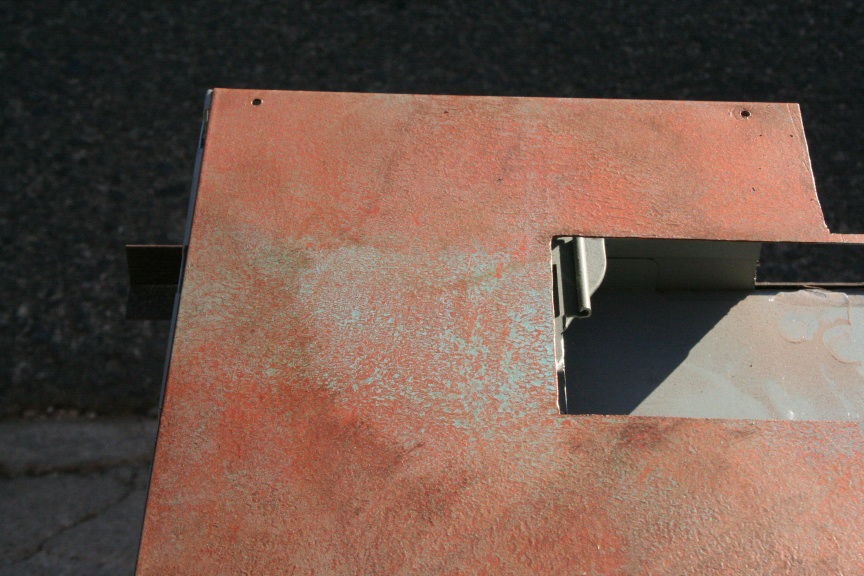
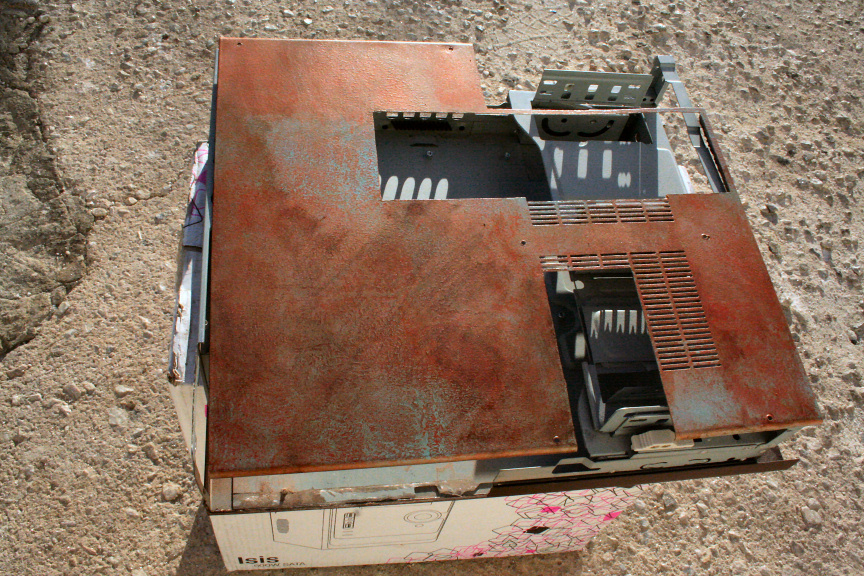
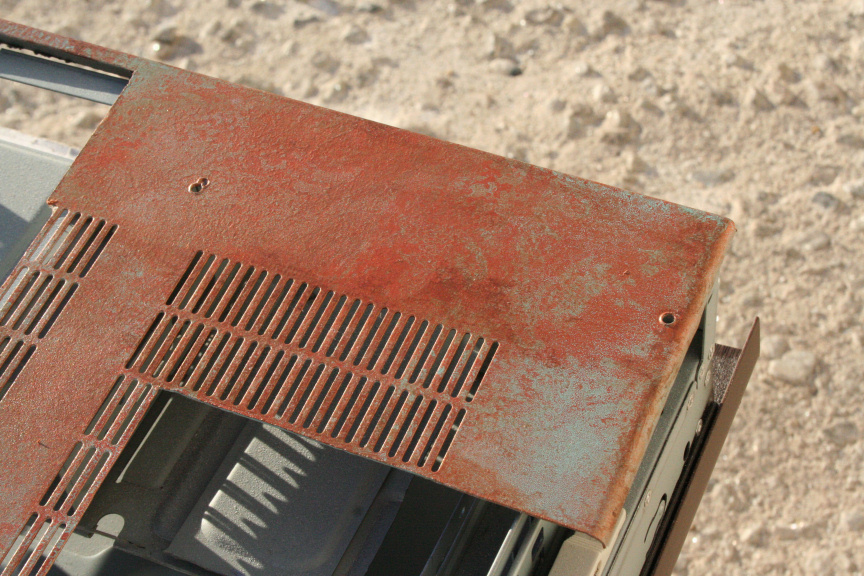
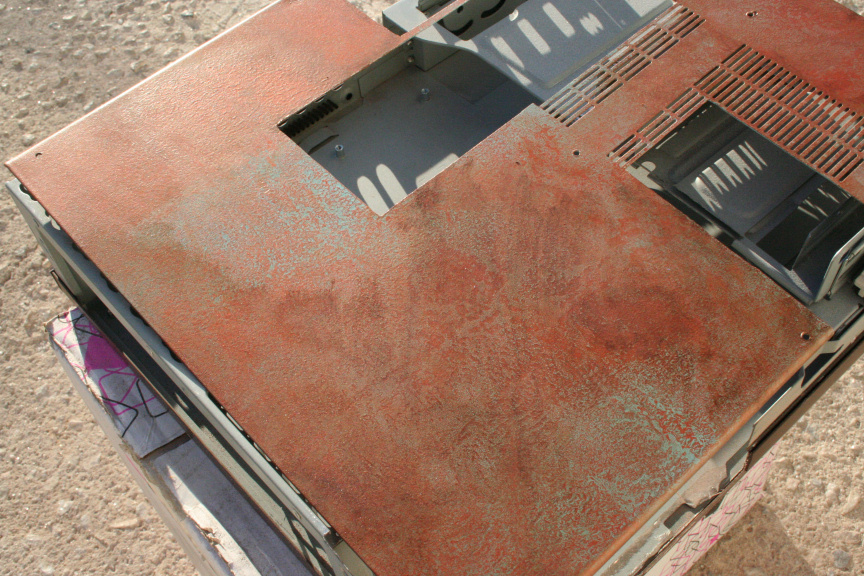
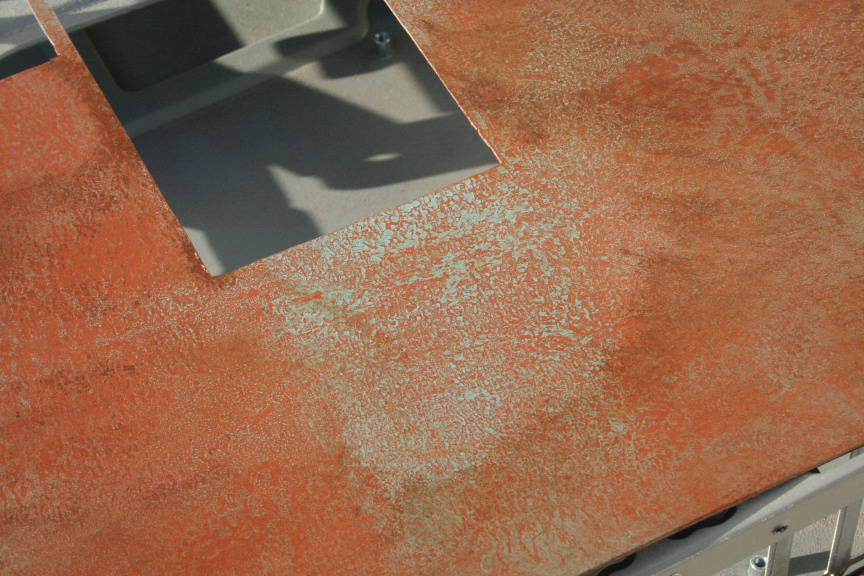
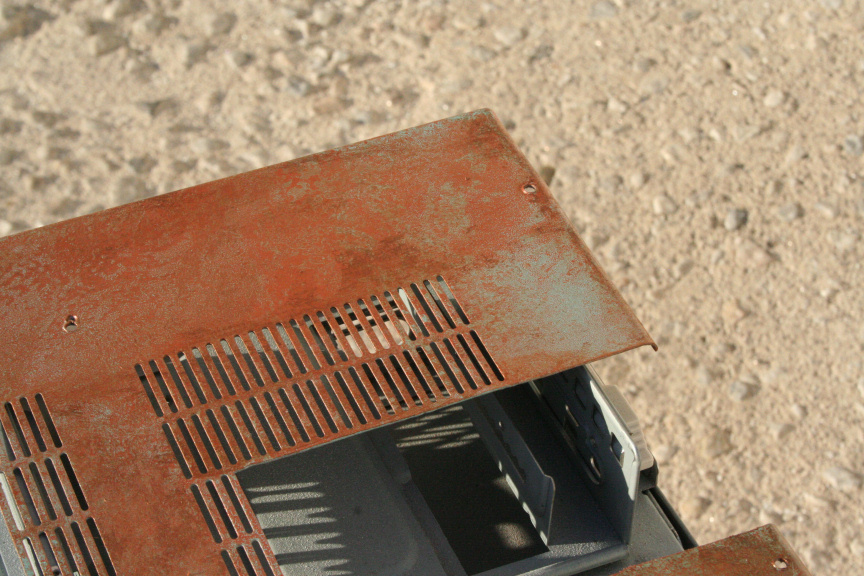
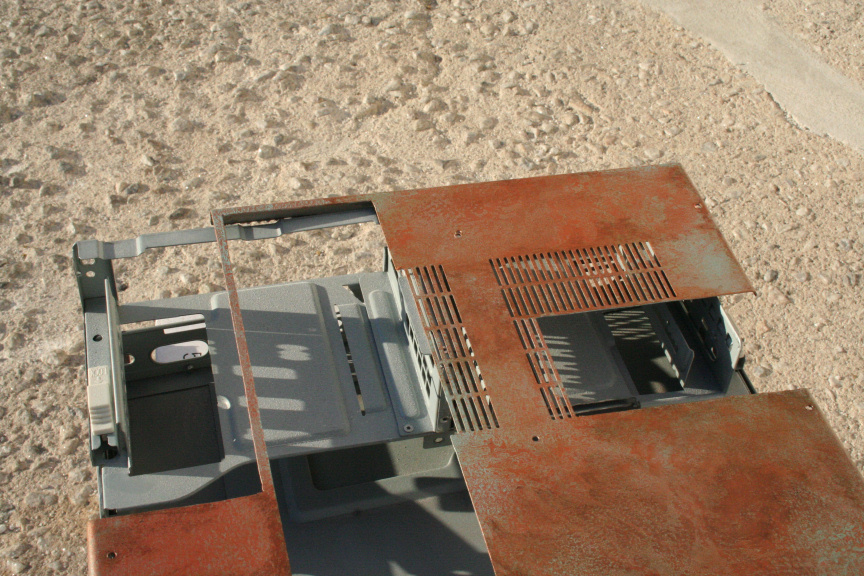
Aniway, the rust effect is finished, I aplied the ageing technique and several tones of copper to give it a more realistic look. The turquoise is very mild and I can´t quite catch it on camera, I took some pictures outside in the sun, hopefully that helps.
You´ll also notice I decided to add some extra effects and I´ve made it look as if the case had been partially submerged from the bottom left corner upwards.
This has without a doubt been the hardest and most time consuming effect I´ve ever done, the whole copper rust thing.
Hope you like it.

////
Update:
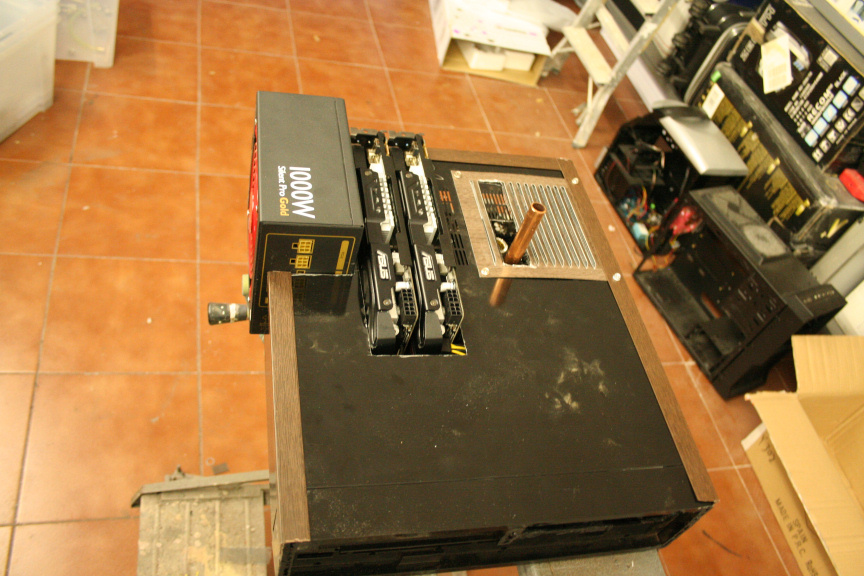
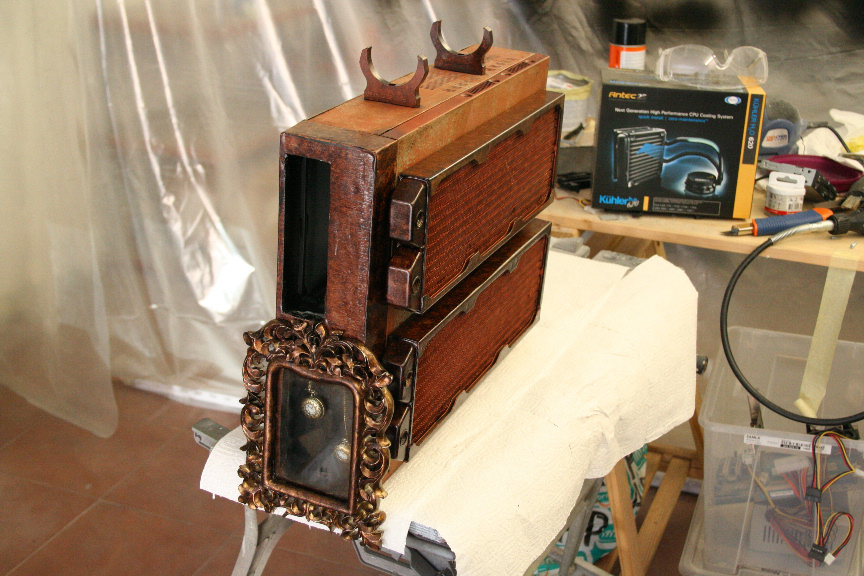
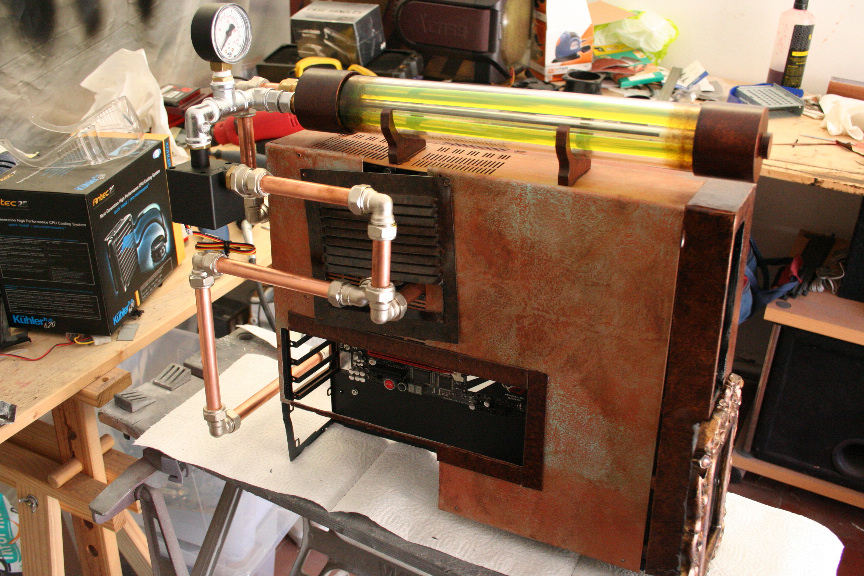
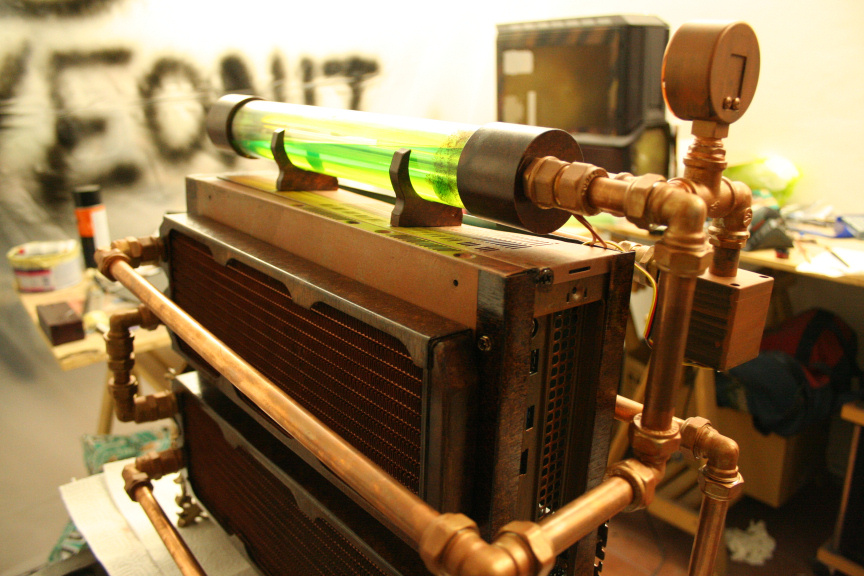
Today I haven´t done much progress in the sense of progress I can show you with pictures. The 3 hours I had today to work on the project I pretty much spent measuring up and deciding mounting of the liquid cooling components (yes, they arrived today).
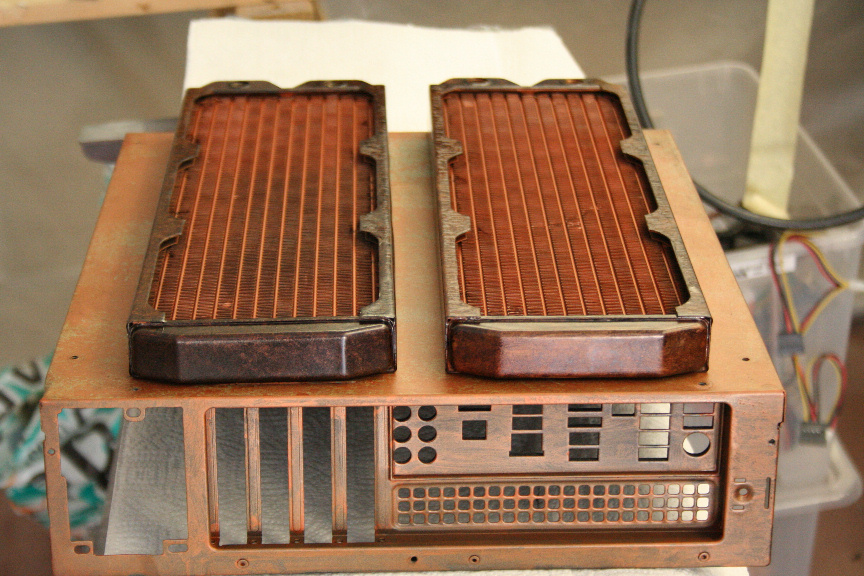
But, for the sake of posting a picture, here´s a teaser on where the rads will be.
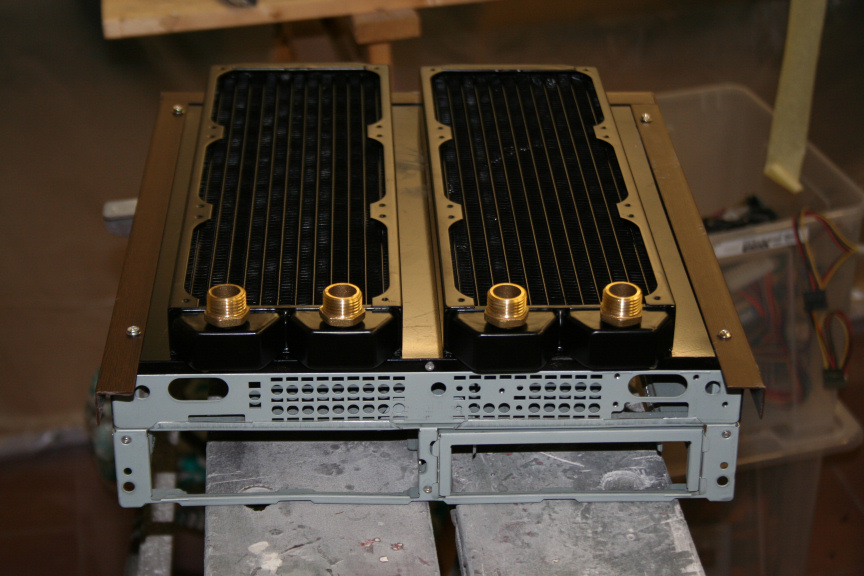
Initially I had planned to mount them with spaces, however, I´ve decided against it for two reasons. First, the weight of the rads would provably unbalance the tower if separated. Secondly the metal sheeting, while thick, isn´t thick enough to keep the rads firmly straight and I don´t like them being able to move at all if touched as it can weaken the sheet metal.
So due to these 2 reasons I will be mounting them straight on the metal plate.
Hopefully, a rather big update tomorrow in prepation for the final update (I´ve taken tomorrow morning and friday morning off work in order to have enough time to finish this by friday midnight, the deadline for the competition, wish me luck!
////
First update of D-Day -1.
I am plausibly going slightly crazy...
...yes
Started drilling based on measurements taken yesterday and test mounted both radiators.
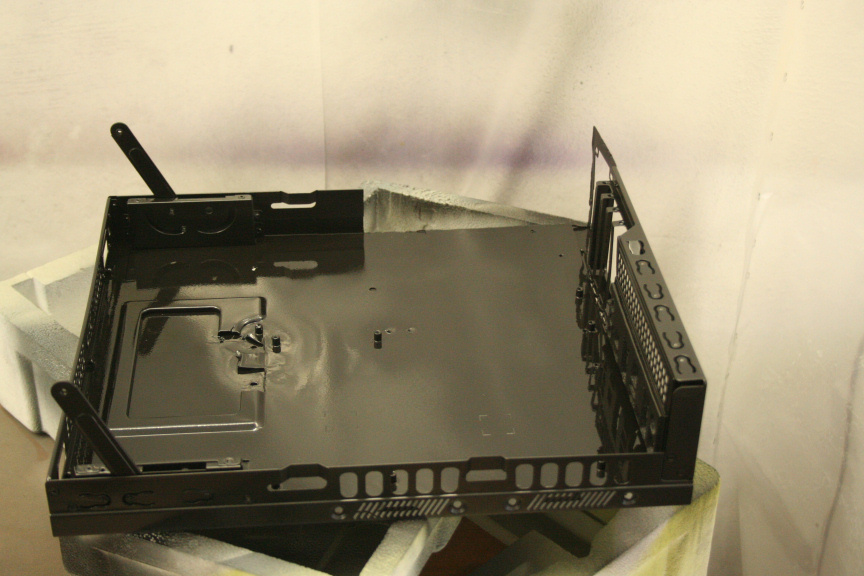
Matt black painted the chasis, even though in the picture it doesn´t look matt, that´s because paint wasn´t dry yet.
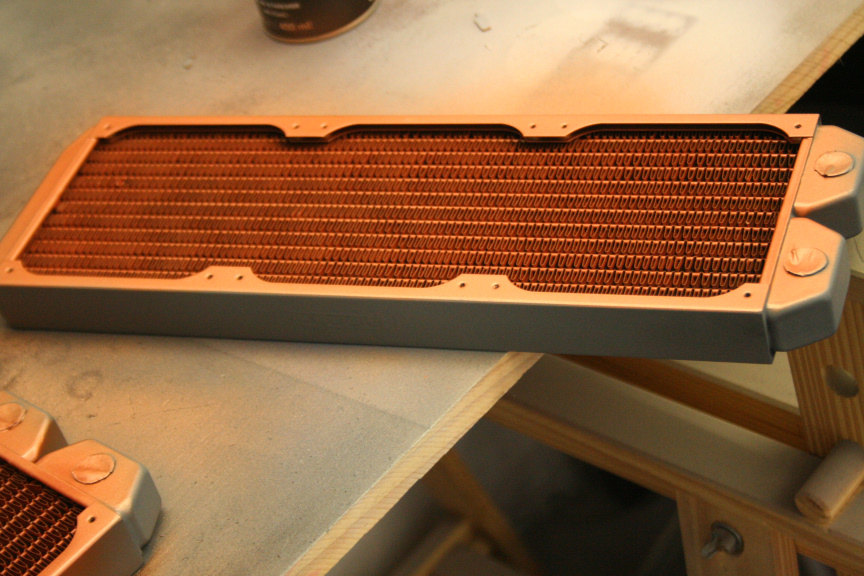
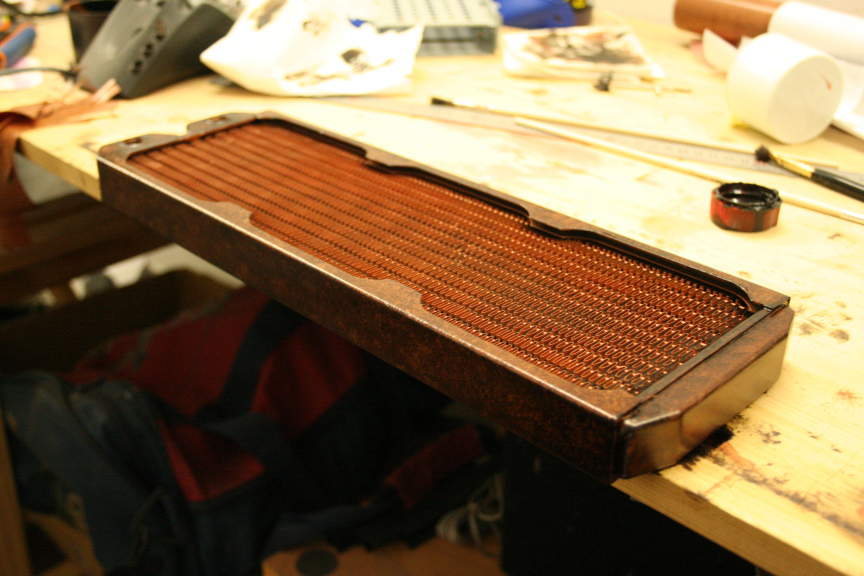
Painted one side of both radiators (mainly the middle as the the non-radiator-y-bits will receive the wood treatment later today. Before anyone goes crazy about loosing performance and all that. I´ll say what I´ve said every other time I´ve painted a rad or heatsink and noticed no loss of performance. If you do it with acrylic paint, it´s fine. It´s not fine when you do it with synthetic or plastic paints. You can argue all you want, but I wouldn´t be doing it if I hadn´t tested it countless times : )
I´m hoping I can run the system without fans on the radiator to acceptable temps, since there´s 2 rads and all they are cooling is the cpu, if not, will add fans at a later point, but for the "final" look they won´t have fans on them.

Painted the plastic parts of the reservoir...

...and it´s mounts.
And finished all the wood effect trimmings.
Piping won´t be done today as all the parts need to be mounted and while that will happen today, it won´t before the plumbing supplies shop closes for the day.
So will be going hopefully first thing tomorrow morning and getting all the piping done, leave the loop running for as many hours as I can allow it to and still have time to mount the hardware and psu in and finish by midning tomorrow.
...I can´t believe I haven´t aplied the matt clear coat finish yet...
Now I have to go to my actual job and pretend like I´m not freaking out about not finishing this in time.
February 10th, 2013 02:16 PM #5
Skilled
- Join Date
- Sep 2012
- Location
- Malaga, Spain
- Posts
- 88
- Mentioned
- 0 Post(s)
- Tagged
- 28 Thread(s)
- Sex:
Right, I´m at then end of D-Day -1, tomorrow is the last day.
Now, a lot of stuff has been finished but because some where still drying I didnt want to risk mounting what I need to measure for the piping till tomorrow morning, then as I mentioned in the previous post, piping time.
Anyhow...
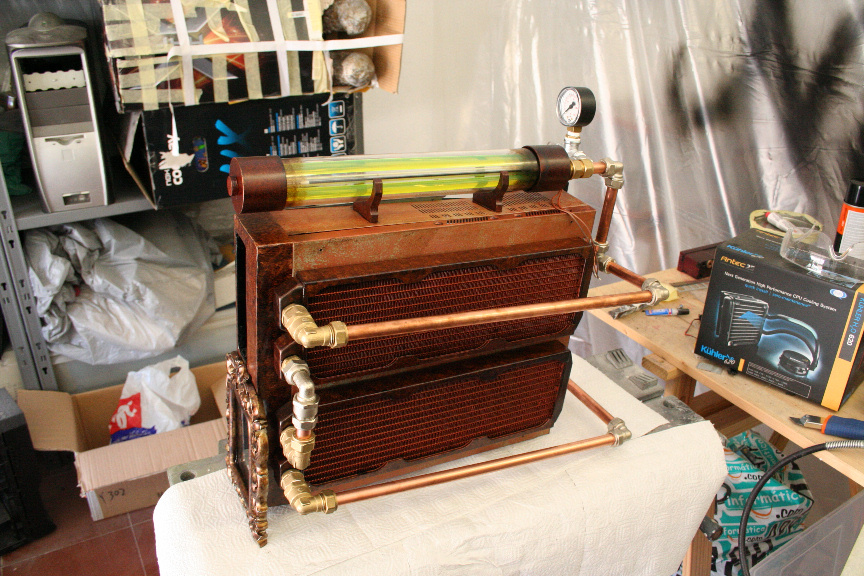
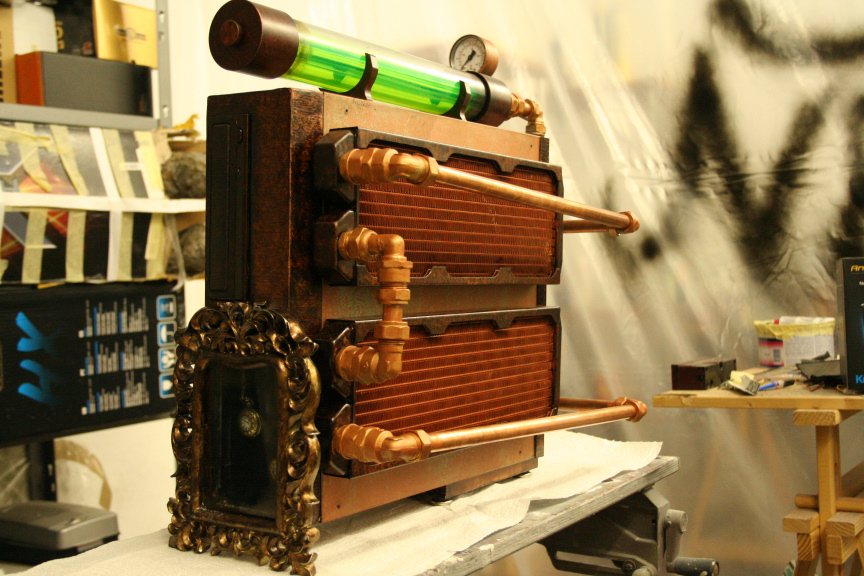
Rads finished.
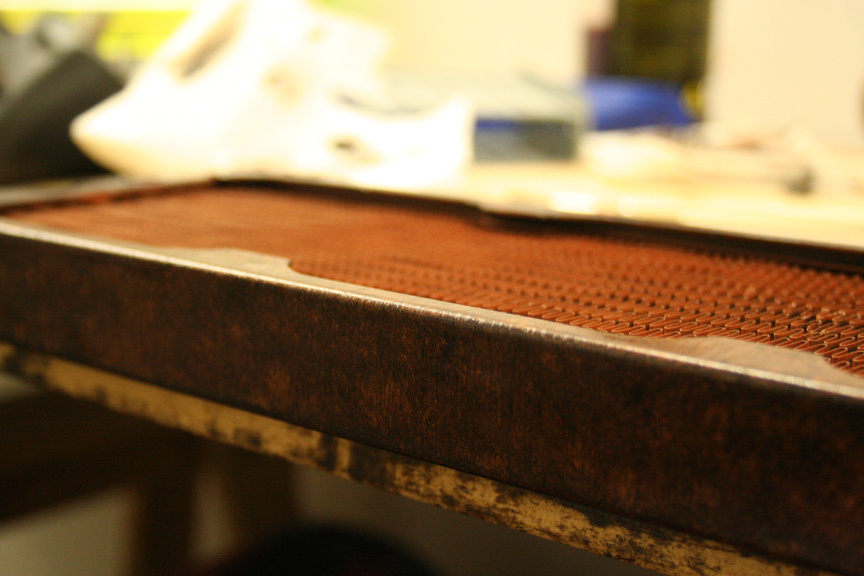
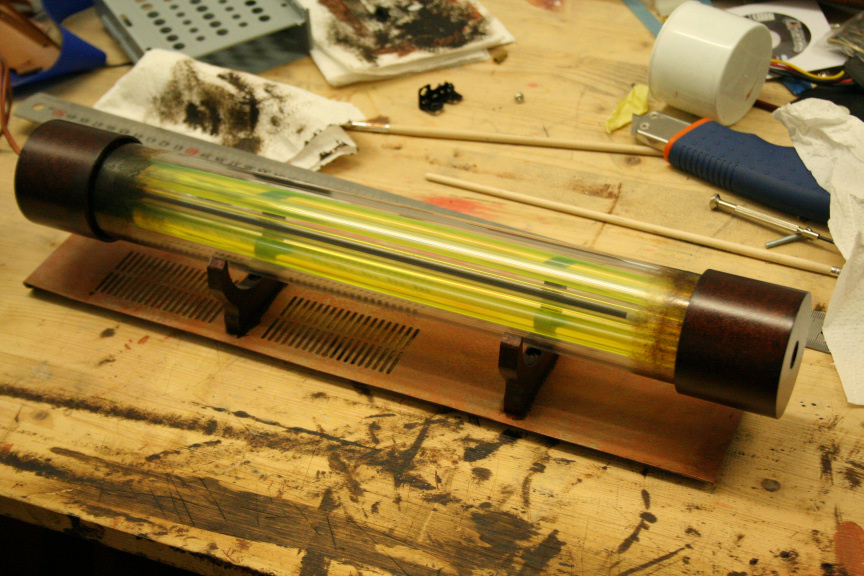
Reservoir unmasked...
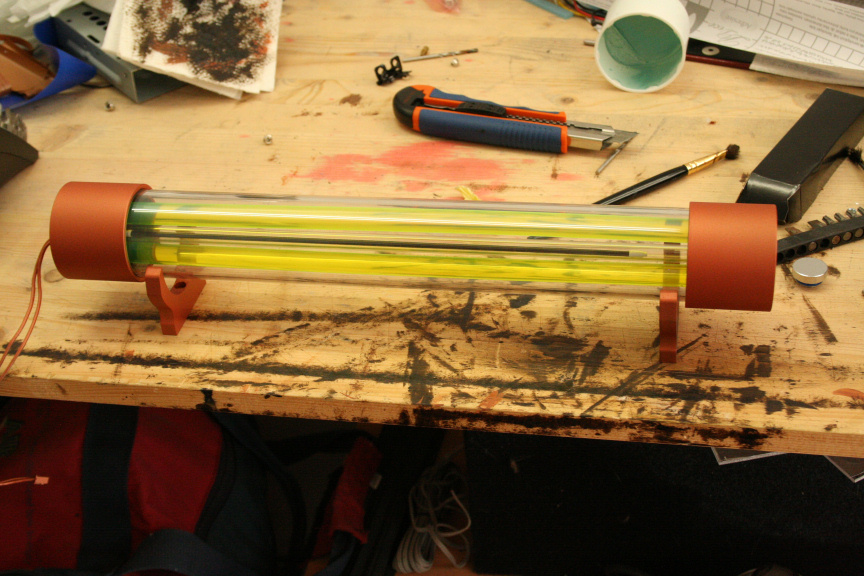
...and aged with a touch of "filth".
If all goes well, tomorrow 1 to 2 updates + final update... after that, beer and a nervous breakdown
////
Right guys, we´re at that point, this is the update before the final update (in theory aniway).
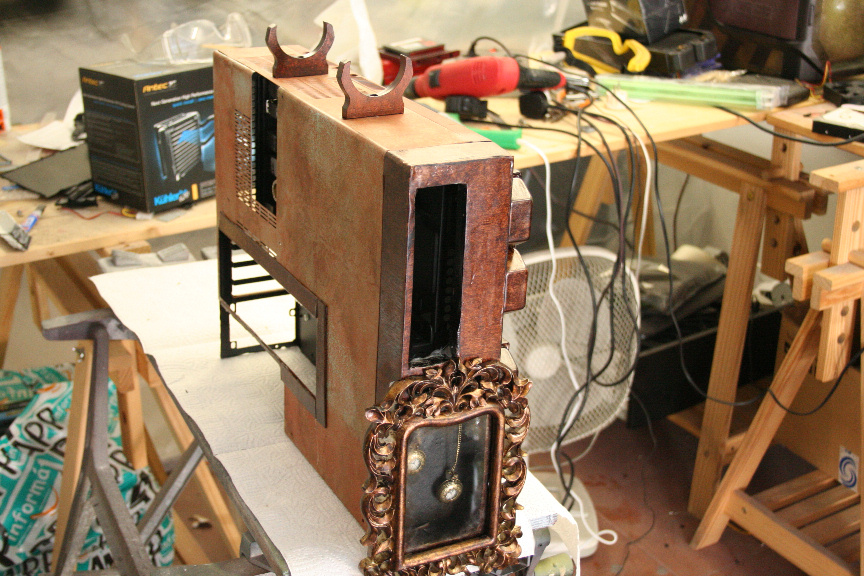
So, this morning I assembled all that needed to be in or on the case in order to do the piping.
So, rads, motherboard and other assorted pieces.
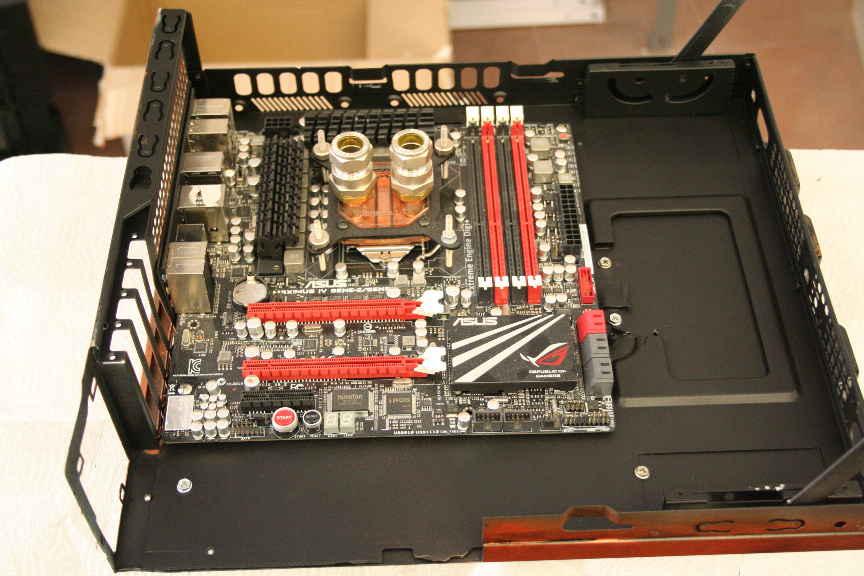
And this is what the case looked like pre-piping.
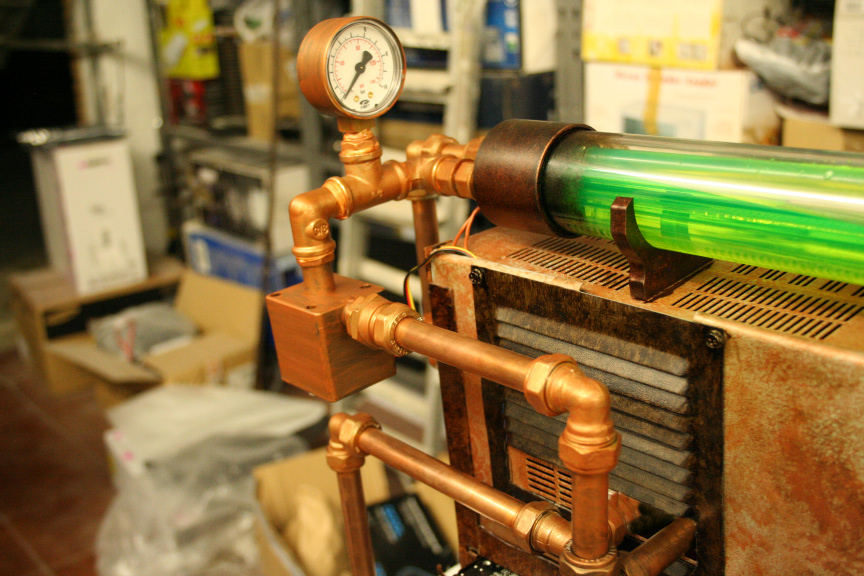
So went down to my local friendly plumbing supplies shop and with some help from the shop attendant (my mate) and later on the owner of the shop (he was intrigued on what we were doing), I put it all togueter, it was incredibly hard to measure everything up correctly, tighten all the fittings being very carefull with the fragile ones (like the plexy ones on the cpu cooler or the plastic ones on the pump and reservoir). And after almost 4 hours, got it ready.
So here is the bare essentials case (nothing is screwed in, details wise, only the liquid cooling related stuff.
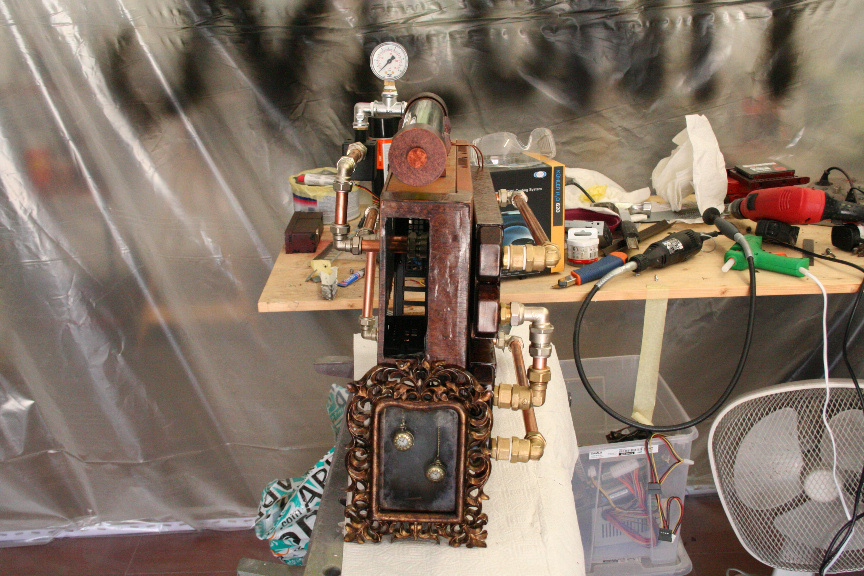
I now of course have to aply all the ageing effects to the fittings and pipes.
After that I went to my actual job (as I mentioned in previous posts I took both yesterday morning and today morning off to work on the project but still had to work 4 hours in the evening.
I´ve taken the motherboard out and left the loop running to be sure there´s no leaks before I put everything togueter.
And yeah if there´s no leaks I feel optimistic about meeting the deadline but words cannot express how tired and generally exhausted I feel.
Again, thanks for reading and following the project.
////
Hi Guys,
I tried my best, I´m sure you all know from my hectic updates these last almost 3 weeks that I´ve been working every second I get free on the project. Unfortunately it was not enough. The reason for starting so late was waiting for parts to arrive and basically financially being able to buy all the materials, paints, etc I needed to make this truelly unique.
The fact is I´m about 1-3 days short worth of work on detailing, fixing some last minute issues (that always pop up) and so on to be happy with the final result.
That said, I have made it as presentable as posible to be able to participate in the competition I started this for.
As you can see some parts are missing like the wood trimmings (that´s what those holes in the metal are for), some modifications to make everything fit better, and a few other things, also theres 2 very small leaks on 2 different fittings on the radiator side of the case which I need to fix.
And a long list of "small things to do".
Goes without saying I am finishing the project, but since the hectic deadline is now over I will be taking my sweet time, and making sure everything is as perfect as my skills allow it to be.
Aniway, here are the pictures of how it looks right now.
////
Update:
I´ve been fighting for the last two weeks with the tubing, I´m still trying to fix the leak on one of the outputs on the reservoir, the other two leaks have been fixed (I took apart those sections and reinforced the joints with teflon which seals it quite nicely, for whatever reason that doesn´t seem to be working with the reservoir.
I have a couple of options I will be trying on monday, hopefully one of them will work. Worst comes to worst I can permanently fit the joint which will fix the issue but will not allow for it to ever be taken apart again (not that its an issue as I never planned to but its nice to know I can if for whatever reason I need to).
Updates to come following that.
On another subject, I´ve been nominated for MOTM over at bit-tech, and the voting has been going on from the 6th of July. The voting ends on the 6th of Aug, i.e. tomorrow monday at 8 am. I´m currently fighting for the first place so if you feel like helping out, pop by and vote. But I´d like to stress that, only do it if you believe APASF is the best out of the 6 mods shown there. I´d greatly appreciate it : )
https://forums.bit-tech.net/showthread.php?t=233580
////
I won!!!!
////
After months of inactivity due to work and life in general and to be completely honest, not feeling like working on the project, I´ve restarted work on it, I´ll be making one final post with the final look and all the fixes that have been done, and shortly after starting work on my next project.
Cheers!
March 29th, 2013 10:49 PM #6
Skilled
- Join Date
- Sep 2012
- Location
- Malaga, Spain
- Posts
- 88
- Mentioned
- 0 Post(s)
- Tagged
- 28 Thread(s)
- Sex:
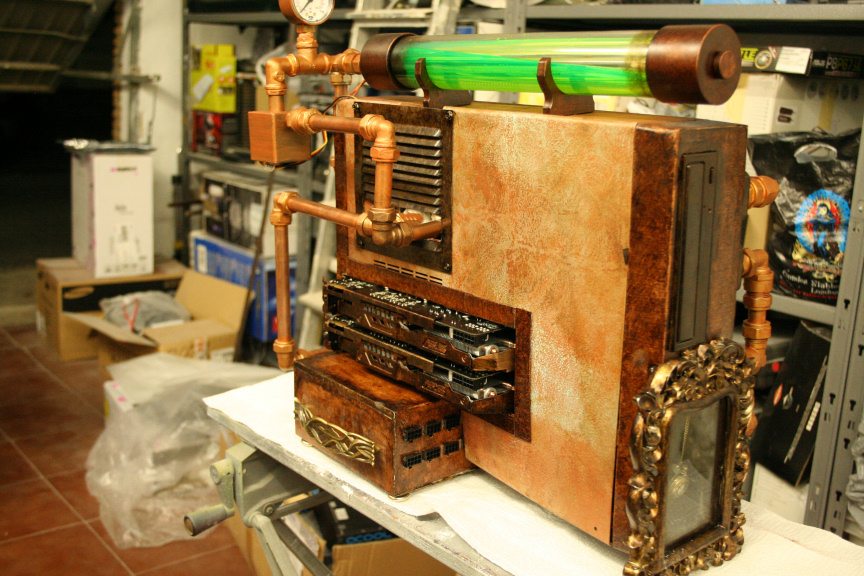
Hi Everyone,
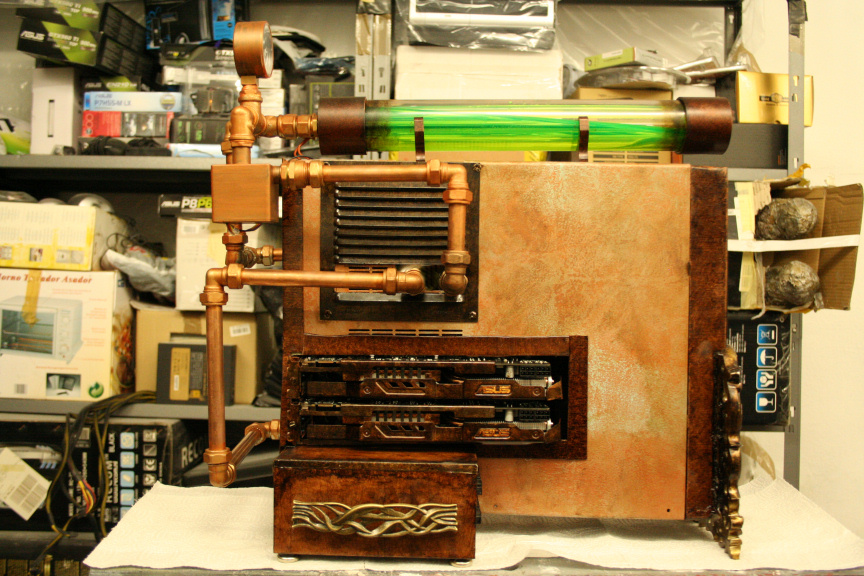
After almost a year since I started the project, it is now Finished.
Since October I´ve been adding paint effects, ink effects, done some detail changes, added missing details and essentially obsessed over there damned thing. Following the original idea I did 2 casings, one for the psu and one for the gpus, unfortunately I just wasn´t happy with them, I felt they changed the overall look to much. I never wanted it to look clean as it simply doesn´t fit the post-apocalyptic style so in the end I opted for a rough way around it. The last 4 PSU connectors are bare and inked cabling for the GPUs. I´m sure quite a few of you would´ve proffered casings but I feel this way is what suits the style of the project best.
I also pretty much "coated" the whole thing with a mix of inks that took me a month to get right for a more old-n-gritty feel as while I was very happy with how the faux wood effect turned out, I felt it didn´t much the rest of the oxidized copper effects, this slight effect ink helps blend these two together and really make it look like it´s been around for a hundred years. If you compare these final pictures to the previous update pictures you´ll find you can´t exactly point why, but you´ll understand what I mean (or at least I hope you will )
)
I also realise there´s no SLI bridge, this is simply because I´ve misplaced mine and didn´t want to wait till I ordered a new one to make the final pictures as I didn´t feel it was that important and... I really needed to end this stage of my life.
APASF is the project I´ve always wanted to do ever since I started painting and modding and while there are somethings that NOW I may have done differently, I´m extremely happy with the final outcome, I´m also relieved it´s over, it's taken a huge toll on me and in the end, it was more of an obligation and obsession rather than something I enjoyed doing as sad as that may sound.
I´d like to thank my sponsors for being so patient with it as it´s taken 6 months more than I originally thought it would and of course for being there with me all the way.
Right, without further wait, here is the final shoot of APASF "A Post-Apocalyptic Steampunk Future".


Thank you all for reading through this long worklog during what for me has been the hardest project I´ve ever done!
Until next time,
Luciel
Thread Information
Users Browsing this Thread
There are currently 1 users browsing this thread. (0 members and 1 guests)
Similar Threads
-
E3 2017: The Darwin Project is Videogame "Hunger Games"
By Feed Monkey in forum GeForce.comReplies: 0Last Post: June 15th, 2017, 06:00 AM -
Please fix misspelling in user "titles" for "Apprentice". It's missing a "p"!
By SpaceOctopus in forum Requests, Site Problems and FeedbackReplies: 2Last Post: July 31st, 2014, 12:27 AM -
Mod in a Week // "APASF: CP London Edition" (Update: 1st Day Completed)
By Luciel in forum Overclocking & Mod RigsReplies: 18Last Post: September 10th, 2013, 04:52 PM -
Project: Mod in a Week // "Fallout Cause SP" (Completed)
By Luciel in forum Overclocking & Mod RigsReplies: 13Last Post: March 12th, 2013, 11:07 PM -
Project Green Machine or "Orange Crush"
By odinlives in forum Overclocking & Mod RigsReplies: 44Last Post: February 28th, 2013, 11:53 PM
 Posting Permissions

-
 Latest Forum Posts
-
-
 Latest Themes
-
-
Popular Recent Themes
-
-
Popular Downloads
-
-
Forum Threads
-
-
Latest Wallpapers
-

 Reply With Quote
Powered by vBulletin® Version 4.2.5
Copyright © 2024 vBulletin Solutions Inc. All rights reserved.
Copyright © 2024 vBulletin Solutions Inc. All rights reserved.
All times are GMT. The time now is 02:50 PM.

Your work is amazing !
Post Your Windows 11...